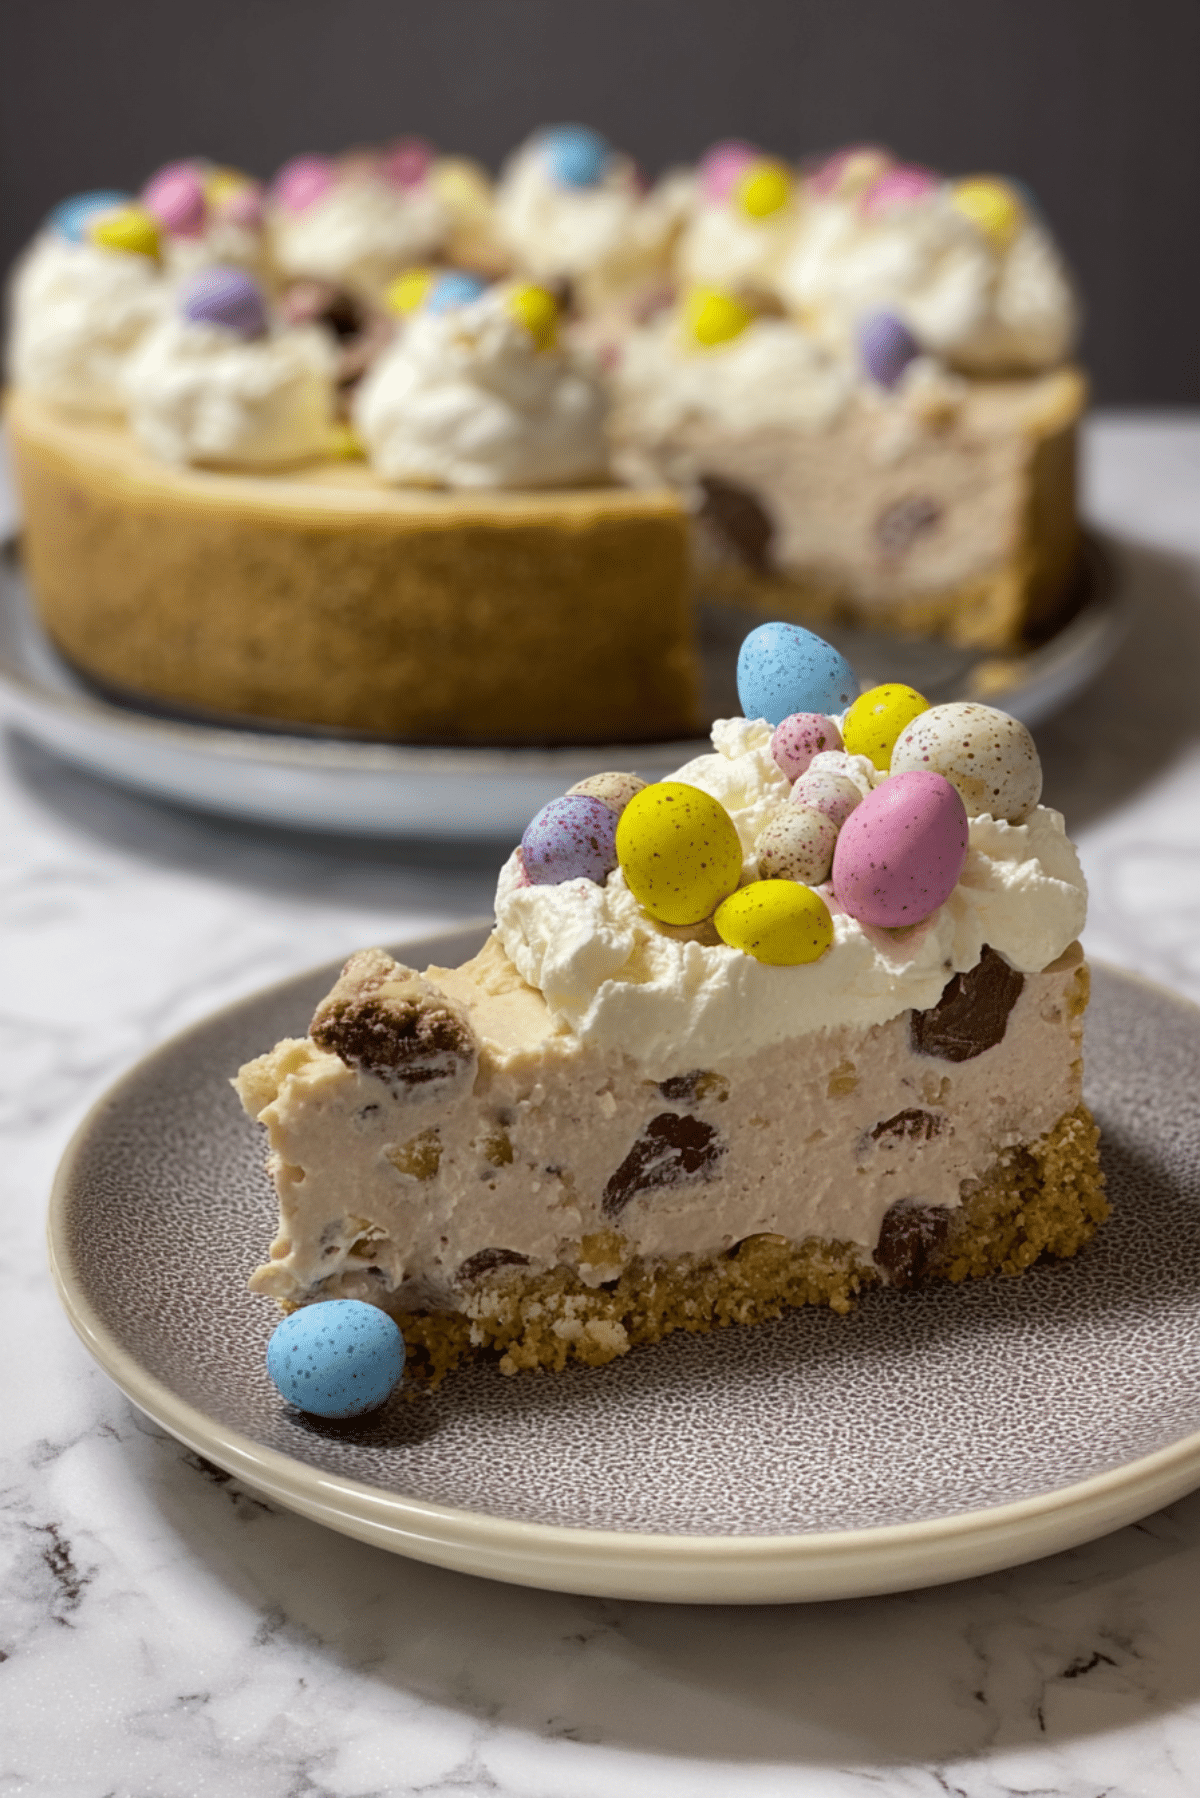
Mini Egg Cheesecake
There’s something about the arrival of spring that makes me crave bright, colorful desserts, and this Mini Egg Cheesecake delivers just that with every single bite. I first made this after an Easter weekend where I had too many leftover mini chocolate eggs lying around, and trust me, this recipe turned them into pure magic. It’s chilled, no-bake, perfectly creamy, and studded with crunchy bits of candy-coated mini eggs that make each slice a little celebration on a plate.
Why This Recipe Will Be Your New Favorite
This cheesecake is the kind of dessert that brings everyone to the table with smiles. It’s easy to make, joyful to look at, and even more joyful to eat.
Adaptable: You can easily swap the topping, use different chocolates, or even make it in mini form for parties.
Easy on the Wallet: Most of the ingredients are pantry or fridge staples, with the mini eggs being the only splurge.
No-Fuss: No baking, no water baths, and no complicated steps — just chill and enjoy.
Easy to Tweak: Prefer it more chocolatey or less sweet? The recipe adjusts well to small changes.
Always a Hit: The colors alone draw attention, and the flavor keeps everyone asking for seconds.
Great for Planning Ahead: You can make it a day or two in advance, and it holds up beautifully.
Leftover-Friendly: Leftovers (if you’re lucky to have any) keep well and still taste amazing the next day.
Behind the Recipe
This recipe was born out of post-Easter creativity. I had a stash of mini eggs and a craving for something chilled and creamy. I remembered the no-bake cheesecakes I used to make with my mom during the warmer months, and it just clicked. There’s something so playful about mixing that childhood candy crunch with a grown-up cheesecake base. It’s nostalgic, sweet, and comforting — all the best parts of spring in a single slice.
Ingredients You’ll Need
The magic of this cheesecake lies in the balance between silky filling, crunchy chocolate eggs, and a buttery base.
- Digestive Biscuits: 200 grams, crushed. These form the classic, crumbly base with just the right texture.
- Unsalted Butter: 100 grams, melted. It binds the biscuit crumbs and gives richness to the crust.
- Full-Fat Cream Cheese: 500 grams, softened. The heart of the cheesecake, providing a smooth, creamy texture.
- Powdered Sugar: 100 grams. Adds sweetness without grittiness.
- Vanilla Extract: 1 teaspoon. Enhances the flavor of the creamy filling.
- Heavy Cream: 250 ml, whipped to soft peaks. Makes the filling light and airy.
- Mini Chocolate Eggs: 200 grams, crushed roughly. These add crunch, color, and chocolatey goodness.
- Whipped Cream (for topping): Optional, but adds a lovely decorative and creamy finish.
- Extra Mini Eggs (for garnish): A handful for that final festive touch on top.

Time Needed to Make This Recipe
Prep Time: 25 minutes
Cook Time: 0 minutes
Total Time: 25 minutes (plus 4–6 hours chilling)
Special Equipment You’ll Need
You don’t need fancy tools for this one just a few basics to make everything come together smoothly.
Springform Pan (8-inch): Makes unmolding the cheesecake effortless and keeps the edges neat.
Mixing Bowls: For combining the base and filling.
Hand Mixer or Stand Mixer: Helps whip the cream and beat the filling until smooth and fluffy.
Rubber Spatula: Perfect for folding and smoothing.
Rolling Pin or Food Processor: To crush those biscuits nice and fine.
Step-by-Step Instructions
You’re just a few steps away from a chilled slice of cheesecake heaven. Here’s how to do it:
- Prepare the Base: Combine crushed digestive biscuits with melted butter. Mix until it resembles wet sand.
- Press into Pan: Spoon the biscuit mixture into the base of the springform pan and press down evenly. Chill in the fridge while making the filling.
- Whip the Cream: In a clean bowl, whip the heavy cream to soft peaks. Set aside.
- Make the Filling: Beat the cream cheese, powdered sugar, and vanilla extract together until smooth and creamy.
- Fold in the Cream: Gently fold the whipped cream into the cream cheese mixture until fully combined.
- Add Mini Eggs: Fold in the crushed mini chocolate eggs, reserving a few for topping if desired.
- Fill the Pan: Pour the filling over the chilled base and smooth out the top with a spatula.
- Chill: Cover and refrigerate for at least 4 hours or overnight until fully set.
- Decorate and Serve: Top with whipped cream swirls and extra mini eggs just before serving. Slice and enjoy!
Serving Suggestions & Presentation Tips
Serve each slice with a few extra mini eggs on the side for extra crunch. For a polished look, pipe whipped cream rosettes around the edge and press a mini egg gently into each one. Pair with fresh berries or a drizzle of melted chocolate if you want to elevate it even further. A chilled dessert plate makes each bite even more refreshing.
Extra Tips for Best Results
A few insider tips will take your cheesecake from good to great:
- Use room temperature cream cheese for a smoother filling.
- Chill the mixing bowl before whipping cream for better peaks.
- Don’t overfold the whipped cream into the filling — gentle is key.
- Let the cheesecake chill completely before slicing to get clean cuts.
Variations You Can Try
Here’s how to mix things up while still keeping the heart of the recipe intact:
- Chocolate Base: Use chocolate biscuits for a cocoa-rich crust.
- Lemon Twist: Add lemon zest to the filling for a tangy contrast to the sweet eggs.
- Mini Cheesecakes: Make them in cupcake liners for easy single-serve portions.
- Layered Version: Add a thin chocolate ganache layer between the crust and filling.
- Gluten-Free: Use gluten-free biscuits and check your mini eggs for certified labels.
Make Ahead and Storage
This cheesecake is a dream for planners. You can make it up to two days ahead and store it in the fridge, covered. It also freezes beautifully — just skip the whipped cream topping until serving. Freeze slices individually or as a whole for up to a month. To thaw, transfer to the fridge overnight.
Chef’s Pro Tips for Perfect Results
Want that wow factor? Keep these pro moves in mind:
- Always use full-fat cream cheese for stability and creaminess.
- Press the base firmly so it holds together when sliced.
- Refrigerate for a minimum of 4 hours, overnight is even better.
- Wipe your knife clean between slices for neat presentation.
Nutrition Facts
Servings: 10
Calories per serving: 420
Note: These are approximate values.
FAQ’s
Q1: Can I use other candies instead of mini eggs?
Absolutely. Crushed chocolate buttons or peanut M&Ms work well too.
Q2: Is this cheesecake freezer-friendly?
Yes, it freezes well. Just avoid topping it with whipped cream until you’re ready to serve.
Q3: Can I make this in a pie dish instead?
You can, though a springform pan makes it easier to unmold cleanly.
Q4: How long will leftovers keep in the fridge?
They’ll stay fresh for up to 4 days when covered and stored properly.
Q5: My filling looks lumpy. What went wrong?
It’s likely the cream cheese was too cold. Always bring it to room temp before mixing.
Q6: Can I use low-fat cream cheese?
Technically yes, but the texture won’t be as rich or creamy.
Q7: What if I don’t have powdered sugar?
You can blitz granulated sugar in a blender until fine, though texture may vary slightly.
Q8: Can I skip the whipped cream topping?
Yes, the cheesecake stands well on its own — but it does add a lovely touch.
Q9: Can kids help make this?
Definitely! It’s a fun, no-bake recipe that’s great for little helpers.
Q10: Do I need to bloom gelatin?
Not for this recipe. The whipped cream and chill time set it beautifully.
Conclusion
Let me tell you, it’s worth every bite. This Mini Egg Cheesecake brings color, joy, and irresistible creaminess to your table with very little effort. Whether it’s Easter, springtime, or just a sweet craving calling your name, this one’s a total game-changer. Give it a try and watch it disappear faster than you think!
Print
Mini Egg Cheesecake
- Prep Time: 25 minutes
- Cook Time: 0 minutes
- Total Time: 25 minutes (plus 4–6 hours chilling)
- Yield: 10 servings 1x
- Category: Dessert
- Method: No-Bake
- Cuisine: American
- Diet: Vegetarian
Description
A rich and creamy no-bake cheesecake packed with crushed mini chocolate eggs, set over a buttery biscuit base and topped with whipped cream and colorful candy crunch.
Ingredients
- 200g digestive biscuits, crushed
- 100g unsalted butter, melted
- 500g full-fat cream cheese, softened
- 100g powdered sugar
- 1 tsp vanilla extract
- 250ml heavy cream, whipped to soft peaks
- 200g mini chocolate eggs, roughly crushed
- Whipped cream, for topping (optional)
- Extra mini chocolate eggs, for garnish
Instructions
- Combine the crushed biscuits with melted butter and mix until it resembles wet sand.
- Press the mixture into the base of an 8-inch springform pan and refrigerate.
- Whip the heavy cream to soft peaks in a separate bowl and set aside.
- In another bowl, beat the cream cheese, powdered sugar, and vanilla extract until smooth.
- Fold the whipped cream into the cream cheese mixture gently until fully combined.
- Fold in the crushed mini chocolate eggs, saving a few for garnish if desired.
- Pour the filling over the chilled base and smooth the top with a spatula.
- Chill the cheesecake in the fridge for at least 4 hours or overnight until fully set.
- Top with whipped cream swirls and extra mini eggs before serving. Slice and enjoy!
Notes
- Use room temperature cream cheese for a smooth filling.
- Chill the mixing bowl before whipping the cream for best results.
- Clean your knife between slices for neat presentation.
Nutrition
- Serving Size: 1 slice
- Calories: 420
- Sugar: 28g
- Sodium: 210mg
- Fat: 30g
- Saturated Fat: 18g
- Unsaturated Fat: 10g
- Trans Fat: 0g
- Carbohydrates: 34g
- Fiber: 1g
- Protein: 6g
- Cholesterol: 90mg
Keywords: mini egg cheesecake, easter dessert, no bake cheesecake, spring dessert, chocolate egg cheesecake