Chocolate Lava Cookies
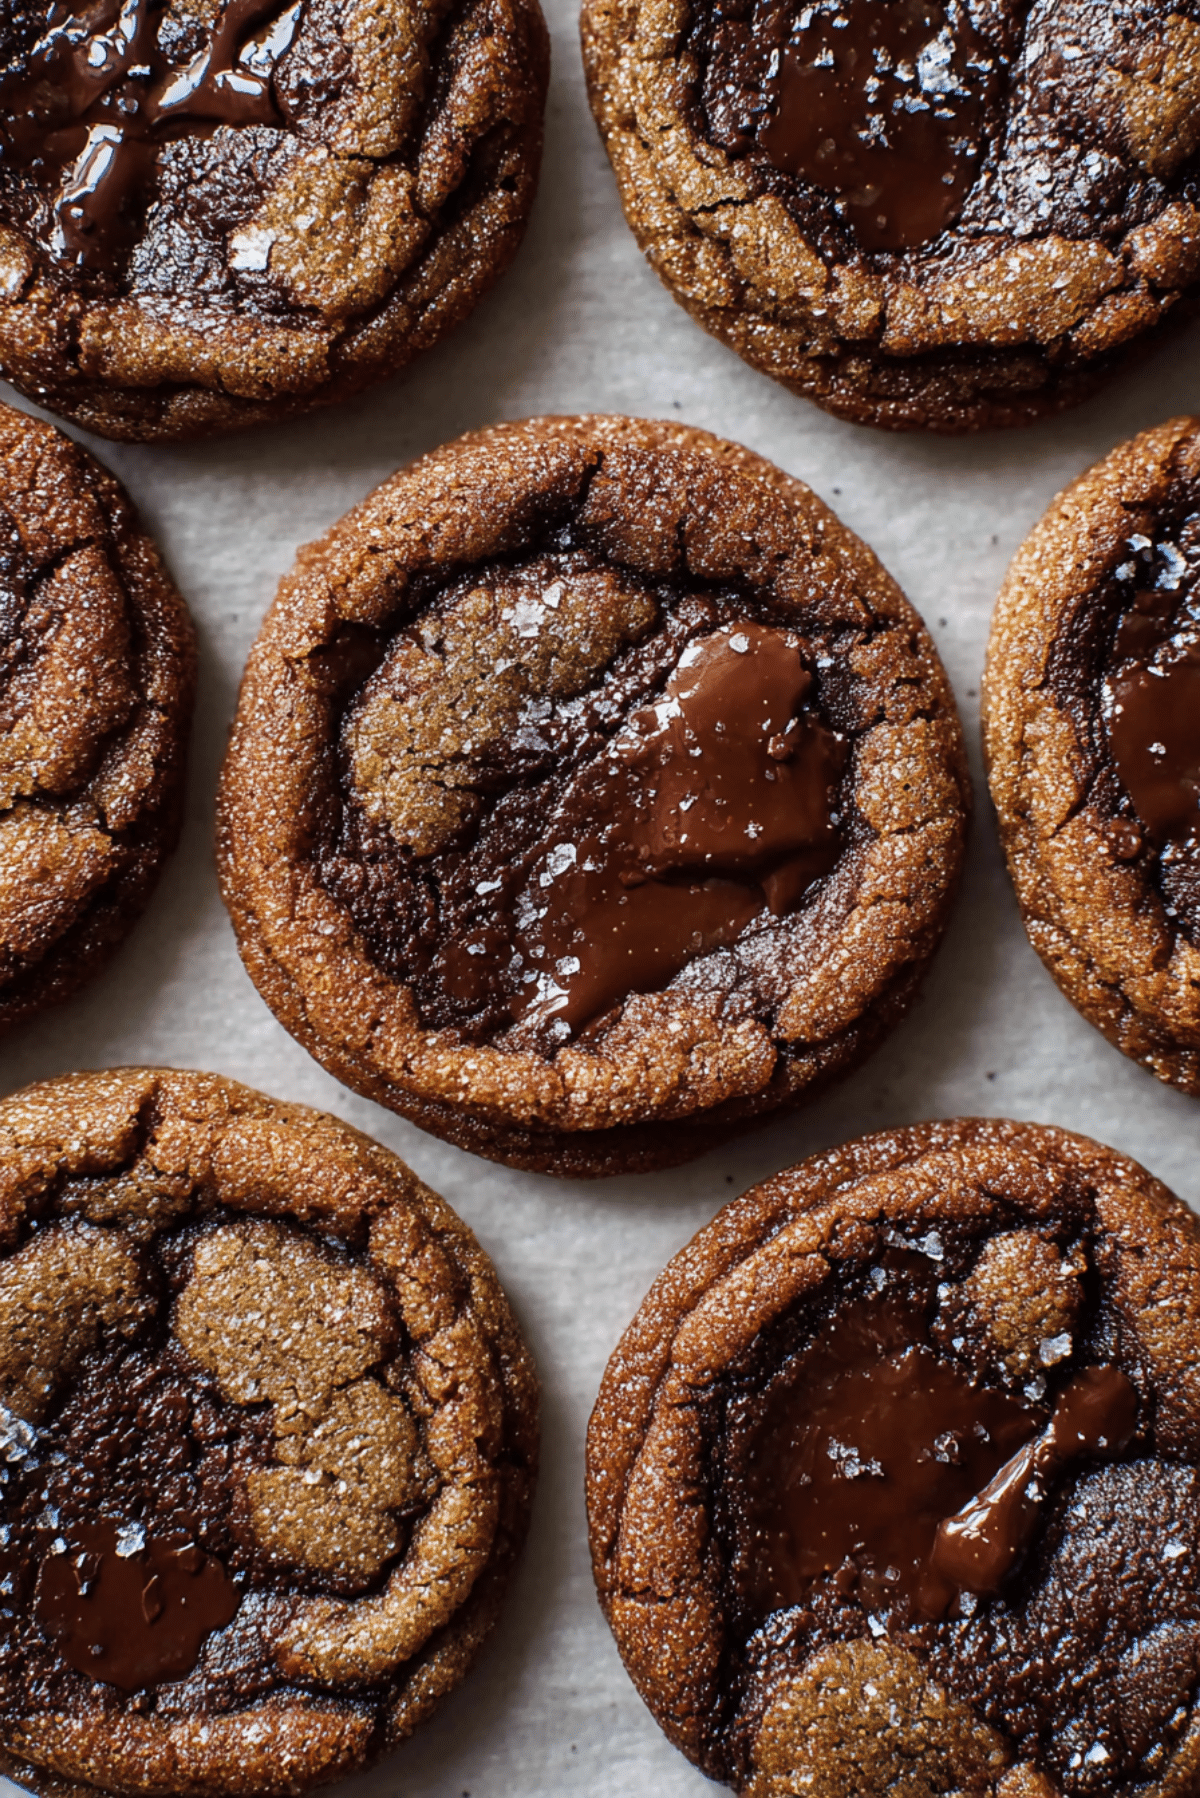
There is something almost magical about breaking into a warm cookie and watching melted chocolate slowly spill out. It feels a little indulgent, a little comforting, and honestly, completely irresistible. These chocolate lava cookies are exactly that kind of treat, crisp around the edges, soft in the center, and filled with rich, molten chocolate that makes every bite feel special. Trust me, you are going to love this.
Why These Cookies Feel Like a Warm Hug in Every Bite
You know those desserts that instantly make you pause and just enjoy the moment? This is one of them. The contrast between the lightly crisp exterior and the gooey, almost fudgy center creates a texture that feels luxurious without being complicated. The deep chocolate flavor wraps everything together, giving you that bakery style experience right at home. And the best part, they come together with simple pantry ingredients.
A Sweet Little Story Behind These Molten Treats
Chocolate filled desserts have long been a favorite in baking, often inspired by the famous molten chocolate cakes that took over restaurant menus years ago. These cookies take that same idea and make it more casual, more shareable, and honestly more fun to eat. Instead of a plated dessert, you get something you can hold, break, and enjoy in a cozy setting with friends or just by yourself on a quiet evening.
Why This Recipe Always Works
This recipe has become a go to for so many reasons, and once you try it, you will see why.
Versatile: You can easily adjust the chocolate type or even add a hint of espresso powder for a deeper flavor.
Budget-Friendly: Everything here comes from basic baking staples, no fancy ingredients needed.
Quick and Easy: The dough comes together fast, and the baking time is short, perfect for last minute cravings.
Customizable: Add nuts, swap chocolates, or sprinkle sea salt on top for a twist.
Crowd-Pleasing: Everyone loves that gooey center surprise, it never fails.
Make-Ahead Friendly: You can prepare the dough ahead and bake fresh whenever you want.
Great for Leftovers: They stay soft and reheat beautifully, bringing back that molten center.
Pro Tips That Make All the Difference
Before we get into the kitchen, here are a few little tricks that really elevate the result.
- Chill the dough slightly if it feels too soft, this helps control spreading.
- Use high quality chocolate chunks for a richer, smoother melt.
- Do not overbake, the center should still look slightly underdone.
- Let them rest for a few minutes after baking so the structure sets while keeping the center gooey.
Tools That Make Baking Easier
Having the right tools nearby just makes everything smoother and more enjoyable.
Mixing Bowl: A medium sized bowl works perfectly for combining everything.
Hand Mixer or Whisk: Helps create a smooth, well combined dough.
Baking Sheet: A flat sheet lined with parchment ensures even baking.
Cookie Scoop: Keeps your cookies uniform in size.
Spatula: Great for folding and scraping every bit of dough.
Ingredients That Bring It All Together
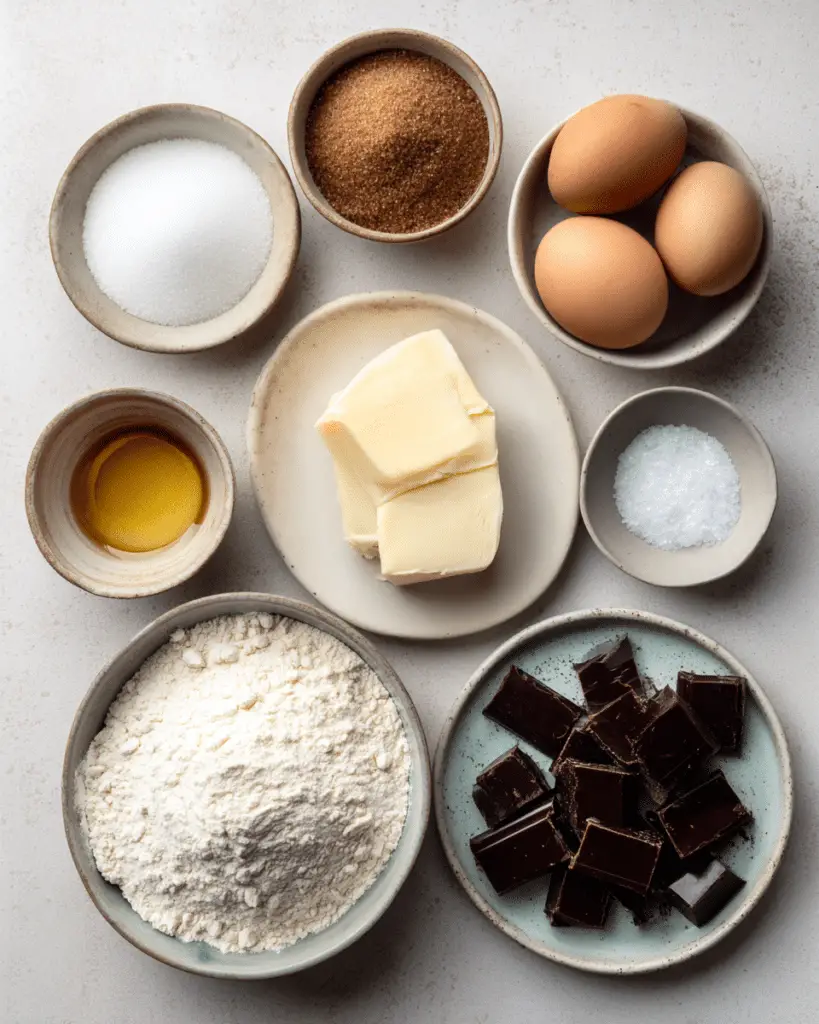
Now let’s take a closer look at what goes into these cookies and how each ingredient plays its role.
- All-Purpose Flour: 1 1/2 cups, provides structure and balance.
- Brown Sugar: 3/4 cup, adds moisture and a deep caramel flavor.
- Granulated Sugar: 1/4 cup, helps create that slightly crisp edge.
- Unsalted Butter: 1/2 cup, melted, brings richness and softness.
- Eggs: 2 large, bind everything together and add tenderness.
- Vanilla Extract: 1 teaspoon, enhances all the flavors.
- Baking Soda: 1/2 teaspoon, gives the cookies a gentle lift.
- Salt: 1/4 teaspoon, balances sweetness and boosts flavor.
- Dark Chocolate Chunks: 1 cup, the star that creates the molten center.
Easy Swaps If You Want to Experiment
If you feel like switching things up, here are a few ideas.
All-Purpose Flour: You can use a gluten free blend if needed.
Brown Sugar: Coconut sugar works for a slightly different flavor.
Butter: Plant based butter can be used for a dairy free option.
Dark Chocolate Chunks: Milk chocolate or semi sweet works just as well.
Spotlight on the Star Ingredients
Let’s take a moment to appreciate what really makes these cookies shine.
Dark Chocolate Chunks: This is where the magic happens, melting into that rich, gooey center that defines the whole experience.
Brown Sugar: Adds that soft, chewy texture and a warm sweetness that feels comforting.
Let’s Bake These Delicious Cookies Together
Alright, now let’s bring everything together and turn these ingredients into something unforgettable.
- Preheat Your Equipment: Set your oven to 350°F and line a baking sheet with parchment paper.
- Combine Ingredients: In a bowl, mix melted butter, brown sugar, and granulated sugar until smooth. Add eggs and vanilla extract, then whisk until fully combined.
- Prepare Your Cooking Vessel: In another bowl, combine flour, baking soda, and salt. Gradually add the dry mixture into the wet mixture, stirring gently.
- Assemble the Dish: Fold in the dark chocolate chunks, making sure they are evenly distributed.
- Cook to Perfection: Scoop dough onto the baking sheet, leaving space between each cookie. Bake for 10 to 12 minutes until edges are golden and centers look soft.
- Finishing Touches: Let the cookies cool for about 5 minutes, this helps them set while keeping the center molten.
- Serve and Enjoy: Serve warm and enjoy that rich, gooey chocolate center with every bite.
That Perfect Balance of Texture and Flavor
As these cookies bake, something wonderful happens. The edges become lightly crisp while the inside stays soft and almost fudgy. The chocolate melts into pockets of richness, creating that signature lava effect. Each bite gives you a mix of textures, a little crunch, a lot of softness, and that smooth chocolate finish that lingers.
Helpful Tips for Even Better Results
A few small adjustments can really take these cookies to the next level.
- Use room temperature eggs for better mixing
- Do not overcrowd the baking sheet
- Slightly underbake for that perfect gooey center
What to Avoid While Baking
Even simple recipes have a few pitfalls, but they are easy to avoid.
- Overmixing the dough, which can make cookies tough
- Overbaking, which removes the molten texture
- Using low quality chocolate, which affects the final flavor
Nutrition Facts You Should Know
Servings: 12 cookies
Calories per serving: 210
Note: These are approximate values.
Time Breakdown for This Recipe
Prep Time: 15 minutes
Cook Time: 12 minutes
Total Time: 27 minutes
Make Ahead and Storage Tips
If you want to plan ahead, you can prepare the dough and refrigerate it for up to 24 hours. This actually deepens the flavor a bit. Once baked, store the cookies in an airtight container at room temperature for up to 3 days. For longer storage, freeze them and reheat gently to bring back that gooey center.
How to Serve These Cookies
These cookies are amazing on their own, but you can take them even further. Serve them warm with a scoop of vanilla ice cream or a drizzle of chocolate sauce. A glass of cold milk on the side never hurts either.
Creative Ways to Use Leftovers
If you somehow have leftovers, here are a few fun ideas.
- Crumble them over ice cream
- Turn them into a cookie sandwich with cream filling
- Warm and serve with fruit for a quick dessert plate
Extra Tips for Success
A few final thoughts before you get baking.
- Always measure your flour correctly for the best texture
- Let cookies rest before serving for structure
- Use parchment paper for easy cleanup
Make Them Look Bakery Worthy
For that beautiful finish, press a few extra chocolate chunks on top right before baking. It gives that melty, glossy look that makes them impossible to resist.
Fun Variations to Try
If you are feeling creative, here are some ideas.
- Add chopped nuts for crunch
- Mix in white chocolate chips for contrast
- Sprinkle sea salt on top for a sweet and salty twist
- Add a pinch of cinnamon for warmth
FAQ’s
Q1: Can I freeze the dough?
Yes, you can freeze it for up to 2 months and bake directly from frozen with a slight increase in baking time.
Q2: Why are my cookies not gooey inside?
They may have been overbaked, try reducing the baking time slightly.
Q3: Can I use milk chocolate instead?
Absolutely, it will create a sweeter flavor profile.
Q4: Do I need to chill the dough?
Not always, but it helps if the dough feels too soft.
Q5: How do I reheat them?
Warm in the microwave for about 10 seconds to restore the gooey center.
Q6: Can I make them smaller?
Yes, just reduce the baking time slightly.
Q7: What makes them chewy?
The brown sugar and proper baking time create that texture.
Q8: Can I add flavors like espresso?
Yes, a small amount enhances the chocolate flavor.
Q9: How do I know when they are done?
Edges should be golden, centers still soft.
Q10: Can I make them gluten free?
Yes, use a suitable flour substitute.
Conclusion
These chocolate lava cookies are the kind of dessert that feels both simple and special at the same time. From the first mix to that final warm bite, every step is worth it. Let me tell you, it is worth every bite. Once you try them, they might just become your new favorite go to treat.
Print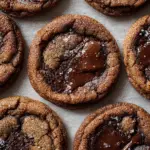
Chocolate Lava Cookies
- Prep Time: 15 minutes
- Cook Time: 12 minutes
- Total Time: 27 minutes
- Yield: 12 cookies 1x
- Category: Dessert
- Method: Baking
- Cuisine: American
- Diet: Vegetarian
Description
Soft and chewy chocolate lava cookies with crisp edges and a rich, gooey chocolate center that melts in every bite.
Ingredients
- 1 1/2 cups all-purpose flour
- 3/4 cup brown sugar
- 1/4 cup granulated sugar
- 1/2 cup unsalted butter, melted
- 2 large eggs
- 1 teaspoon vanilla extract
- 1/2 teaspoon baking soda
- 1/4 teaspoon salt
- 1 cup dark chocolate chunks
Instructions
- Preheat oven to 350°F and line a baking sheet with parchment paper.
- In a bowl, mix melted butter, brown sugar, and granulated sugar until smooth.
- Add eggs and vanilla extract, then whisk until fully combined.
- In another bowl, combine flour, baking soda, and salt.
- Gradually mix the dry ingredients into the wet ingredients until a soft dough forms.
- Fold in the dark chocolate chunks evenly.
- Scoop dough onto the baking sheet, spacing evenly.
- Bake for 10 to 12 minutes until edges are golden and centers remain soft.
- Let cookies cool for 5 minutes before serving.
Notes
- Do not overbake to maintain the molten center.
- Use high quality chocolate for best flavor.
- Chill dough slightly if too soft before baking.
- Reheat briefly to restore gooey texture.
Nutrition
- Serving Size: 1 cookie
- Calories: 210
- Sugar: 18g
- Sodium: 95mg
- Fat: 11g
- Saturated Fat: 6g
- Unsaturated Fat: 4g
- Trans Fat: 0g
- Carbohydrates: 26g
- Fiber: 2g
- Protein: 3g
- Cholesterol: 35mg
Keywords: chocolate lava cookies, gooey cookies, molten chocolate cookies, chewy chocolate cookies, easy dessert recipe