Easy Garlic Chili Oil with Peanuts
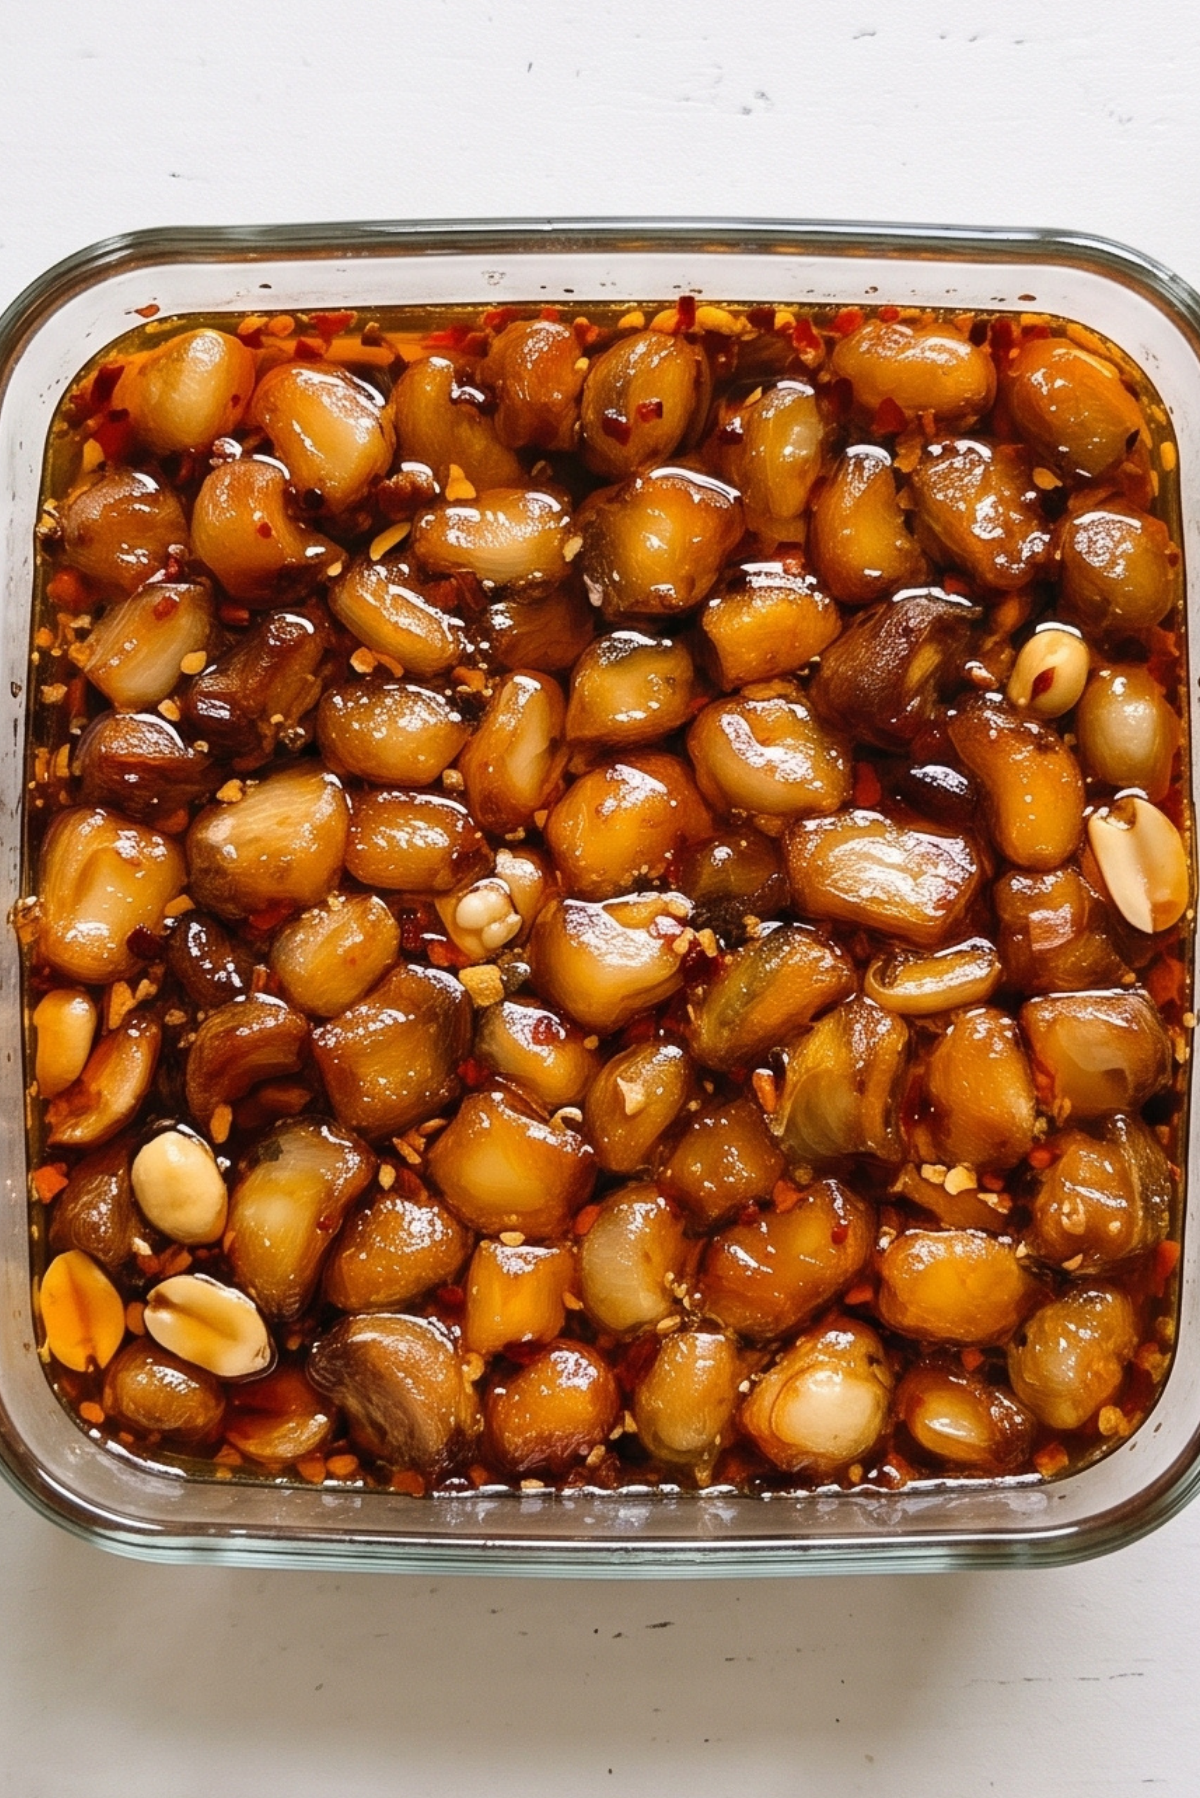
Easy Garlic Chili Oil with Peanuts is the ultimate condiment that brings a fiery, smoky, and deeply savory crunch to your kitchen table. Trust me, you’re going to love this recipe because it combines slowly simmered golden garlic cloves, bold chili flakes, and toasted nuts into an addictive texture that instantly elevates any dish from ordinary to spectacular.
The Bold and Addictive Crunch of Slow-Simmered Condiments
There is an absolute alchemy that happens when hot oil meets fragrant aromatics, releasing a deeply layered warmth that coats your tongue with satisfaction. This one’s a total game-changer for your pantry collection because it infuses home-cooked meals with gourmet street food energy in just a matter of minutes. Let me tell you, it’s worth every bite when you spoon a generous helping of this glistening red condiment over your food and experience that incredible contrast of sweet garlic and fiery crunch.
The Global Evolution of Fiery Texturized Oils
The rich tradition of crafting infused chili condiments stretches across centuries, finding its most famous origins in the vibrant regional kitchens of southwestern China. Historically, families would carefully select local sun-dried peppers, crushing them by hand before pouring hot lard or seed oil over the top to preserve their harvest through the changing seasons. This modern adaptation introduces a beautiful nutty texture by slow-frying whole blanched peanuts and plump garlic cloves directly in the oil, resulting in a rich, chunkier condiment that satisfies contemporary flavor lovers all over the world.
Why You Will Fall in Love with This Fiery Pantry Staple
The simple process of creating this magnificent texturized oil rewards your kitchen with a wealth of versatile culinary advantages.
Versatile: You can drizzle this spicy condiment over noodles, fried rice, steamed dumplings, grilled vegetables, or even a simple bowl of morning eggs.
Budget-Friendly: This spectacular oil relies entirely on low-cost pantry basics like dried peppers, garlic, and nuts to deliver a truly premium flavor experience.
Quick and Easy: The straightforward simmering method takes less than twenty minutes, requiring very little hands-on effort to master completely.
Customizable: You can easily dial the heat up or down by mixing in different varieties of chili flakes or adding a pinch of ground cinnamon for aromatic complexity.
Crowd-Pleasing: Gift a small jar of this glistening ruby condiment to friends and family, and they will be absolutely amazed by its restaurant-quality depth.
Make-Ahead Friendly: This entire recipe is designed to be made entirely in advance, as the flavors continue to mature and improve as it sits.
Great for Leftovers: The infused oil keeps remarkably well for weeks, ensuring you always have a splash of fiery excitement ready at a moment’s notice.
Culinary Secrets for Perfect Aromatic Infusion
Achieving the perfect balance of a deep ruby-red color and a clean, toasted savoriness without burning your ingredients requires adhering to a few vital kitchen secrets.
First, keeping your stove heat strictly on low throughout the cooking process is absolutely crucial because garlic and red pepper flakes possess delicate sugars that turn instantly bitter if scorched. Second, frying the whole garlic cloves slowly alongside the peanuts allows their moisture to evaporate gently, ensuring both elements achieve a perfectly uniform, crispy texture that snaps delightfully when bitten. Finally, let the finished mixture cool down completely in your cooking vessel before transferring it to glass storage, which allows the natural oil-soluble pigments of the chilies to bloom into a brilliant, crystalline red hue.
Essential Kitchen Tools for Success
Using these basic, sturdy tools will ensure your oil-infusing process is perfectly controlled, safe, and highly efficient.
- A Heavy-Bottomed Saucepan: Crucial for distributing heat evenly across the oil, preventing hot spots from scorching your delicate spices.
- A Wooden Spoon: Ideal for stirring the simmering aromatics continuously without scratching your pan surface.
- A Digital Kitchen Thermometer: Helps you monitor the cooking temperature accurately to ensure the oil stays safely below the smoking point.
- A Clean Sterilized Glass Jar: The perfect airtight storage vessel to preserve the freshness and aroma of your finished condiment.
- A Fine Mesh Skimmer: Useful for gently moving your ingredients around to check their color development as they fry.
Ingredients You Will Need For This Recipe
Gather these bold, aromatic components together to build an irresistible blend of fiery warmth, savory crunch, and rich nutty notes.
- Vegetable Oil: 240 milliliters, choosing a clean, neutral-flavored liquid base that lets the spices shine brightly.
- Raw Blanched Peanuts: 100 grams, unsalted whole nuts that provide a spectacular, crunchy textural foundation.
- Fresh Garlic Cloves: 12 pieces, peeled and left whole to soften and sweeten as they slow-fry in the pan.
- Coarse Red Chili Flakes: 4 tablespoons, providing the robust heat and gorgeous ruby color that defines the condiment.
- Gochugaru Korean Chili Flakes: 2 tablespoons, bringing a mild, smoky sweetness and an incredibly vibrant red pop.
- Soy Sauce: 1 tablespoon, to inject a deep, umami-rich salty anchor into the base of the oil.
- Toasted Sesame Seeds: 1 tablespoon, for a subtle nuttiness and a beautiful flecked appearance throughout the jar.
- Sugar: 1 teaspoon, granulated to perfectly balance the sharp heat and enhance the natural sweetness of the fried garlic.
- Sea Salt: 1/2 teaspoon, fine grain to season the aromatics thoroughly and lock in the savory elements.
Smart Substitutions for Every Pantry
If you find yourself missing a specific component, these simple alternatives will keep your condiment-making process moving forward flawlessly.
- Vegetable Oil: Canola oil, peanut oil, or sunflower oil work as excellent neutral-flavored frying bases.
- Gochugaru Flakes: Sweet paprika can step in to provide that gorgeous red color and mild sweetness without extra heat.
- Raw Peanuts: Whole raw almonds, cashews, or standard sunflower seeds can provide an equally satisfying crunch.
- Soy Sauce: Tamari or coconut aminos are fantastic alternatives that preserve that necessary splash of savory umami depth.
- Sesame Seeds: Toasted hemp hearts can offer a similar look and a lovely mild nuttiness if sesame is unavailable.
Spotlight on Our Star Ingredients
Let us take a close look at the key elements that give this vibrant texturized oil its remarkable character and addictive quality.
Fresh Garlic Cloves: Leaving the cloves completely whole allows them to roast gently inside the hot oil bath, transforming their raw, sharp sting into a mellow, buttery sweetness that complements the heat of the peppers.
Coarse Red Chili Flakes: These crushed pepper pieces release their fiery capsaicin compounds slowly into the warm fat, tinting the oil a magnificent amber color while providing a clean, lingering heat that wakes up your palate.
Step-by-Step Guide to Perfection
Follow these clear, numbered instructions precisely to craft this beautiful, deeply aromatic texturized chili oil.
- Preheat Your Equipment: Place your heavy-bottomed saucepan over low heat and pour in the neutral vegetable oil to warm through gently.
- Combine Ingredients: In a medium-sized heatproof glass bowl, measure out the coarse red chili flakes, gochugaru, soy sauce, toasted sesame seeds, sugar, and sea salt, mixing them until evenly distributed.
- Prepare Your Cooking Vessel: Ensure your whole peeled garlic cloves and raw blanched peanuts are completely dry, as any water droplets will cause the hot oil to splatter dangerously.
- Assemble the Dish: Drop the dry peanuts and whole garlic cloves carefully into the lukewarm oil inside your saucepan, keeping the heat low so the oil maintains a gentle, lazy bubble.
- Cook to Perfection: Simmer the mixture for twelve to fifteen minutes, stirring occasionally, until the garlic cloves turn a gorgeous light golden brown and the peanuts are completely crisp through to the center.
- Finishing Touches: Carefully remove the saucepan from the stove heat and immediately pour the hot oil, peanuts, and garlic directly over your prepared bowl of mixed dry chili flakes and seasonings, allowing the hot oil to sizzle and bloom the spices.
- Serve and Enjoy: Let the entire mixture cool down completely to room temperature, stir well to distribute the crunchy sediment evenly, then spoon generously over your favorite meals or seal inside your glass jar.
A Symphony of Textures and Deep Flavors
As the warm vegetable oil bubbles gently around the aromatics, it coaxes out the natural oils locked inside the garlic and peanuts, creating a deeply infused savory base. When this hot fat splashes over the dry pepper flakes, it toasts the spices instantly, filling your kitchen with a rich, smoky, and mouthwatering aroma. The final result is a texturized masterpiece where the smooth, rich oil carries a wave of clean heat, balanced beautifully by the crunchy snap of fried peanuts and the soft, sweet bite of golden garlic nuggets.
Pro Cooking Tips for Perfect Results
- Always cook your garlic and nuts starting from cold or lukewarm oil to ensure the interior cooks fully before the outside skin turns too dark.
- Use a completely dry heatproof bowl when blooming your spices, as moisture can cause the hot oil to boil over violently.
- Feel free to crush a few of the fried garlic cloves with the back of your spoon after cooking if you prefer a more distributed garlic texture.
- Store your finished jar in a dark, cool cupboard rather than next to your hot stove to preserve the bright chili aroma for a longer period.
Common Pitfalls and How to Avoid Them
- Bitter Acrid Flavor: This happens if the oil gets too hot and burns the red pepper flakes, so always ensure the oil cools slightly if it starts to smoke.
- Chewy Soggy Peanuts: If the peanuts are simmered too fast over high heat, the moisture stays inside, so strictly maintain a low, gentle bubble.
- Greenish Tinted Oil: Using a strongly flavored fat like extra virgin olive oil will mask the chilies and color the oil green, so always use a truly neutral vegetable oil.
Estimated Nutritional Profiles
Servings: 16 servings (2 tablespoons per serving)
Calories per serving: 165 calories
Note: These are approximate values.
Kitchen Timing Breakdown
Prep Time: 10 minutes
Cook Time: 15 minutes
Total Time: 25 minutes
Storage and Reheating Strategies
Once your texturized oil has reached room temperature, screw the lid tightly onto your clean glass jar and store it away from direct sunlight. Note: This infused oil stores beautifully at room temperature for up to one month, or inside your refrigerator for up to three months. There is absolutely no need to reheat this condiment before using it, simply give the jar a vigorous stir with a clean, completely dry spoon to lift the heavy peanuts, garlic, and chili sediment from the bottom before drizzling.
Perfect Pairings for Your Dinner Table
This intensely savory, crunchy chili oil makes an incredible companion to an endless array of comforting dishes. Spoon it generously over a steaming bowl of garlicky noodles, a platter of pan-seared potstickers, or a hot skillet of vegetable fried rice. It also acts as an incredible flavor booster when swirled into a warm bowl of silken tofu, drizzled across creamy avocado toast, or served alongside grilled flatbreads and a selection of marinated olives for a fun fusion appetizer spread.
Transforming Your Leftovers into Something New
If you have a few tablespoons of chili oil left at the bottom of your jar, you can easily use it to create a spectacular spicy peanut stir-fry sauce. Simply whisk the remaining texturized oil and sediment with two large spoonfuls of creamy peanut butter, a splash of hot water, and an extra dash of soy sauce until smooth. Toss this rich, nutty emulsion with warm udon noodles and fresh julienned vegetables for a lightning-fast, deeply satisfying dinner bowl that takes zero effort.
Extra Insights for Culinary Success
When selecting your chili flakes, utilizing a combination of standard crushed red pepper and Korean gochugaru yields the absolute best results because it strikes a flawless balance between clean, sharp heat and a deep, smoky sweetness. Additionally, ensure your glass storage jars are completely dry before filling them, as any trapped moisture will significantly reduce the shelf life of your beautiful homemade oil.
Creating a Showstopping Presentation
To make this beautiful condiment stand out on your dining table, store it in a clear, minimalist glass jar with an elegant ceramic serving spoon resting nearby. When ready to serve your meal, drizzle the glowing red oil in a clean, deliberate circle around the perimeter of your white noodle or rice bowls, allowing the bright red color to contrast beautifully with your food. Scatter the golden whole peanuts and plump garlic cloves right in the center so your guests can see the incredible textures waiting inside.
Exciting Flavor Variations to Explore
- Sichuan Peppercorn Numbness: Add a teaspoon of crushed Sichuan peppercorns to your dry spice bowl for a unique, tongue-tingling sensation.
- Five-Spice Warmth: Toss a half teaspoon of Chinese five-spice powder into the chilies to introduce a sweet, highly aromatic winter warmth.
- Crispy Shallot Boost: Slice two shallots thinly and fry them along with the garlic cloves to add an extra layer of crispy, sweet onion texture.
- Ginger Aromatic Twist: Simmer a few thick coins of fresh ginger in the oil, removing them right before pouring the hot fat over your pepper flakes.
FAQ’s
Q1
Does this chili oil need to be kept in the refrigerator?
A1
It can be stored safely in a cool, dark cupboard for up to a month, but refrigeration will extend its freshness for up to three months.
Q2
Why did my oil turn cloudy after putting it in the fridge?
A2
Neutral oils will naturally solidify and turn cloudy when chilled, but it will become perfectly clear and liquid again once it sits at room temperature.
Q3
Can I use roasted peanuts instead of raw blanched peanuts?
A3
Yes, but since they are already cooked, only add them to the oil during the final three minutes of simmering so they do not over-brown.
Q4
Is this chili oil extremely spicy?
A4
It has a medium, comfortable warmth because the Gochugaru chili flakes bring a lot of color and sweetness rather than pure fire.
Q5
What can I use if I have a peanut allergy?
A5
You can completely omit the peanuts or replace them with raw sunflower seeds or toasted pumpkin seeds for an excellent nut-free crunch.
Q6
How do I prevent the garlic from turning bitter?
A6
Ensure your stove heat stays very low so the garlic cloves cook gently and turn a light golden color rather than dark brown.
Q7
Can I use fresh chili peppers instead of dried flakes?
A7
This specific recipe requires dried flakes to achieve the correct texture and shelf life, as fresh peppers contain too much water.
Q8
Why did my chili flakes smell burnt when I poured the oil?
A8
Your frying oil was likely too hot, so let the pan rest off the heat for sixty seconds before pouring it over your dry spices.
Q9
What kind of vinegar pairs well with this oil at the table?
A9
A splash of dark Chinese black vinegar pairs absolutely magnificently with this oil when dipping dumplings or dressing noodles.
Q10
How long should I let the oil sit before using it?
A10
While it tastes great immediately, letting the jar sit for twenty-four hours allows the flavors to meld and intensify significantly.
Conclusion
Easy Garlic Chili Oil with Peanuts is a magnificent pantry staple that instantly transforms simple home cooking into a deeply savory, restaurant-quality dining experience. With its brilliant ruby color, sweet golden garlic, and an addictive nutty crunch, this fiery condiment is destined to become a beloved fixture on your kitchen counter. So assemble your spices, preheat your pan, and get ready to bring a spectacular wave of warmth to your culinary journey that is worth every single crunchy bite!
Print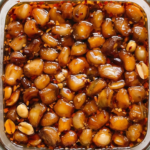
Easy Garlic Chili Oil with Peanuts
- Prep Time: 5 mins
- Cook Time: 25 mins
- Total Time: 30 mins
- Yield: 16 servings 1x
- Category: Condiment
- Method: Oven Roasting
- Cuisine: Fusion
- Diet: Vegan
Description
A rich, aromatic chili oil featuring buttery slow-roasted garlic and crunchy peanuts, infused in extra virgin olive oil with a perfect balance of savory and spicy notes.
Ingredients
- 240 ml extra virgin olive oil
- 12 fresh garlic cloves, peeled
- 4 tbsp coarse red chili flakes
- 100 g crunchy peanuts, roughly chopped
- 1 tbsp toasted sesame seeds
- 1 tbsp soy sauce
- 1 tsp rice vinegar
- 1/2 tsp garlic powder
- 1/2 tsp onion powder
Instructions
- Preheat your oven to 325°F (165°C).
- Place the peeled garlic cloves into a small glass baking dish and pour the extra virgin olive oil over them until mostly submerged.
- Bake for 20 to 25 minutes, until the garlic cloves are pale golden and tender.
- While the oil is still warm, carefully pour it along with the roasted garlic cloves into a mixing bowl.
- Stir in the chili flakes, chopped peanuts, sesame seeds, garlic powder, and onion powder to bloom the spices in the warm oil.
- Add the soy sauce and rice vinegar, stirring gently to combine.
- Allow the mixture to cool to room temperature, then transfer to a clean glass jar.
- Let the jar sit for 24 hours before serving to allow the flavors to fully meld.
Notes
- Note: Keep the oven temperature low to ensure the garlic roasts into a buttery paste rather than turning dark brown.
- Note: Store in the refrigerator for the best quality and longest shelf life, especially given the roasted garlic content.
- Note: Always give the jar a good stir before using, as the crunchy garlic and peanut pieces will settle at the bottom.
Nutrition
- Serving Size: 2 tablespoons
- Calories: 145
- Sugar: 0g
- Sodium: 110mg
- Fat: 15g
- Saturated Fat: 2g
- Unsaturated Fat: 13g
- Trans Fat: 0g
- Carbohydrates: 3g
- Fiber: 1g
- Protein: 2g
- Cholesterol: 0mg
Keywords: no-fry chili oil, slow-roasted garlic chili oil, homemade chili crisp, crunchy peanut chili oil, easy aromatic chili oil