Homemade Cherry Pie
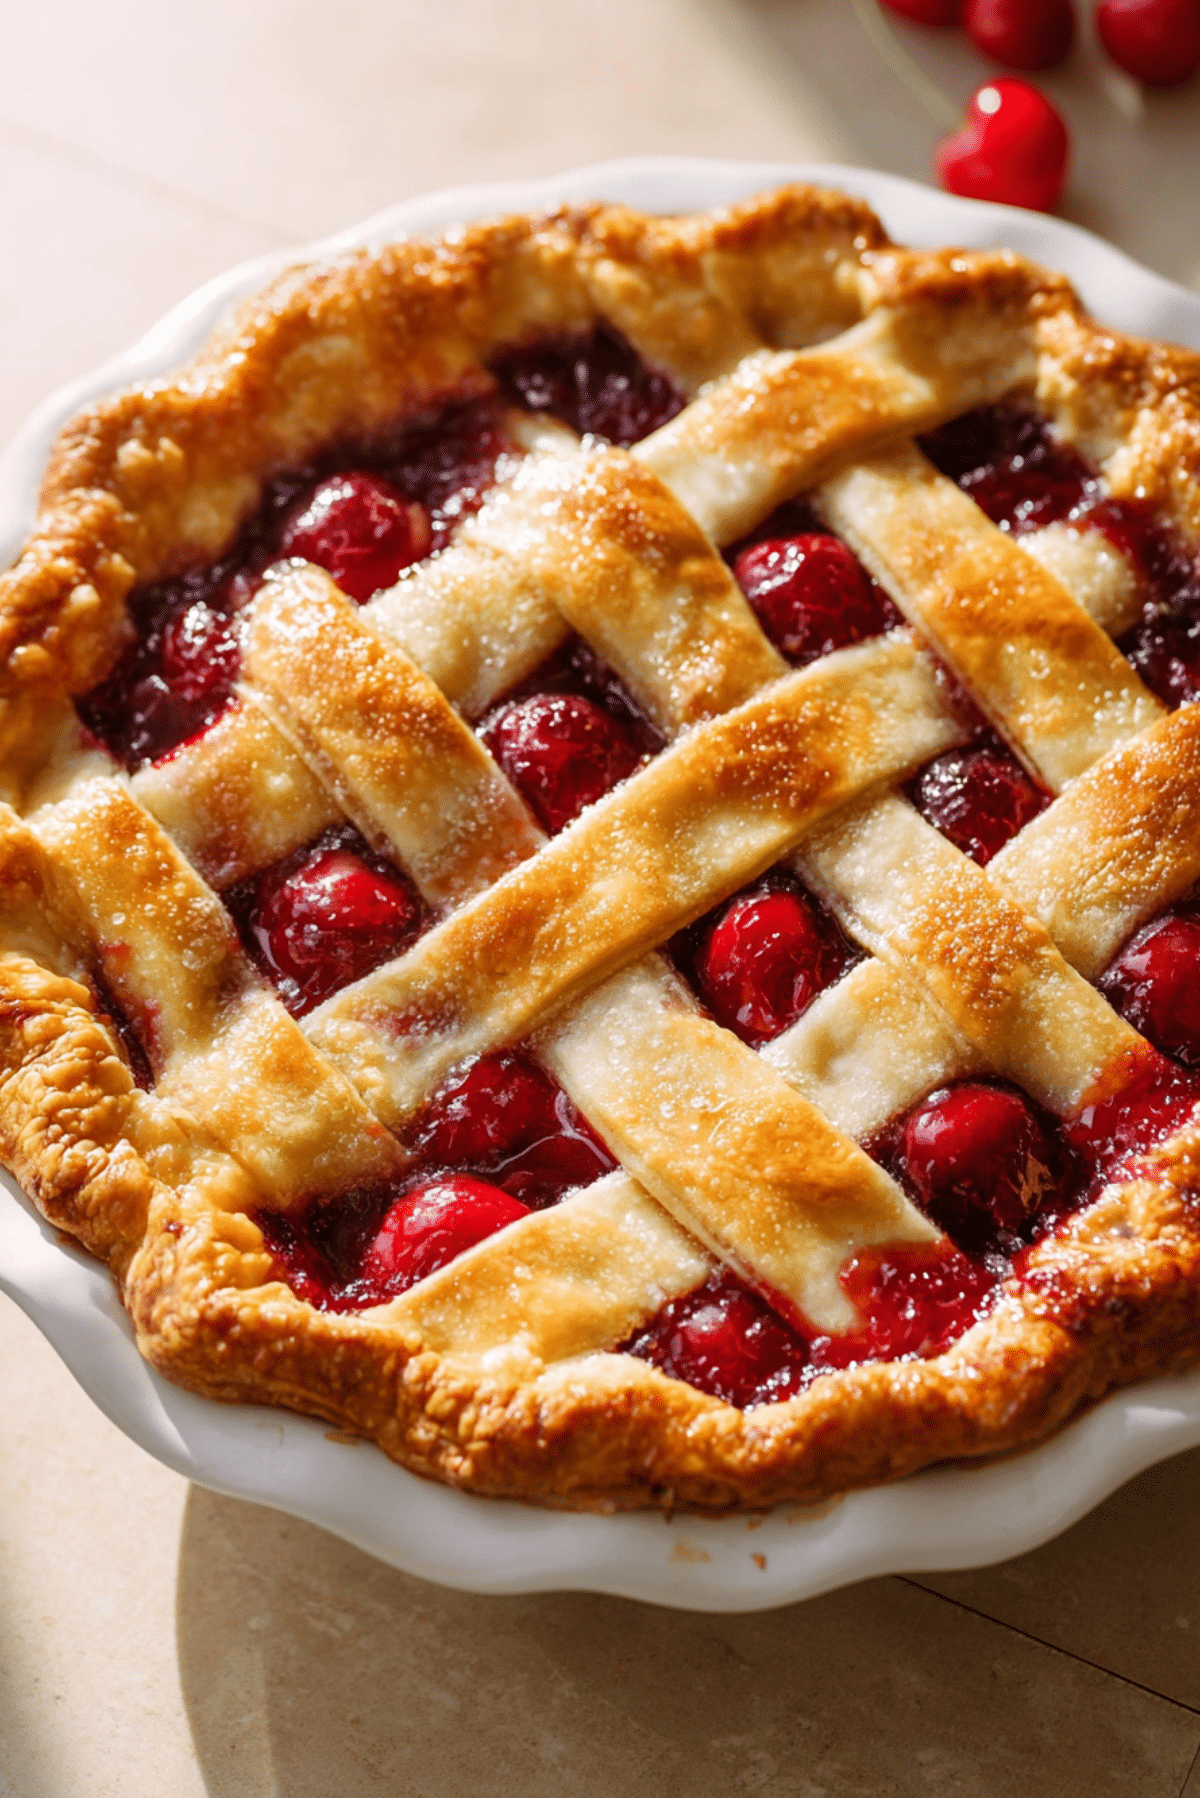
There’s something timeless about a cherry pie. That ruby red filling, bubbling just beneath a golden lattice crust, sends waves of nostalgia with every bite. You can smell the warm, fruity aroma filling the kitchen before it even comes out of the oven. And once it does, it’s a showstopper crisp, buttery crust giving way to a sweet, slightly tart cherry center that just melts on your tongue.
Behind the Recipe
This homemade cherry pie is inspired by my grandmother’s kitchen. Every summer, we’d pick cherries from the tree in the backyard, our fingers stained red and our baskets brimming. By evening, the pie would be in the oven, and we’d hover around, sneaking peeks through the oven door. It’s that sense of comfort and togetherness I try to recreate every time I bake it.
Recipe Origin or Trivia
Cherry pie has long held a place in American tradition, often celebrated during summer holidays like the Fourth of July. The earliest versions trace back to European settlers, though they used sour cherries and simpler crusts. In the U.S., it became a symbol of home baking, especially in the Midwest where cherry orchards flourished. Today, it’s a staple in diners and holiday tables, bridging generations and tastes.
Why You’ll Love Homemade Cherry Pie
This pie isn’t just pretty it’s packed with flavor and texture. Here’s why you’ll keep coming back to it:
Versatile: Serve it warm with a scoop of vanilla ice cream or chilled for a midday treat. It fits any season.
Budget-Friendly: Made with pantry staples and fresh or frozen cherries, it’s easy on your wallet.
Quick and Easy: With a straightforward crust and filling, you won’t spend hours in the kitchen.
Customizable: Use sour cherries, add almond extract, or top with streusel make it your own.
Crowd-Pleasing: This classic dessert always gets applause, whether at potlucks or holiday dinners.
Make-Ahead Friendly: Bake it a day early and let the flavors deepen overnight.
Great for Leftovers: Tastes just as amazing the next day maybe even better.
Chef’s Pro Tips for Perfect Results
Getting your cherry pie just right is all about the details. Here’s what I’ve learned over the years:
- Use Cold Butter: Keep your butter cold for a flakier crust. Cut it into cubes and chill before mixing.
- Don’t Overwork the Dough: Mix just until it comes together. Overmixing will make it tough.
- Thicken with Cornstarch: Cherry filling can get runny. Cornstarch keeps it luscious and sliceable.
- Let It Cool Completely: As tempting as it is, cutting too soon will cause the filling to run.
- Brush with Egg Wash: For that gorgeous golden shine, a quick brush with egg and milk does wonders.
Kitchen Tools You’ll Need
You won’t need any fancy equipment here just the essentials:
Mixing Bowls: For the dough and filling prep.
Pastry Cutter or Fork: To cut the butter into the flour.
Rolling Pin: For rolling out your pie dough evenly.
Pie Dish (9-inch): The classic vessel for your masterpiece.
Small Saucepan: To cook the cherry filling just slightly.
Pastry Brush: For applying egg wash.
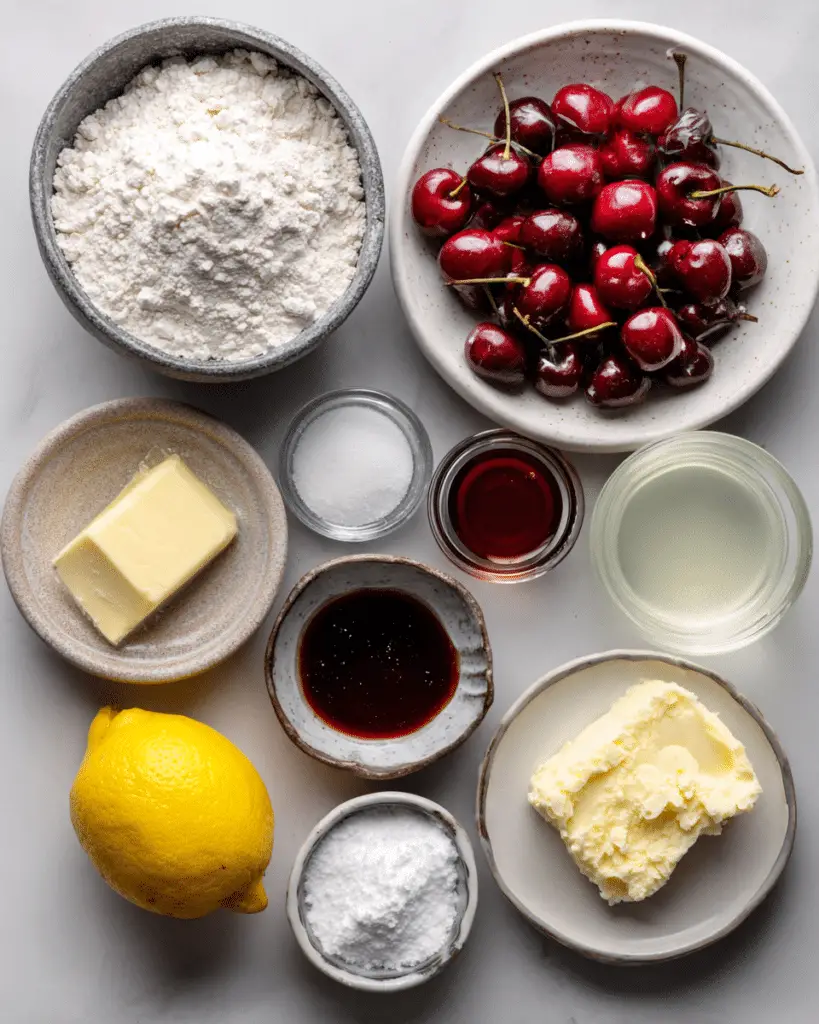
Ingredients in Homemade Cherry Pie
Each ingredient plays a starring role in this pie, working together to create that unforgettable flavor and texture.
- All-Purpose Flour: 2 ½ cups – Forms the base of your buttery, flaky crust.
- Granulated Sugar: 1 cup (divided) – Sweetens both the crust and the cherry filling.
- Salt: ½ teaspoon – Enhances the flavor of the crust.
- Unsalted Butter: 1 cup (cold and cubed) – The secret to a tender, flaky pie crust.
- Ice Water: 6 to 8 tablespoons – Helps bring the dough together without warming it.
- Fresh Cherries (pitted): 5 cups – The heart of the pie, juicy and bursting with flavor.
- Cornstarch: 4 tablespoons – Thickens the cherry filling so it slices beautifully.
- Lemon Juice: 1 tablespoon – Adds brightness and balances sweetness.
- Vanilla Extract: 1 teaspoon – Deepens the flavor of the filling.
- Egg (for egg wash): 1 – Gives the crust that perfect golden color.
- Milk: 1 tablespoon – Helps the egg wash blend smoothly.
Ingredient Substitutions
Need to swap something? No worries, here are some easy fixes:
All-Purpose Flour: Gluten-free all-purpose blend.
Fresh Cherries: Frozen cherries (thawed and drained).
Unsalted Butter: Vegan butter for a dairy-free option.
Cornstarch: Arrowroot powder or tapioca starch.
Lemon Juice: White vinegar or apple cider vinegar.
Vanilla Extract: Almond extract for a nuttier twist.
Ingredient Spotlight
Fresh Cherries: The star of the show. They bring juicy sweetness and a slight tartness that balances the sugar perfectly. When in season, they’re unbeatable.
Unsalted Butter: It gives that signature flaky, tender crust. Using unsalted lets you control the salt levels in your dough.
Instructions for Making Homemade Cherry Pie
Let’s walk through the steps together it’s easier (and more fun) than you think.
- Preheat Your Equipment:
Preheat your oven to 400°F (200°C). Place a baking sheet on the bottom rack to catch any drips. - Combine Ingredients:
In a large bowl, mix flour, ½ cup sugar, and salt. Cut in the cold butter until pea-sized crumbs form. Gradually add ice water until the dough comes together. Divide in half and chill for 30 minutes. - Prepare Your Cooking Vessel:
Roll out one dough half and fit it into a 9-inch pie dish. Trim the edges but leave a slight overhang. - Assemble the Dish:
In a saucepan, combine cherries, remaining sugar, cornstarch, lemon juice, and vanilla. Heat gently until just thickened. Pour into crust. Roll out second dough half and create a lattice top. Seal and crimp edges. - Cook to Perfection:
Brush with egg wash. Bake for 45 to 50 minutes until crust is golden and filling is bubbly. Cover edges with foil if they brown too quickly. - Finishing Touches:
Cool on a wire rack for at least 2 hours. This helps the filling set. - Serve and Enjoy:
Slice and serve with whipped cream or vanilla ice cream. Trust me, it’s worth every bite.
Texture & Flavor Secrets
The contrast is magical crisp, golden crust with buttery layers that shatter under your fork, followed by a warm, jammy cherry center that’s both sweet and just tart enough. The vanilla and lemon add depth, lifting the flavor of the fruit beautifully.
Cooking Tips & Tricks
A few extra tips to make this pie even better:
- Chill your dough ingredients and tools before starting for best results.
- If using frozen cherries, thaw completely and drain excess juice.
- Tent the pie loosely with foil if the top is browning too fast.
What to Avoid
Even experienced bakers trip up sometimes. Here’s what to watch for:
- Too little thickener: Will leave your pie runny and soggy.
- Hot filling in cold crust: Can melt the butter before baking.
- Overbaking: Can dry out your filling and darken the crust too much.
Nutrition Facts
Servings: 8
Calories per serving: 420
Note: These are approximate values.
Preparation Time
Prep Time: 30 minutes
Cook Time: 50 minutes
Total Time: 1 hour 20 minutes
Make-Ahead and Storage Tips
Cherry pie is a great make-ahead dessert. Bake it the night before and let it sit at room temperature. Store leftovers covered at room temperature for 2 days or refrigerated for up to 5 days. Reheat slices gently in the oven. You can also freeze the fully baked pie for up to 3 months.
How to Serve Homemade Cherry Pie
Serve warm with a scoop of vanilla bean ice cream, or drizzle with a little heavy cream. A dusting of powdered sugar on top adds a beautiful touch. For a brunch twist, serve alongside coffee or even mimosa mocktails.
Creative Leftover Transformations
Leftover slices? Try these ideas:
- Warm and top with Greek yogurt and granola for a cherry pie parfait.
- Crumble into a sundae with chocolate syrup and whipped cream.
- Slice and toast lightly for a cherry pie “toast” with a drizzle of honey.
Additional Tips
- Let your pie rest before slicing. It firms up and slices much cleaner.
- Add a sprinkle of coarse sugar on top of the crust before baking for extra crunch.
- Try baking it in a cast iron skillet for rustic charm and even heat.
Make It a Showstopper
Use a decorative pie crust cutter for the lattice or edge. A simple leaf or heart shape makes it instantly more festive. Brushing with egg and milk gives that rich, glossy bakery finish.
Variations to Try
- Cherry-Almond Pie: Add almond extract to the filling and top with slivered almonds.
- Mixed Berry Pie: Combine cherries with blueberries or raspberries.
- Crumble Top: Skip the top crust and add a buttery crumble for crunch.
- Mini Hand Pies: Use the same filling in pastry circles for cute hand pies.
- Chocolate Cherry Pie: Add a handful of dark chocolate chips to the filling for richness.
FAQ’s
Q1: Can I use canned cherries?
A1: Yes, but make sure they’re not already sweetened. Drain well and reduce added sugar.
Q2: How do I pit cherries easily?
A2: A cherry pitter works best, but you can also use a straw or chopstick to push the pit out.
Q3: Can I freeze the pie unbaked?
A3: Yes, assemble the pie and freeze it. Bake from frozen, adding 10 to 15 minutes to the bake time.
Q4: My crust is too hard. What happened?
A4: Likely overmixed or too much water. Handle the dough gently and don’t overwork it.
Q5: Can I make it gluten-free?
A5: Absolutely. Just swap the flour for a 1-to-1 gluten-free baking blend.
Q6: What cherries are best?
A6: Tart cherries give a classic flavor, but sweet ones work well too. Adjust sugar if needed.
Q7: Can I skip the egg wash?
A7: You can, but the crust won’t be as golden or shiny. Milk alone works in a pinch.
Q8: Should I blind bake the crust?
A8: Not for this pie. The filling cooks fully during baking.
Q9: Why is my filling runny?
A9: It may not have cooked long enough or used too little cornstarch.
Q10: How do I prevent a soggy bottom crust?
A10: Bake the pie on a lower rack and preheat a baking sheet underneath.
Conclusion
This homemade cherry pie is everything you want in a dessert buttery, fruity, nostalgic, and impossibly good. Whether you’re baking for a special occasion or just craving something classic and comforting, this one’s a total game-changer. Trust me, it’s worth every bite.
Print
Homemade Cherry Pie
- Prep Time: 30 minutes
- Cook Time: 50 minutes
- Total Time: 1 hour 20 minutes
- Yield: 8 servings 1x
- Category: Dessert
- Method: Baking
- Cuisine: American
- Diet: Vegetarian
Description
This homemade cherry pie is a timeless dessert with a flaky, buttery crust and juicy cherry filling. Perfect for summer gatherings or cozy family dinners, it’s sweet, slightly tart, and always a crowd favorite.
Ingredients
- 2 ½ cups all-purpose flour
- 1 cup granulated sugar (divided)
- ½ teaspoon salt
- 1 cup unsalted butter, cold and cubed
- 6 to 8 tablespoons ice water
- 5 cups fresh cherries, pitted
- 4 tablespoons cornstarch
- 1 tablespoon lemon juice
- 1 teaspoon vanilla extract
- 1 egg
- 1 tablespoon milk
Instructions
- Preheat your oven to 400°F (200°C) and place a baking sheet on the bottom rack.
- In a large bowl, combine flour, ½ cup sugar, and salt. Cut in the cold butter until pea-sized crumbs form. Add ice water gradually until the dough forms. Divide in half, wrap, and chill for 30 minutes.
- Roll out one dough half and place into a 9-inch pie dish. Trim the edges and set aside.
- In a saucepan, mix cherries, remaining sugar, cornstarch, lemon juice, and vanilla. Heat gently until just thickened, then remove from heat.
- Pour the filling into the crust. Roll out the second dough half and create a lattice top. Seal and crimp edges.
- Whisk the egg and milk together, then brush over the crust.
- Bake for 45–50 minutes until golden and bubbly. Cover edges with foil if they brown too quickly.
- Cool on a wire rack for at least 2 hours before slicing.
Notes
- Chill all your crust ingredients for maximum flakiness.
- If using frozen cherries, thaw and drain them well before cooking.
- Sprinkle coarse sugar on top for extra crunch and sparkle.
- Let the pie rest before cutting to avoid runny slices.
Nutrition
- Serving Size: 1 slice
- Calories: 420
- Sugar: 28g
- Sodium: 140mg
- Fat: 21g
- Saturated Fat: 13g
- Unsaturated Fat: 7g
- Trans Fat: 0g
- Carbohydrates: 55g
- Fiber: 3g
- Protein: 4g
- Cholesterol: 60mg
Keywords: cherry pie, homemade pie, summer dessert, classic cherry pie, lattice pie