Homemade Pita Bread
There is something deeply comforting about warm bread fresh from your own kitchen, and this homemade pita bread brings that feeling to life in the best way. Soft, slightly chewy, and filled with a savory spiced meat mixture, each bite feels like a little celebration. The aroma alone, rich with herbs and warm spices, will pull everyone into the kitchen before you even call them. Trust me, you’re going to love this.
Why This Recipe Feels Like a Warm Hug on a Plate
There is a special kind of joy in recipes that are simple yet incredibly satisfying, and this one fits right in. The golden edges of the bread, the juicy filling, and that fresh sprinkle of herbs come together in a way that feels both comforting and exciting.
Whether you are making it for a quick family dinner or a casual weekend gathering, this dish always feels like the right choice. It is hearty without being heavy, and every bite delivers a balance of soft, crisp, and savory.
A Little Story Behind This Beloved Bread
Pita bread has roots that go back thousands of years across the Middle East and Mediterranean regions. It has always been a staple, loved for its versatility and simplicity. Traditionally baked in very hot ovens, pita forms that iconic pocket, making it perfect for stuffing with all kinds of fillings.
Over time, home cooks everywhere started adding their own twists, and this version filled with seasoned meat is one of those delicious evolutions. It brings together tradition and comfort in a way that feels familiar yet exciting.
Why You Will Keep Coming Back to This Recipe
Before we dive deeper, let me tell you why this one’s a total game-changer.
Versatile: You can serve it as a snack, lunch, or dinner, and it fits every occasion effortlessly.
Budget-Friendly: The ingredients are simple pantry staples, which means no fancy shopping trips.
Quick and Easy: Once the dough is ready, everything comes together faster than you think.
Customizable: You can switch up the filling, spices, or even make it vegetarian.
Crowd-Pleasing: Everyone loves warm stuffed bread, no exceptions.
Make-Ahead Friendly: You can prep the dough and filling ahead of time, which saves you stress later.
Great for Leftovers: They reheat beautifully, making them perfect for the next day.
Pro Tips That Make All the Difference
Now that you are excited, let’s make sure you get the best possible result.
- Let the dough rest properly so it becomes soft and easy to shape.
- Cook the filling until it is nicely browned to develop deep flavor.
- Do not overfill the bread or it may tear while cooking.
- Use medium heat so the bread cooks evenly without burning.
Tools That Make This Process Smooth
Before we jump into ingredients, let’s make sure your kitchen is ready.
Mixing Bowl: For bringing the dough together and letting it rise.
Rolling Pin: Helps shape the dough evenly for perfect pockets.
Skillet or Pan: A good nonstick or cast iron pan works best for cooking.
Spatula: Makes flipping easy and keeps the bread intact.
Ingredients That Bring It All Together
And now, let’s dive into what you will need to create this delicious dish.
- All-Purpose Flour: 2 cups, this forms the base of the soft and chewy bread.
- Warm Water: 3/4 cup, helps activate the dough and bring everything together.
- Active Dry Yeast: 1 teaspoon, gives the bread its light and airy texture.
- Sugar: 1 teaspoon, feeds the yeast and adds a subtle balance.
- Salt: 1/2 teaspoon, enhances the flavor of the dough.
- Olive Oil: 1 tablespoon, adds softness and a hint of richness.
- Ground Beef: 250 grams, the heart of the savory filling.
- Onion: 1 small, finely chopped, adds sweetness and depth.
- Garlic: 2 cloves, minced, for that irresistible aroma.
- Paprika: 1 teaspoon, brings warmth and color.
- Cumin: 1/2 teaspoon, adds an earthy touch.
- Black Pepper: 1/2 teaspoon, for gentle heat.
- Salt: 1/2 teaspoon, balances the filling.
- Fresh Parsley: 2 tablespoons, chopped, adds freshness at the end.
Simple Swaps You Can Try
Cooking should always feel flexible and fun.
Ground Beef: You can use ground chicken or turkey for a lighter option.
Olive Oil: Any neutral oil will work just fine.
Parsley: Try cilantro if you prefer a brighter herbal note.
Spotlight on Flavor Stars
Let’s take a closer look at what makes this dish shine.
Ground Beef: Rich, juicy, and deeply flavorful, it creates that satisfying bite.
Garlic: Small but powerful, it adds a warm, aromatic backbone to the filling.
Let’s Get Cooking Together
Alright, and now let’s dive into the process where everything comes to life.
- Preheat Your Equipment: Warm a skillet over medium heat so it is ready when you need it.
- Combine Ingredients: In a bowl, mix warm water, yeast, and sugar. Let it sit for 5 minutes, then add flour, salt, and olive oil to form a soft dough.
- Prepare Your Cooking Vessel: Lightly oil your bowl and let the dough rest for about 1 hour until it doubles in size.
- Assemble the Dish: Cook the ground beef with onion and garlic until browned, then add spices and cook for another few minutes. Divide the dough, roll it out, and fill with the meat mixture.
- Cook to Perfection: Place the filled dough onto the skillet and cook each side for about 3 to 4 minutes until golden and slightly crispy.
- Finishing Touches: Sprinkle fresh parsley over the top for a burst of color and freshness.
- Serve and Enjoy: Serve warm and enjoy every soft, savory bite.
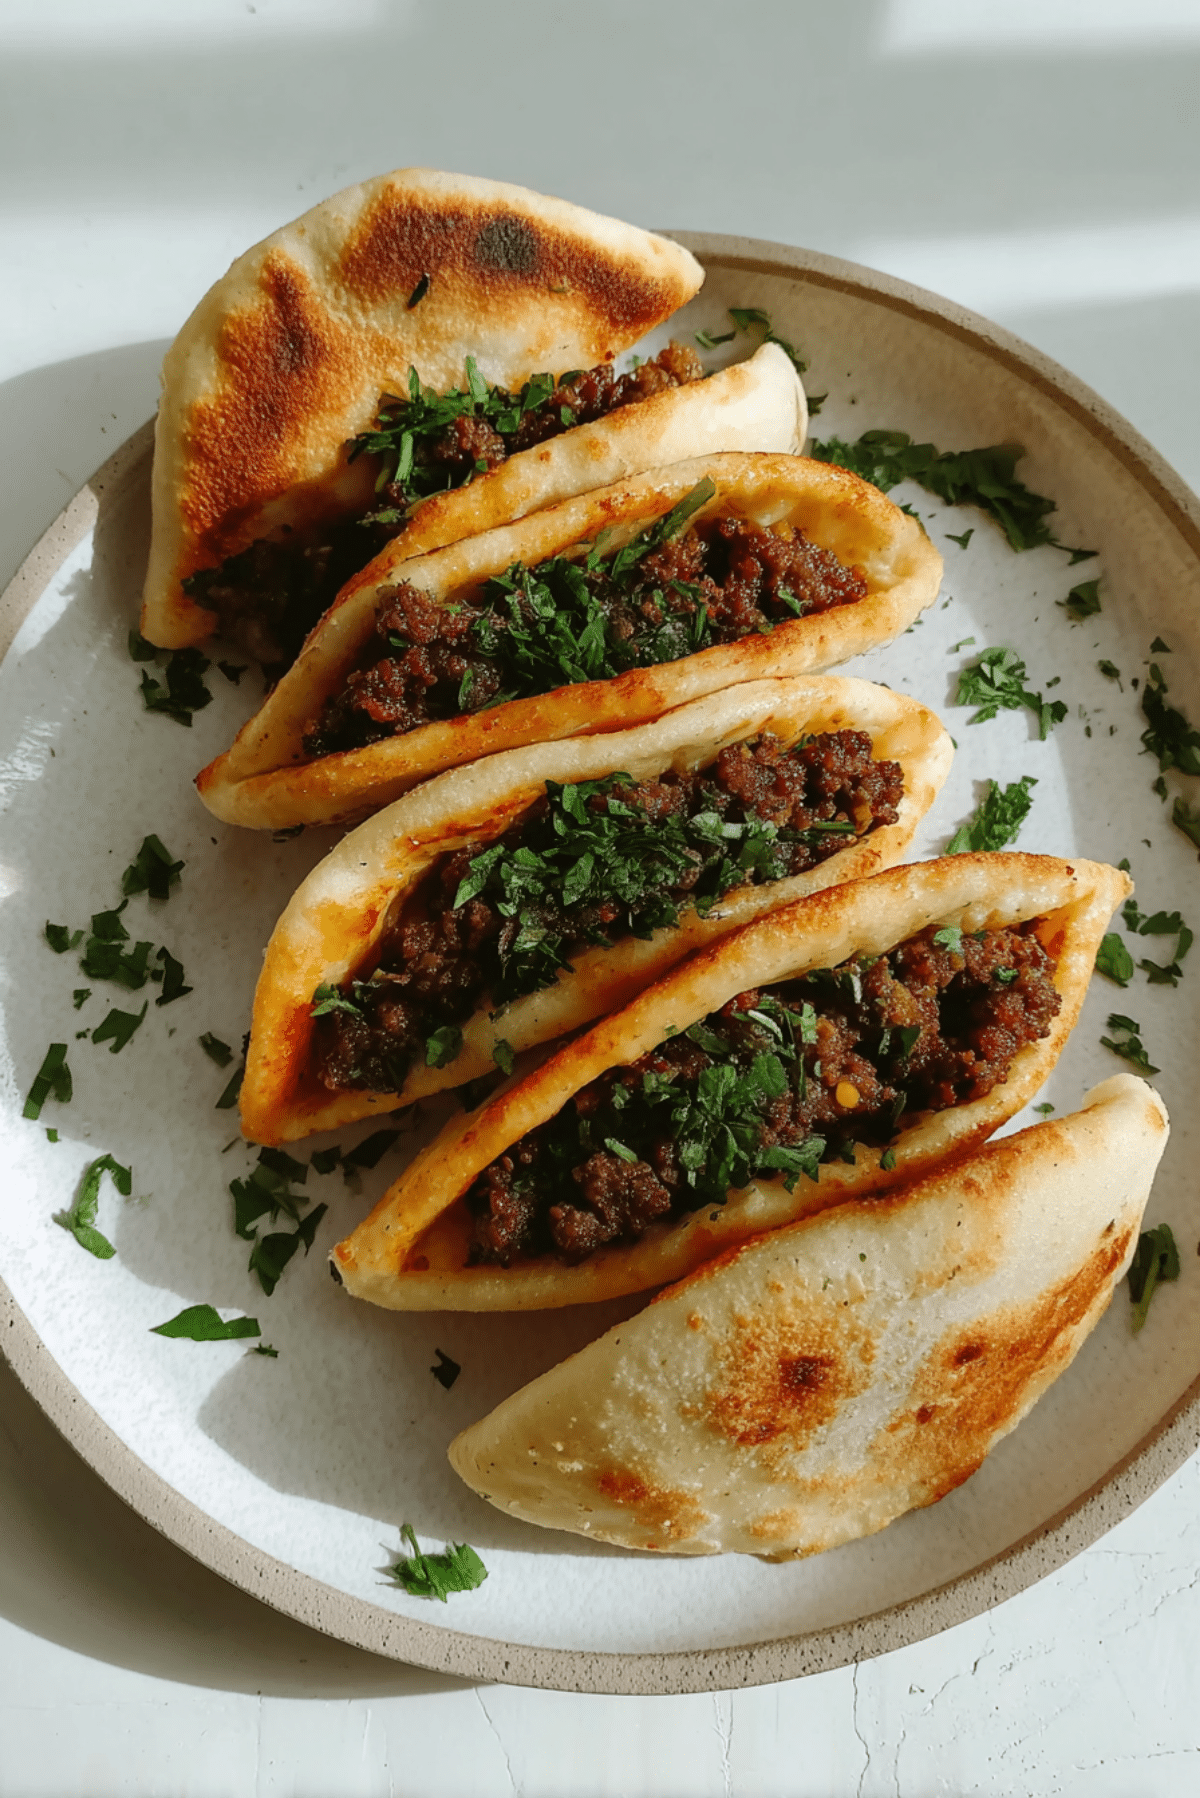
The Magic of Texture and Flavor
What makes this dish so special is the contrast. The outside gets lightly crisp with golden spots, while the inside stays soft and fluffy. Then comes the filling, juicy, spiced, and full of flavor. Each bite is a perfect mix of textures that keeps you coming back for more.
Helpful Tips for the Best Results
If you want to make it even better, keep these in mind.
- Use fresh yeast for the best rise and texture.
- Let the filling cool slightly before stuffing the dough.
- Roll the dough evenly so it cooks at the same rate.
What to Avoid for Perfect Results
Even simple recipes can go wrong, but these tips will keep you on track.
- Do not rush the dough rising time, it needs that rest.
- Avoid cooking on high heat, it can burn the outside too quickly.
- Do not overstuff, it makes sealing difficult.
Nutrition Snapshot
Servings: 4
Calories per serving: 420
Note: These are approximate values.
Timing Breakdown
Prep Time: 20 minutes
Cook Time: 20 minutes
Total Time: 40 minutes
Make-Ahead and Storage Tips
If you like planning ahead, this recipe is perfect. You can prepare the dough and filling a day in advance and store them in the fridge. Once cooked, keep leftovers in an airtight container for up to 3 days. Reheat in a pan to bring back that fresh texture, or freeze them for longer storage.
Serving Ideas You Will Love
Serve these warm with a side of yogurt sauce, fresh salad, or even a squeeze of lemon. They also pair beautifully with pickled vegetables, adding a tangy contrast to the rich filling.
Turn Leftovers Into Something New
Leftovers never have to be boring.
Chop them up and turn them into a quick wrap, or slice and serve over a salad for a hearty twist. You can even reheat and top with a fried egg for a comforting breakfast option.
Extra Tips for Even Better Flavor
A little extra effort goes a long way.
Add a pinch of chili flakes if you like heat, or a sprinkle of cheese inside for a melty surprise. Let me tell you, it’s worth every bite.
Make It Look as Good as It Tastes
Presentation matters more than you think. Arrange the stuffed bread on a simple plate, sprinkle fresh herbs, and serve while warm. The golden color and fresh green garnish make it instantly inviting.
Fun Variations to Try
- Add cheese inside for a gooey, rich twist.
- Use lamb instead of beef for a deeper flavor.
- Make mini versions for appetizers.
- Add chopped vegetables to the filling for extra texture.
FAQ’s
Q1: Can I make the dough ahead of time?
Yes, you can refrigerate it overnight and use it the next day.
Q2: Can I bake instead of pan cooking?
Yes, bake at 200°C for about 10 to 12 minutes.
Q3: How do I store leftovers?
Keep them in an airtight container in the fridge for up to 3 days.
Q4: Can I freeze them?
Yes, freeze after cooking and reheat when needed.
Q5: What other fillings can I use?
Try vegetables, cheese, or even shredded chicken.
Q6: Why is my dough not rising?
Your yeast might not be active or the water may be too hot.
Q7: Can I use whole wheat flour?
Yes, but the texture will be slightly denser.
Q8: How do I keep them soft?
Cover them with a cloth after cooking to retain moisture.
Q9: Can I make them spicy?
Absolutely, just add chili flakes or hot sauce.
Q10: What sauce goes best with this?
Yogurt-based sauces or garlic sauce work beautifully.
Conclusion
There is something truly special about making bread from scratch, especially when it turns into something this flavorful and satisfying. From the soft dough to the rich filling, every step feels rewarding. This one’s a total game-changer, and once you try it, it will quickly become a favorite in your kitchen.
Print
Homemade Pita Bread
- Prep Time: 20 minutes
- Cook Time: 20 minutes
- Total Time: 40 minutes
- Yield: 4 servings 1x
- Category: Main Course
- Method: Pan-Cooked
- Cuisine: Middle Eastern
- Diet: Low Lactose
Description
Soft homemade pita bread filled with a savory spiced meat mixture, cooked until golden and finished with fresh herbs for a warm and satisfying meal.
Ingredients
- 2 cups all-purpose flour
- 3/4 cup warm water
- 1 teaspoon active dry yeast
- 1 teaspoon sugar
- 1/2 teaspoon salt
- 1 tablespoon olive oil
- 250 grams ground beef
- 1 small onion, finely chopped
- 2 cloves garlic, minced
- 1 teaspoon paprika
- 1/2 teaspoon cumin
- 1/2 teaspoon black pepper
- 1/2 teaspoon salt
- 2 tablespoons fresh parsley, chopped
Instructions
- Warm a skillet over medium heat so it is ready when needed.
- In a bowl, mix warm water, yeast, and sugar. Let it sit for 5 minutes, then add flour, salt, and olive oil to form a soft dough.
- Lightly oil the bowl and let the dough rest for about 1 hour until it doubles in size.
- Cook the ground beef with onion and garlic until browned, then add paprika, cumin, black pepper, and salt and cook for a few more minutes.
- Divide the dough into portions, roll each one out, and fill with the meat mixture.
- Place the filled dough onto the skillet and cook each side for 3 to 4 minutes until golden and slightly crispy.
- Sprinkle chopped parsley on top and serve warm.
Notes
- Let the dough rise fully for the best texture.
- Do not overfill the pita to prevent tearing.
- Cook on medium heat to avoid burning the outside before the inside is done.
- Allow the filling to cool slightly before assembling.
Nutrition
- Serving Size: 1 stuffed pita
- Calories: 420
- Sugar: 2g
- Sodium: 480mg
- Fat: 18g
- Saturated Fat: 6g
- Unsaturated Fat: 10g
- Trans Fat: 0g
- Carbohydrates: 42g
- Fiber: 2g
- Protein: 20g
- Cholesterol: 55mg
Keywords: homemade pita bread, stuffed pita, meat pita recipe, easy pita bread, savory stuffed bread