Korean Garlic Salt Bread
There is something almost magical about pulling apart a warm, golden loaf and watching that creamy garlic filling stretch just slightly between the layers. The smell alone is enough to make your kitchen feel like a cozy bakery tucked into a quiet street in Seoul. Korean garlic salt bread is soft inside, lightly crisp outside, and packed with buttery garlic flavor that melts into every bite. Trust me, you’re going to love this. This one’s a total game-changer for anyone who thinks bread is just a side dish. Let me tell you, it’s worth every bite.
Why This Savory Bread Wins Everyone Over
There is something deeply comforting about bread that feels both simple and indulgent at the same time. The first bite gives you that gentle crunch from the crust, then you sink into the pillowy interior soaked with garlicky butter and a hint of salt. It is rich but not heavy, flavorful yet balanced. Whether you serve it for brunch, as a snack, or alongside soup, it always disappears fast.
A Little Taste of Korea in Every Bite
Korean garlic salt bread became popular through neighborhood bakeries in South Korea, where creative twists on classic European style breads have become part of everyday food culture. Korean bakeries are known for taking familiar flavors and giving them a bold, modern spin. In this case, the humble garlic bread gets transformed with generous slits filled with buttery garlic mixture that seeps deep into the crumb. It reflects the Korean love for balance, combining savory richness with a light, fluffy texture that keeps you reaching for more.
Why You Can Trust This Recipe Every Single Time
Before we dive into the kitchen, let me share why this one is such a reliable favorite.
Versatile: It works beautifully as a snack, appetizer, or side dish. You can even pair it with salads, soups, or pasta for a complete meal.
Budget-Friendly: The ingredients are simple pantry staples, flour, butter, garlic, and yeast, which makes it easy on your grocery bill.
Quick and Easy: While it does require proofing time, the hands-on work is simple and beginner-friendly.
Customizable: You can adjust the garlic intensity, add herbs, or even sprinkle in a little grated cheese if you like.
Crowd-Pleasing: Warm bread with garlic butter is universally loved. It is almost impossible to serve this and not see smiles.
Make-Ahead Friendly: You can prepare the dough ahead of time and refrigerate it overnight before baking.
Great for Leftovers: If you somehow have leftovers, they reheat beautifully and still taste amazing the next day.
Insider Secrets for Bakery-Style Results
Getting that perfect fluffy center with a slightly crisp exterior is easier than you think.
- Use room temperature ingredients so the yeast activates properly and the dough rises evenly.
- Do not rush the proofing time, give the dough enough time to double in size for the best texture.
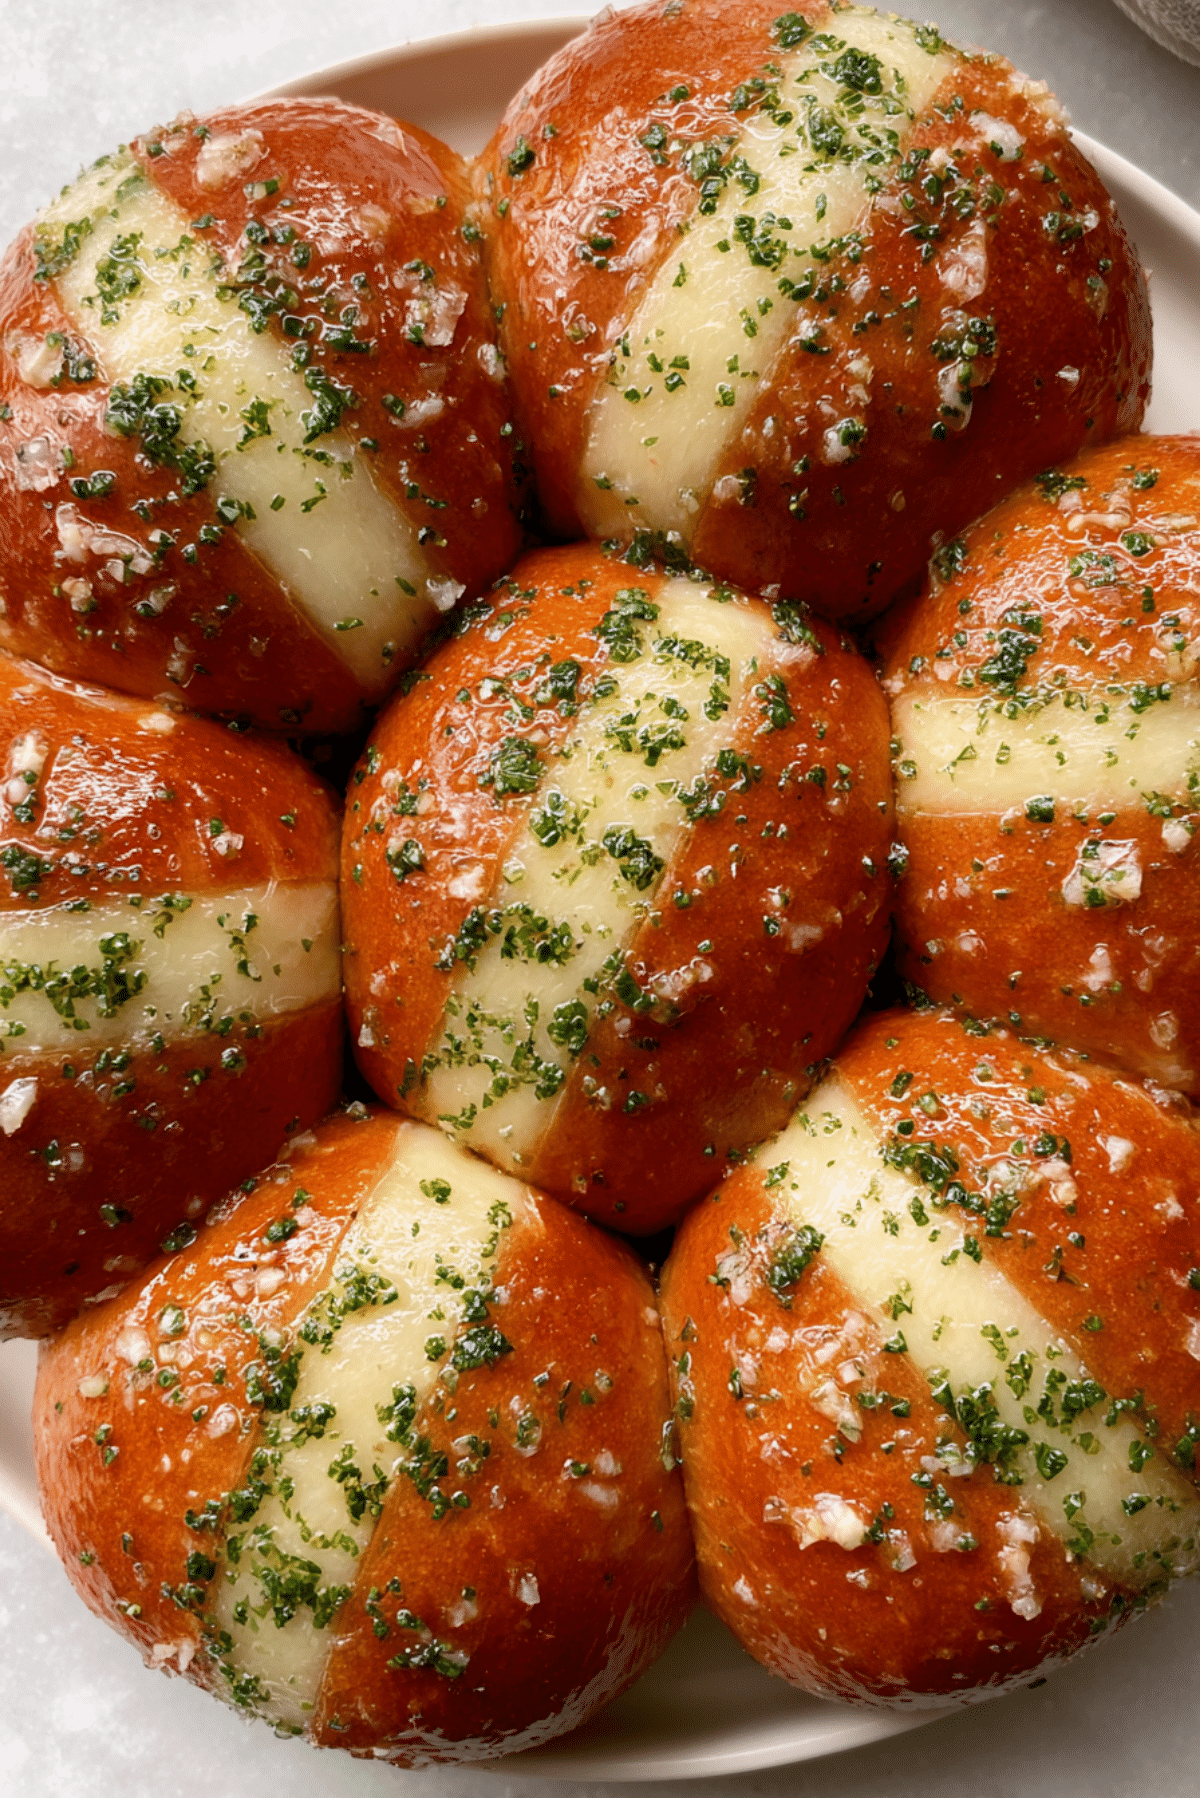
- Make deep but controlled slits in the rolls so the garlic butter can soak in without tearing the bread apart.
- Brush extra melted butter right after baking for a glossy finish and extra flavor.
Essential Tools for Success
Having the right tools makes the whole process smoother.
Mixing Bowl: For combining and kneading your dough comfortably.
Measuring Cups and Spoons: Accuracy is key for consistent bread texture.
Baking Tray: A sturdy tray lined with parchment keeps the bread from sticking.
Sharp Knife: To create clean, even slits for the garlic filling.
Pastry Brush: For spreading that glorious garlic butter evenly.
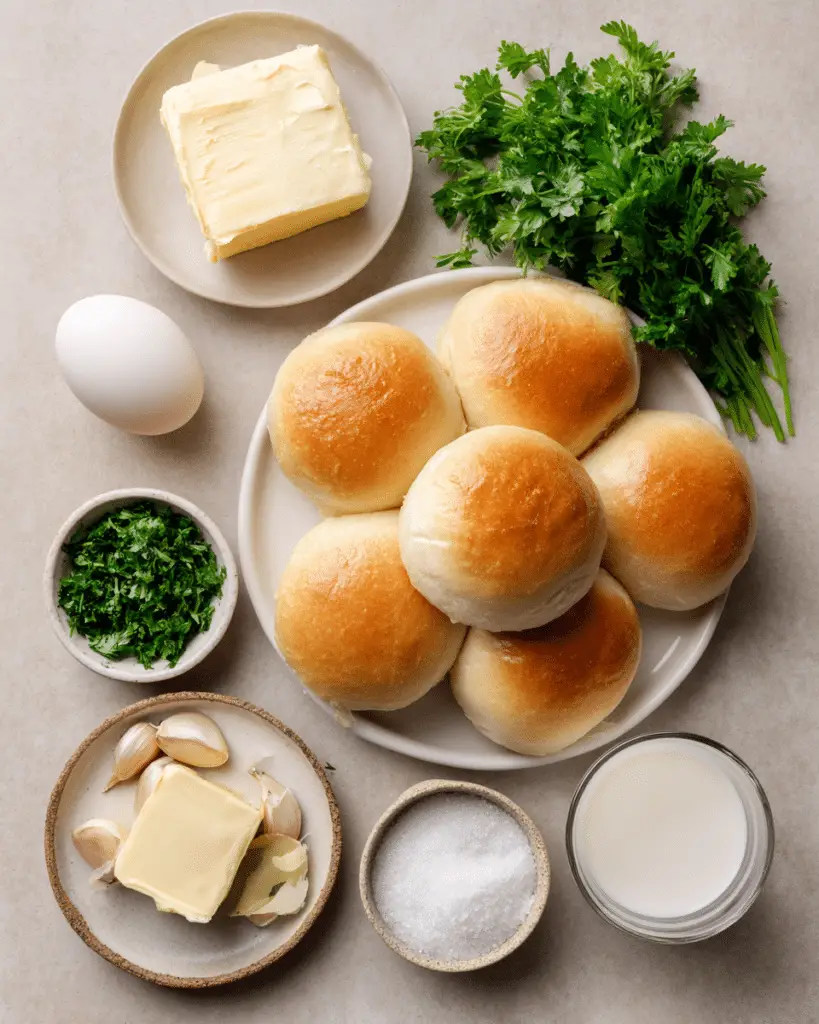
The Ingredients That Make It Shine
Everything comes together beautifully in this simple yet flavorful combination. Here is exactly what you will need.
- All Purpose Flour: 3 ½ cups, about 440 grams, provides the structure and soft crumb.
- Warm Milk: 1 cup, about 240 ml, helps create a tender dough and activates the yeast.
- Granulated Sugar: 2 tablespoons, feeds the yeast and adds slight sweetness.
- Active Dry Yeast: 2 ¼ teaspoons, which is one standard packet, helps the dough rise.
- Unsalted Butter: 4 tablespoons, melted, about 60 grams, enriches the dough.
- Salt: 1 teaspoon for the dough, plus ½ teaspoon for topping, enhances flavor.
- Garlic Cloves: 5 cloves, finely minced, deliver bold aromatic flavor.
- Unsalted Butter for Filling: ½ cup, softened, about 115 grams, creates the creamy garlic center.
- Fresh Parsley: 2 tablespoons, finely chopped, adds freshness and color.
Flexible Swaps If You Need Them
Sometimes you work with what you have, and that is perfectly fine.
All Purpose Flour: Bread flour for a slightly chewier texture.
Warm Milk: Warm water or a mix of milk and water.
Fresh Parsley: Dried parsley or chopped green onions.
Unsalted Butter: Salted butter, just reduce added salt slightly.
Spotlight on the Flavor Stars
Garlic Cloves: Fresh garlic is essential here. It gives a sharp, aromatic kick that mellows beautifully once baked.
Unsalted Butter for Filling: This is what makes the bread luxurious. When it melts into the slits, it creates pockets of savory richness.
Let’s Get Baking Together
Now comes the fun part. Roll up your sleeves and let’s make your kitchen smell incredible.
- Preheat Your Equipment: Preheat your oven to 350°F, which is about 175°C, and line a baking tray with parchment paper.
- Combine Ingredients: In a large bowl, mix warm milk, sugar, and yeast. Let it sit for 5 to 10 minutes until foamy. Add flour, melted butter, and salt. Mix until a dough forms, then knead for about 8 to 10 minutes until smooth and elastic.
- Prepare Your Cooking Vessel: Lightly grease a bowl, place the dough inside, and cover it with a clean towel. Let it rise in a warm spot for about 1 hour or until doubled in size.
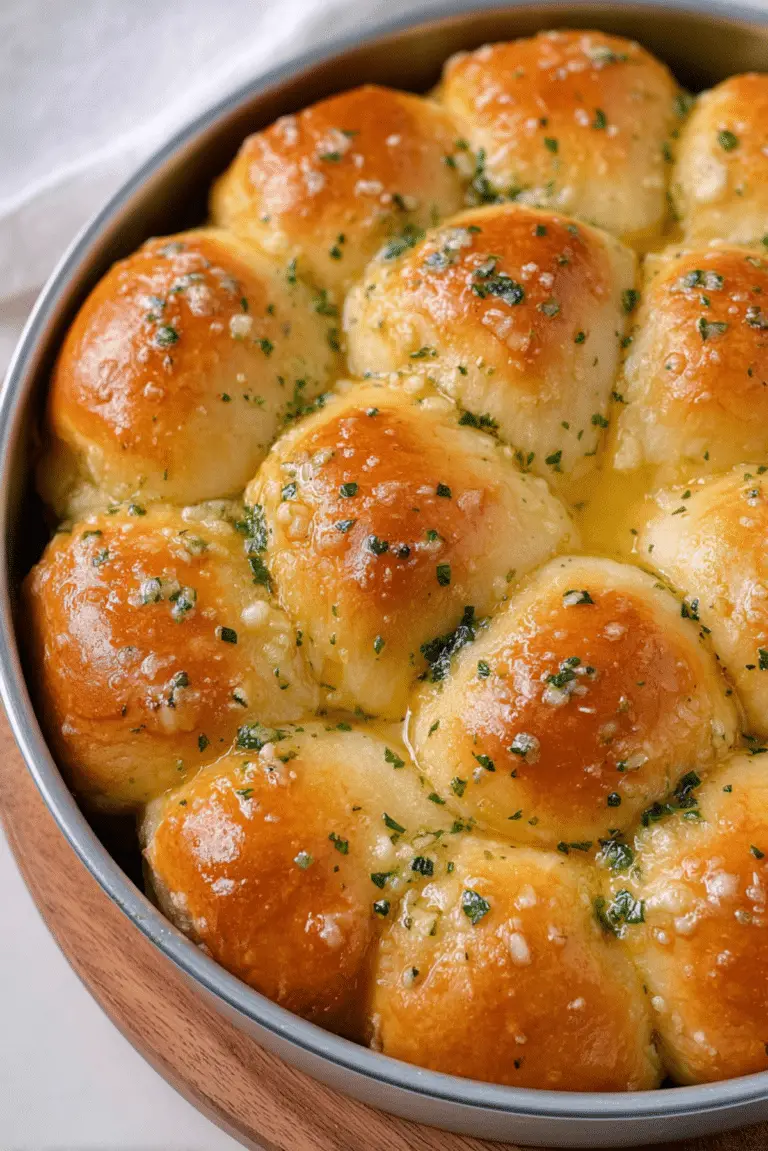
- Assemble the Dish: Divide the dough into 8 equal rolls and place them on the tray. Let them rest for 20 minutes. Mix softened butter, minced garlic, parsley, and ½ teaspoon salt. Cut deep slits into each roll and generously fill them with the garlic butter mixture.
- Cook to Perfection: Bake for 18 to 22 minutes until golden brown and fragrant. The tops should look lightly crisp while the inside stays soft.
- Finishing Touches: Brush extra melted butter over the warm rolls for added shine and flavor.
- Serve and Enjoy: Serve warm and watch everyone tear into them with pure joy.
Texture and Flavor That Keep You Coming Back
The outside has that delicate crispness that gently cracks when you press it. Inside, the crumb is fluffy and light, almost cloud-like. As it bakes, the garlic softens and blends with butter, creating a savory aroma that fills the room. The salt on top gives tiny bursts of contrast, balancing the richness beautifully.
Helpful Baking Tips for Extra Success
A few small tweaks can make a big difference.
- Let the bread cool slightly before serving so the filling settles into the crumb.
- If your kitchen is cold, proof the dough inside your oven with the light turned on.
- Do not overbake, which can dry out the interior.
Common Mistakes and How to Avoid Them
Even simple recipes can have small hiccups.
- Skipping proper proofing, which results in dense bread. Always wait until doubled in size.
- Using cold milk, which can prevent the yeast from activating properly.
- Cutting shallow slits, which limits how much garlic butter soaks in.
Nutrition Snapshot
Servings: 8
Calories per serving: 310
Note: These are approximate values.
Time Breakdown at a Glance
Prep Time: 20 minutes
Cook Time: 20 minutes
Total Time: 1 hour 40 minutes
Plan Ahead and Store with Confidence
If you want to prepare ahead, make the dough the night before and refrigerate it after the first rise. Bring it back to room temperature before shaping. Store baked bread in an airtight container at room temperature for up to 2 days. You can freeze the rolls tightly wrapped for up to 1 month. Reheat in the oven at 300°F, which is about 150°C, for 8 to 10 minutes to bring back that fresh baked texture.
Serving Ideas That Elevate the Experience
Serve these warm alongside creamy tomato soup, fresh salads, or even as part of a brunch spread. They also pair beautifully with scrambled eggs and roasted vegetables for a savory breakfast treat.
Reinventing Leftovers in Delicious Ways
Leftover bread can be sliced and toasted for garlic croutons. You can also turn it into a savory bread pudding with cheese and herbs. Even cubed and baked again, it becomes an irresistible crunchy snack.
Extra Little Details That Matter
Always taste your garlic butter before filling the rolls so you can adjust salt levels. Use fresh parsley for the brightest flavor. And most importantly, enjoy the process. Baking bread should feel comforting, not stressful.
Turn It Into a Bakery-Worthy Showpiece
Brush a little extra butter right before serving and sprinkle fresh parsley on top for color. Arrange the rolls in a circle on a serving platter so they look inviting and abundant. A warm basket lined with a cloth napkin makes it feel extra special.
Fun Variations to Explore
- Add grated mozzarella inside the slits for a cheesy version.
- Mix in a pinch of red pepper flakes for gentle heat.
- Add finely chopped green onions for extra savory depth.
- Brush with honey butter for a sweet and savory twist.
FAQ’s
Q1: Can I use instant yeast instead of active dry yeast?
Yes, you can. Skip the proofing step and mix it directly with the dry ingredients.
Q2: Why is my bread dense?
It likely did not proof long enough or the yeast was inactive.
Q3: Can I make it dairy free?
Yes, substitute plant based milk and butter alternatives.
Q4: How do I know when it is done baking?
The tops should be golden brown and the bottom should sound slightly hollow when tapped.
Q5: Can I freeze the dough?
Yes, freeze after shaping and thaw before baking.
Q6: Can I reduce the garlic?
Absolutely, adjust to your taste preference.
Q7: What if I do not have fresh parsley?
Use dried parsley or finely chopped green onions.
Q8: Can I double the recipe?
Yes, just ensure enough space between rolls on the tray.
Q9: Is this bread very salty?
No, it is balanced, but you can adjust the topping salt.
Q10: Can I make smaller rolls?
Yes, just reduce baking time slightly.
Conclusion
There is something deeply satisfying about baking your own Korean garlic salt bread at home. The aroma, the golden crust, and that soft buttery center make the whole experience unforgettable. Once you try it, you will find yourself craving it again and again. Trust me, you are going to love every warm, garlicky bite.
Print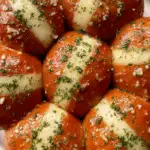
Korean Garlic Salt Bread
- Prep Time: 20 minutes
- Cook Time: 20 minutes
- Total Time: 1 hour 40 minutes
- Yield: 8 rolls 1x
- Category: Bread
- Method: Baking
- Cuisine: Korean
- Diet: Vegetarian
Description
Soft and fluffy Korean garlic salt bread filled with rich garlic butter and fresh parsley, baked until golden brown with a lightly crisp crust and a tender, buttery center.
Ingredients
- 3 ½ cups (440 g) all purpose flour
- 1 cup (240 ml) warm milk
- 2 tablespoons granulated sugar
- 2 ¼ teaspoons active dry yeast
- 4 tablespoons (60 g) unsalted butter, melted
- 1 teaspoon salt (for dough)
- ½ teaspoon salt (for topping)
- 5 garlic cloves, finely minced
- ½ cup (115 g) unsalted butter, softened (for filling)
- 2 tablespoons fresh parsley, finely chopped
Instructions
- Preheat oven to 350°F (175°C) and line a baking tray with parchment paper.
- In a large bowl, combine warm milk, sugar, and yeast. Let sit for 5 to 10 minutes until foamy.
- Add flour, melted butter, and 1 teaspoon salt. Mix until a dough forms, then knead for 8 to 10 minutes until smooth and elastic.
- Place dough in a lightly greased bowl, cover, and let rise for 1 hour or until doubled in size.
- Divide dough into 8 equal rolls and place on prepared tray. Let rest for 20 minutes.
- Mix softened butter, minced garlic, parsley, and ½ teaspoon salt.
- Cut deep slits into each roll and generously fill with garlic butter mixture.
- Bake for 18 to 22 minutes until golden brown.
- Brush with extra melted butter if desired and serve warm.
Notes
- Ensure milk is warm, not hot, to properly activate the yeast.
- Allow full proofing time for a light and fluffy texture.
- Store leftovers in an airtight container for up to 2 days or freeze for up to 1 month.
Nutrition
- Serving Size: 1 roll
- Calories: 310
- Sugar: 4 g
- Sodium: 290 mg
- Fat: 15 g
- Saturated Fat: 9 g
- Unsaturated Fat: 5 g
- Trans Fat: 0 g
- Carbohydrates: 38 g
- Fiber: 1 g
- Protein: 6 g
- Cholesterol: 40 mg
Keywords: korean garlic salt bread, garlic butter bread, korean bakery bread, fluffy garlic bread rolls, savory korean bread