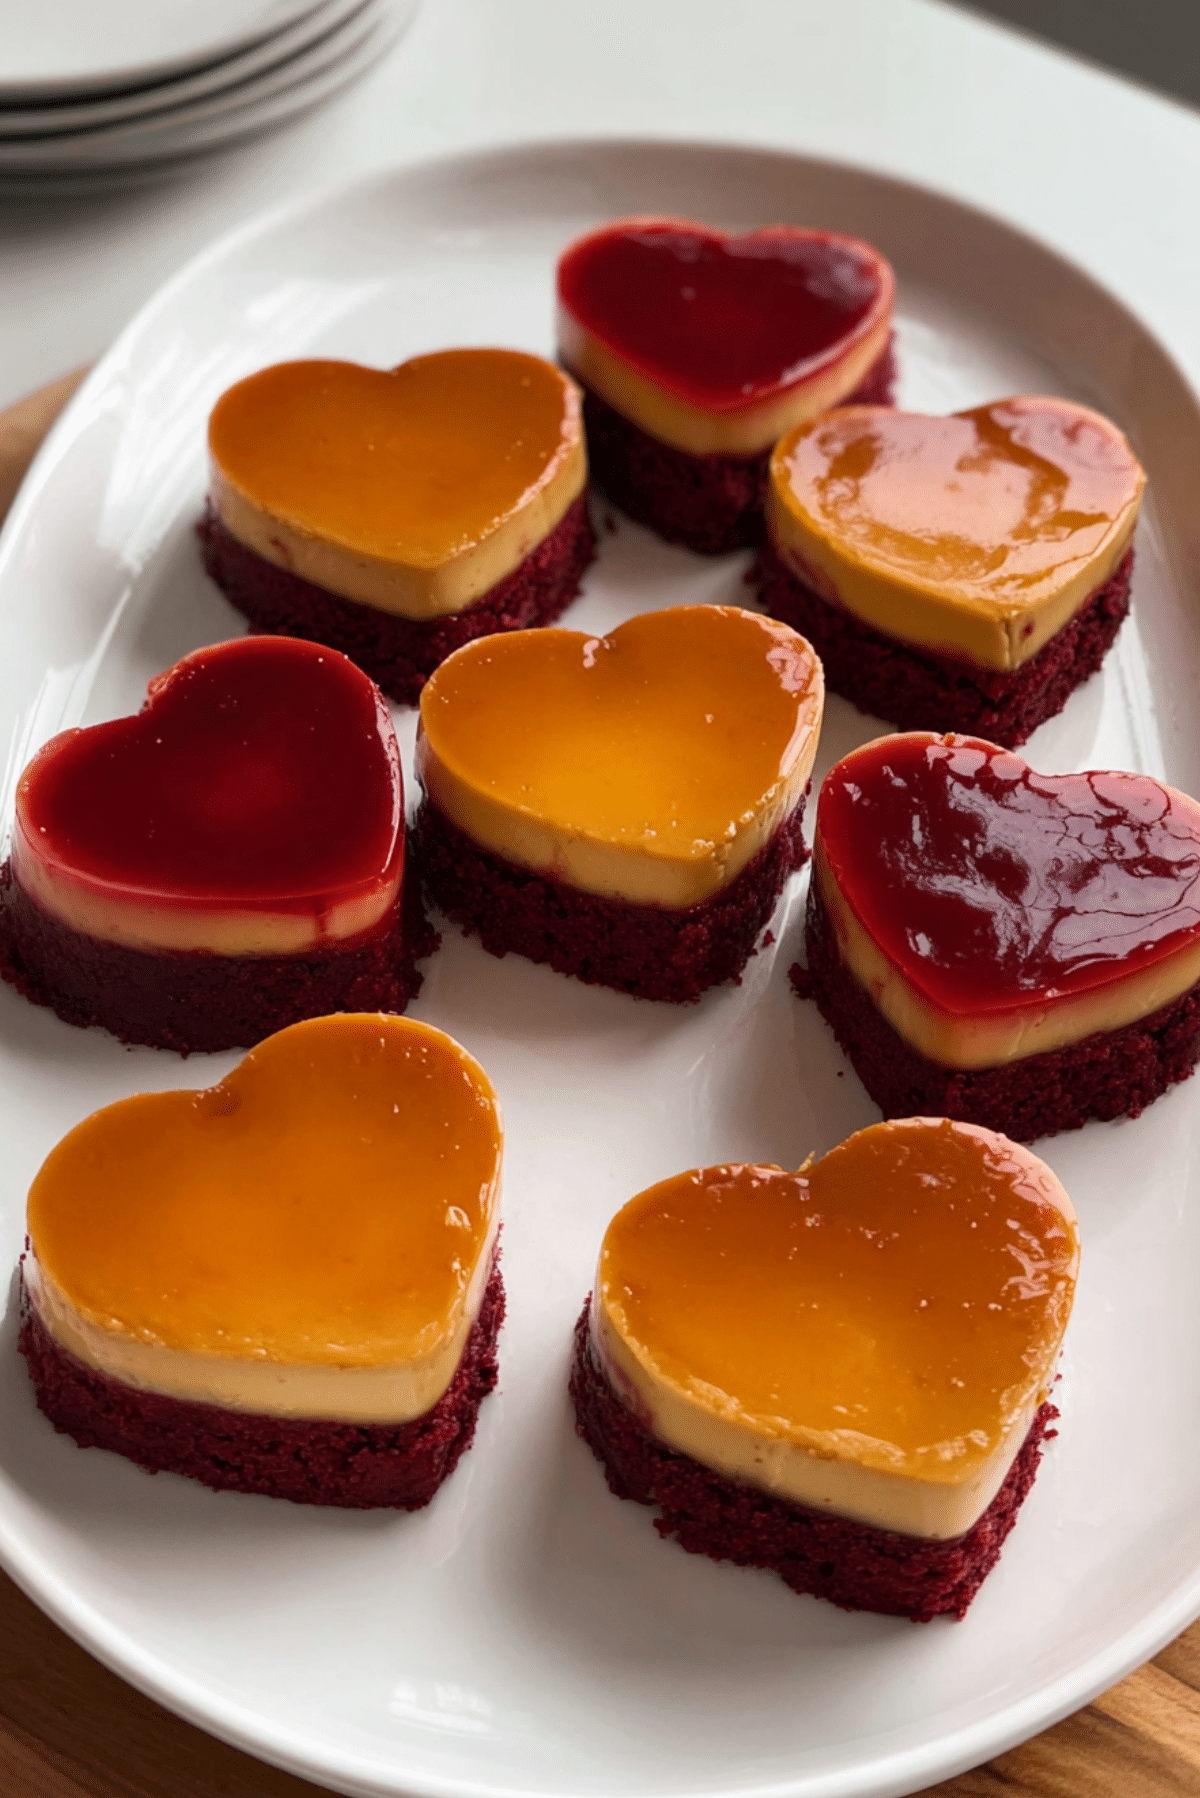
Mini Heart-shaped Red Velvet Chocoflan
The first thing you notice is that glossy caramel top, catching the light like little amber hearts. Then comes the contrast underneath, a creamy flan layer resting over a soft, cocoa kissed red velvet base that feels almost too pretty to slice. Trust me, you’re going to love this. It has that dreamy mix of elegance and comfort, the kind of dessert that makes people pause for a second before taking the first bite, then immediately go back for another.
Why These Little Heart Desserts Feel So Special
There is something about an individually portioned dessert that makes it feel instantly more charming, and this one really leans into that magic. Each bite gives you silky custard, tender cake, and a little caramel sweetness right at the top. The heart shape makes them perfect for celebrations, but honestly, they are just as lovely for a quiet weekend when you want to make something that feels thoughtful and a bit playful.
And now let’s dive into the story behind them, because this sweet little dessert did not just appear out of nowhere. It comes from a classic with a pretty fascinating reputation.
The Sweet Story Behind This Layered Favorite
This dessert is inspired by traditional chocoflan, a beloved Mexican style dessert known for combining cake, flan, and caramel in one bake. In many versions, the layers seem to switch places while baking, which is part of what gives chocoflan its famous magic cake nickname. Here, that classic idea gets a festive twist with red velvet flavor and heart-shaped molds, which makes the whole thing feel a little more celebratory and a lot more adorable.
That mix of tradition and playful presentation is exactly why this version works so well. It feels rooted in something classic, but still fresh enough to surprise people.
Why This Recipe Earns a Spot in Your Dessert Rotation
Before we head into the details, let me tell you why this one is such a keeper. It is not just beautiful, it is genuinely dependable too.
Versatile: These little desserts fit right in at birthdays, Valentine’s gatherings, holiday tables, or even a casual dinner where you want one standout finish.
Budget-Friendly: Most of the ingredients are pantry and baking staples, so you get a dessert that looks bakery-level without a huge grocery bill.
Quick and Easy: The steps are simple and approachable. The batter comes together fast, the flan mixture blends in minutes, and the oven does the rest.
Customizable: You can adjust the size, switch the garnish, or even play with the caramel intensity depending on your style.
Crowd-Pleasing: Let me tell you, it’s worth every bite. People love that contrast of cool creamy custard and soft cake in one neat little serving.
Make-Ahead Friendly: These actually get better after chilling, which means less stress when you are planning ahead.
Great for Leftovers: They hold beautifully in the fridge, and the flavor stays rich and lovely for a few days.
And now that you know why they are worth making, let’s get into the little tricks that make them turn out especially well.
Smart Baker Secrets for the Best Texture Every Time
A dessert like this is simple, but a few insider habits make a huge difference.
- Use room temperature eggs and cream cheese so the flan mixture blends up extra smooth.
- Strain the flan mixture before pouring it into the molds if you want the silkiest finish possible.
- Do not overfill the molds, because the cake layer needs a little room to rise gently.
- Bake with a water bath so the custard stays tender and does not turn rubbery.
- Chill completely before unmolding, because that helps the layers set cleanly and keeps the caramel glossy.
With those tips in your back pocket, let’s talk about the tools that make the whole process feel easy and organized.
Kitchen Tools That Make the Process Smoother
A few basic tools help everything come together neatly, especially since these are mini desserts and a little precision helps.
Heart-shaped silicone mold or mini heart pans: This is what gives the desserts their pretty shape and makes unmolding much easier.
Blender: Perfect for getting the flan mixture silky and lump-free in seconds.
Mixing bowls: You will need one for the cake batter and one for the caramel prep area.
Whisk or hand mixer: Helpful for blending the red velvet batter until smooth without overworking it.
Deep baking pan: This holds the mold during baking and allows for the hot water bath.
Kettle or measuring cup for hot water: Makes it easier to carefully pour water into the outer pan.
Now we are at the fun part, the ingredients. This is where the whole flavor story begins.
Ingredients That Bring These Layers to Life
What makes this dessert so irresistible is the way each part balances the next. The caramel adds shine and sweetness, the flan brings creamy richness, and the red velvet cake gives a soft cocoa vanilla finish that ties it all together beautifully.
- Granulated sugar: 3/4 cup, divided, used for the caramel and the cake batter, which gives sweetness and helps create that signature glossy top.
- Water: 2 tablespoons, for dissolving part of the sugar while making the caramel.
- Sweetened condensed milk: 14 ounces, which gives the flan its rich sweetness and smooth body.
- Evaporated milk: 12 ounces, which lightens the flan slightly while keeping it creamy.
- Cream cheese: 4 ounces, softened, which adds a subtle tang and makes the custard extra luscious.
- Eggs: 5 large, divided, with 3 for the flan and 2 for the cake, which provide structure and richness.
- Vanilla extract: 2 teaspoons, divided, which rounds out both the custard and the cake with warm sweetness.
- All-purpose flour: 3/4 cup, which gives the cake base a tender but sturdy crumb.
- Unsweetened cocoa powder: 1 tablespoon, just enough to bring that classic red velvet depth.
- Baking powder: 1 teaspoon, which helps the cake layer rise gently.
- Salt: 1/4 teaspoon, divided, which sharpens the chocolate and balances the sweetness.
- Buttermilk: 1/2 cup, which gives the cake a soft crumb and a slight tang that works beautifully with the flan.
- Vegetable oil: 1/4 cup, which keeps the cake layer moist even after chilling.
- Red food coloring: 1 tablespoon, which gives the cake that bold ruby tone you want in a festive dessert.
Once you have those lined up, it is easy to see where you can flex the recipe a little if needed.
Easy Swaps If You Need to Improvise
Sometimes you are missing one thing, or you just want to tweak the flavor a bit. Good news, this one is flexible.
Cream cheese: Mascarpone or full-fat ricotta that has been blended smooth.
Buttermilk: Milk mixed with 1 1/2 teaspoons lemon juice or white vinegar.
Vegetable oil: Melted unsalted butter, though the crumb will be slightly firmer.
Vanilla extract: Vanilla bean paste for a deeper flavor.
Red food coloring: A gel-based red coloring works well and often gives a more vibrant shade.
And now let’s give a little spotlight to the ingredients that really make this dessert memorable.
The Two Ingredients Doing the Heavy Lifting
Sweetened condensed milk: This is the ingredient that gives the flan its rich, almost velvety sweetness. It helps create that classic custard texture that feels smooth and luxurious on the tongue.
Buttermilk: This one’s a total game-changer. It brings tenderness to the cake and adds that slight tang that keeps the dessert from tasting flat or overly sugary.
Now that the flavor foundation is set, let’s head into the kitchen and bake these little beauties.

Let’s Bake These Layered Hearts Step by Step
This is the part where everything starts to feel real. You will make the caramel first, then blend the flan, whisk the cake batter, and let the oven work its quiet magic.
- Preheat Your Equipment: Heat your oven to 350°F. Set a kettle of water on to heat for the water bath, and place your heart-shaped silicone mold on a baking tray or inside a deep roasting pan.
- Combine Ingredients: Make the caramel by heating 1/2 cup of the granulated sugar with the water in a small saucepan over medium heat until it melts into a deep amber syrup. Quickly spoon a little caramel into the bottom of each heart cavity. In a blender, combine the sweetened condensed milk, evaporated milk, cream cheese, 3 eggs, and 1 teaspoon vanilla extract. Blend until completely smooth. In a separate bowl, whisk the flour, cocoa powder, baking powder, remaining 1/4 cup sugar, and a pinch of salt. Add the buttermilk, vegetable oil, 2 eggs, remaining 1 teaspoon vanilla extract, and the red food coloring, then mix until the batter is smooth.
- Prepare Your Cooking Vessel: Let the caramel settle for a minute in the mold cavities. Pour the flan mixture into each cavity, filling them about halfway. Spoon or pour a thinner layer of red velvet batter over each one, leaving a little space at the top.
- Assemble the Dish: Place the mold in the deep baking pan. Carefully pour hot water into the outer pan until it comes about halfway up the sides of the mold. This gentle bath helps the custard bake evenly and stay soft.
- Cook to Perfection: Bake for 30 to 35 minutes, or until the cake portion looks set and a toothpick inserted into the cake layer comes out mostly clean. The centers should have a slight wobble from the flan, but not look liquid.
- Finishing Touches: Remove the mold from the water bath and let it cool to room temperature. Transfer to the fridge and chill for at least 4 hours, or overnight if possible. Once fully chilled, carefully unmold each piece so the caramel top glistens beautifully.
- Serve and Enjoy: Place them on a platter or individual dessert plates and serve cold. That first spoonful or forkful is all creamy custard, tender cake, and glossy caramel, and honestly, it is hard not to fall for it immediately.
And now that they are baked, let’s talk about what makes every bite so satisfying.
The Texture and Flavor Contrast That Makes Them Irresistible
What really makes these stand out is the contrast. The flan layer is silky, cool, and rich, while the red velvet base is soft, slightly cocoa scented, and just structured enough to hold everything together. Then there is the caramel on top, which adds a glossy sweetness that melts into the custard as you eat.
The flavors also build in a really lovely way. First you taste the caramel, then the creamy vanilla notes from the flan, and finally the light cocoa tang of the red velvet. It is layered, but not heavy. Sweet, but still balanced.
Helpful Little Tricks for a Better Bake
Once you have made them once, you will see how approachable they are. These extra tips just make the process even smoother.
- Fill the molds evenly so all the mini desserts bake at the same rate.
- Let the caramel reach a rich amber color, but pull it off before it turns bitter.
- Chill the desserts fully before unmolding, because warm flan is much more delicate.
- Run a thin offset spatula or knife around the edges only if needed, especially if your mold is not super flexible.
What Can Go Wrong, and How to Avoid It
Even a pretty forgiving dessert can have a few tricky moments. Here are the common ones to watch for.
- If the caramel gets too dark, it can taste bitter, so keep a close eye on it once it starts coloring.
- If the flan mixture is overblended with lots of air, you may get bubbles in the custard, so blend just until smooth.
- If the water bath runs dry or is too shallow, the custard can bake unevenly, so check the water level before the pan goes into the oven.
- If you unmold too early, the layers may stick or tear, so patience really pays off here.
A Quick Look at the Nutrition
Before serving, it helps to know what to expect. These are rich little treats, so a small portion feels satisfying.
Servings: 7 mini desserts
Calories per serving: 290
Note: These are approximate values.
Time Breakdown So You Can Plan Ahead
This dessert is very manageable, especially because most of the work is hands-off once it goes into the oven.
Prep Time: 25 minutes
Cook Time: 35 minutes
Total Time: 1 hour, plus 4 hours chilling time
Make-Ahead and Storage Tips That Actually Help
One of my favorite things about this dessert is how well it fits into a schedule. You can make the whole batch the day before and let it chill overnight, which actually improves the texture. The flan gets firmer, the caramel settles beautifully, and the flavors meld in the best way.
Store the mini desserts covered in the refrigerator for up to 4 days. For longer storage, you can freeze them individually after they are fully chilled and unmolded. Wrap each one well, then thaw overnight in the fridge before serving. Reheat is not really necessary here, since they are best served cold or lightly cool.
The Best Ways to Serve These Little Beauties
These are gorgeous on their own, but a little styling can make them feel even more special. Serve them on a white platter to show off that caramel shine and the red layer underneath. A few fresh berries on the side look lovely, and a spoonful of lightly whipped cream can turn the whole plate into something dinner-party worthy.
They also pair beautifully with coffee, hot chocolate, or a simple cappuccino. For a romantic dinner or holiday table, they make such a charming finale.
Clever Ways to Use Up Leftovers
If you happen to have leftovers, and that is a big if, there are a few fun ways to enjoy them differently the next day.
Crumble one over a bowl of vanilla yogurt for a dessert-inspired breakfast situation. Layer pieces into a small trifle glass with whipped cream and berries. Or serve one with a scoop of vanilla ice cream and a little extra caramel for an easy plated dessert that feels brand new.
A Few More Details That Make a Difference
Sometimes the smallest details change the whole outcome. Use good vanilla, because both the cake and the flan rely on it. Do not skip the salt, even though it is a sweet recipe, because it sharpens every other flavor. And keep the cake layer thinner than the flan layer, which helps the final texture stay balanced and elegant.
Simple Touches That Make Them Look Bakery-Beautiful
Presentation matters here, and luckily it does not take much. Unmold them onto a clean white platter so the caramel catches the light. Wipe away any extra drips around the plate edges. If you want a little extra flair, a tiny dollop of whipped cream next to each one can look lovely, but keep it subtle so the heart shape still steals the show.
Fun Variations You Can Try Next Time
Once you have the base method down, there is plenty of room to play.
- Cream Cheese Lover’s Version: Add an extra ounce of cream cheese to the flan for a slightly tangier, richer custard.
- Dark Cocoa Twist: Increase the cocoa powder to 2 tablespoons for a deeper chocolate note in the cake layer.
- Mini Round Version: Use mini round molds if that is what you have, keeping the same filling and bake time.
- Berry Finish: Serve with a spoonful of mashed raspberries or strawberries on the side for a bright fruity contrast.
- Extra Vanilla Style: Add a few drops of extra vanilla to the caramel for a warmer, softer sweetness.
FAQ’s
Q1: Can I make these without a silicone mold?
Yes. You can use well-greased mini ramekins or a muffin tin lined with sturdy baking cups, though unmolding may be a little trickier.
Q2: Why does the flan layer end up on top after unmolding?
That is part of the magic of this style of dessert. During baking, the batters shift as they set, so once flipped, you get the glossy caramel and flan on top.
Q3: Can I use boxed red velvet cake mix instead?
Yes, but the homemade version gives you better control over flavor and texture. If you use a mix, keep the batter slightly thin so it layers nicely.
Q4: How do I know when the mini desserts are done?
The cake portion should look set, and the center should jiggle slightly but not look liquid. Chilling finishes the texture.
Q5: Do I really need the water bath?
Yes, it helps the custard bake gently and evenly. Without it, the flan can turn rubbery or crack.
Q6: Can I make them a day ahead?
Absolutely, and they are even better after a long chill. The texture becomes smoother and the flavor settles beautifully.
Q7: What if my caramel hardens in the mold?
That is normal. Once the desserts bake and chill, the caramel softens again and turns glossy when unmolded.
Q8: Can I leave out the food coloring?
Yes. The flavor will still be lovely, though the cake base will look more cocoa brown than classic red velvet red.
Q9: How long do they last in the fridge?
They keep well for up to 4 days when covered and chilled.
Q10: Can I double the recipe?
Yes, as long as you have enough molds or bake in batches. Just keep the filling depth similar so the bake time stays close.
Conclusion
These little layered hearts are the kind of dessert that feels both playful and impressive, which is such a nice combination to have in your back pocket. You get glossy caramel, creamy flan, and soft red velvet cake in one bite, and somehow it all feels even more special because of the mini heart shape. Trust me, this one deserves a spot on your table. Whether you are making them for someone you love or just because you want a dessert that feels extra charming, they are absolutely worth it.
Print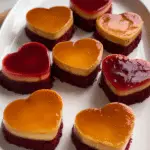
Mini Heart-shaped Red Velvet Chocoflan
- Prep Time: 25 minutes
- Cook Time: 35 minutes
- Total Time: 1 hour
- Yield: 7 mini desserts 1x
- Category: Dessert
- Method: Baked
- Cuisine: Mexican-inspired
- Diet: Vegetarian
Description
These mini heart-shaped red velvet chocoflan desserts combine glossy caramel, creamy flan, and a tender red velvet cake base in one beautiful chilled treat. They are festive, rich, and surprisingly easy to make.
Ingredients
- 1/2 cup granulated sugar, for caramel
- 2 tablespoons water
- 14 ounces sweetened condensed milk
- 12 ounces evaporated milk
- 4 ounces cream cheese, softened
- 3 large eggs, for flan
- 1 teaspoon vanilla extract, for flan
- 3/4 cup all-purpose flour
- 1 tablespoon unsweetened cocoa powder
- 1 teaspoon baking powder
- 1/4 teaspoon salt, divided
- 1/4 cup granulated sugar, for cake batter
- 1/2 cup buttermilk
- 1/4 cup vegetable oil
- 2 large eggs, for cake batter
- 1 teaspoon vanilla extract, for cake batter
- 1 tablespoon red food coloring
Instructions
- Preheat the oven to 350°F and place a heart-shaped silicone mold on a baking tray or inside a deep roasting pan. Heat water for the water bath.
- In a small saucepan, cook 1/2 cup granulated sugar with 2 tablespoons water over medium heat until it turns a deep amber caramel. Quickly spoon a small amount into the bottom of each heart cavity.
- In a blender, blend the sweetened condensed milk, evaporated milk, cream cheese, 3 eggs, and 1 teaspoon vanilla extract until smooth.
- In a separate bowl, whisk together the flour, cocoa powder, baking powder, 1/4 cup granulated sugar, and a pinch of the salt. Add the buttermilk, vegetable oil, 2 eggs, remaining 1 teaspoon vanilla extract, and red food coloring. Mix until smooth.
- Pour the flan mixture into each mold cavity about halfway full, then add a thinner layer of red velvet batter on top, leaving a little space at the top.
- Place the mold in the deep pan and carefully pour hot water into the outer pan until it reaches about halfway up the sides of the mold.
- Bake for 30 to 35 minutes, until the cake layer is set and a toothpick inserted into the cake portion comes out mostly clean.
- Remove from the water bath and cool to room temperature. Refrigerate for at least 4 hours, or overnight.
- Carefully unmold and serve chilled with the caramel side facing up.
Notes
- For the smoothest flan texture, strain the blended custard before pouring it into the molds.
- Do not overcook the caramel, because it can turn bitter very quickly.
- These mini desserts are best made ahead so they have plenty of time to chill and set.
- If using ramekins instead of silicone molds, grease them lightly for easier unmolding.
Nutrition
- Serving Size: 1 mini dessert
- Calories: 290
- Sugar: 28g
- Sodium: 170mg
- Fat: 12g
- Saturated Fat: 5g
- Unsaturated Fat: 6g
- Trans Fat: 0g
- Carbohydrates: 38g
- Fiber: 1g
- Protein: 7g
- Cholesterol: 105mg
Keywords: mini heart-shaped red velvet chocoflan, red velvet flan cake, mini chocoflan, heart-shaped dessert, caramel flan cake, valentine dessert