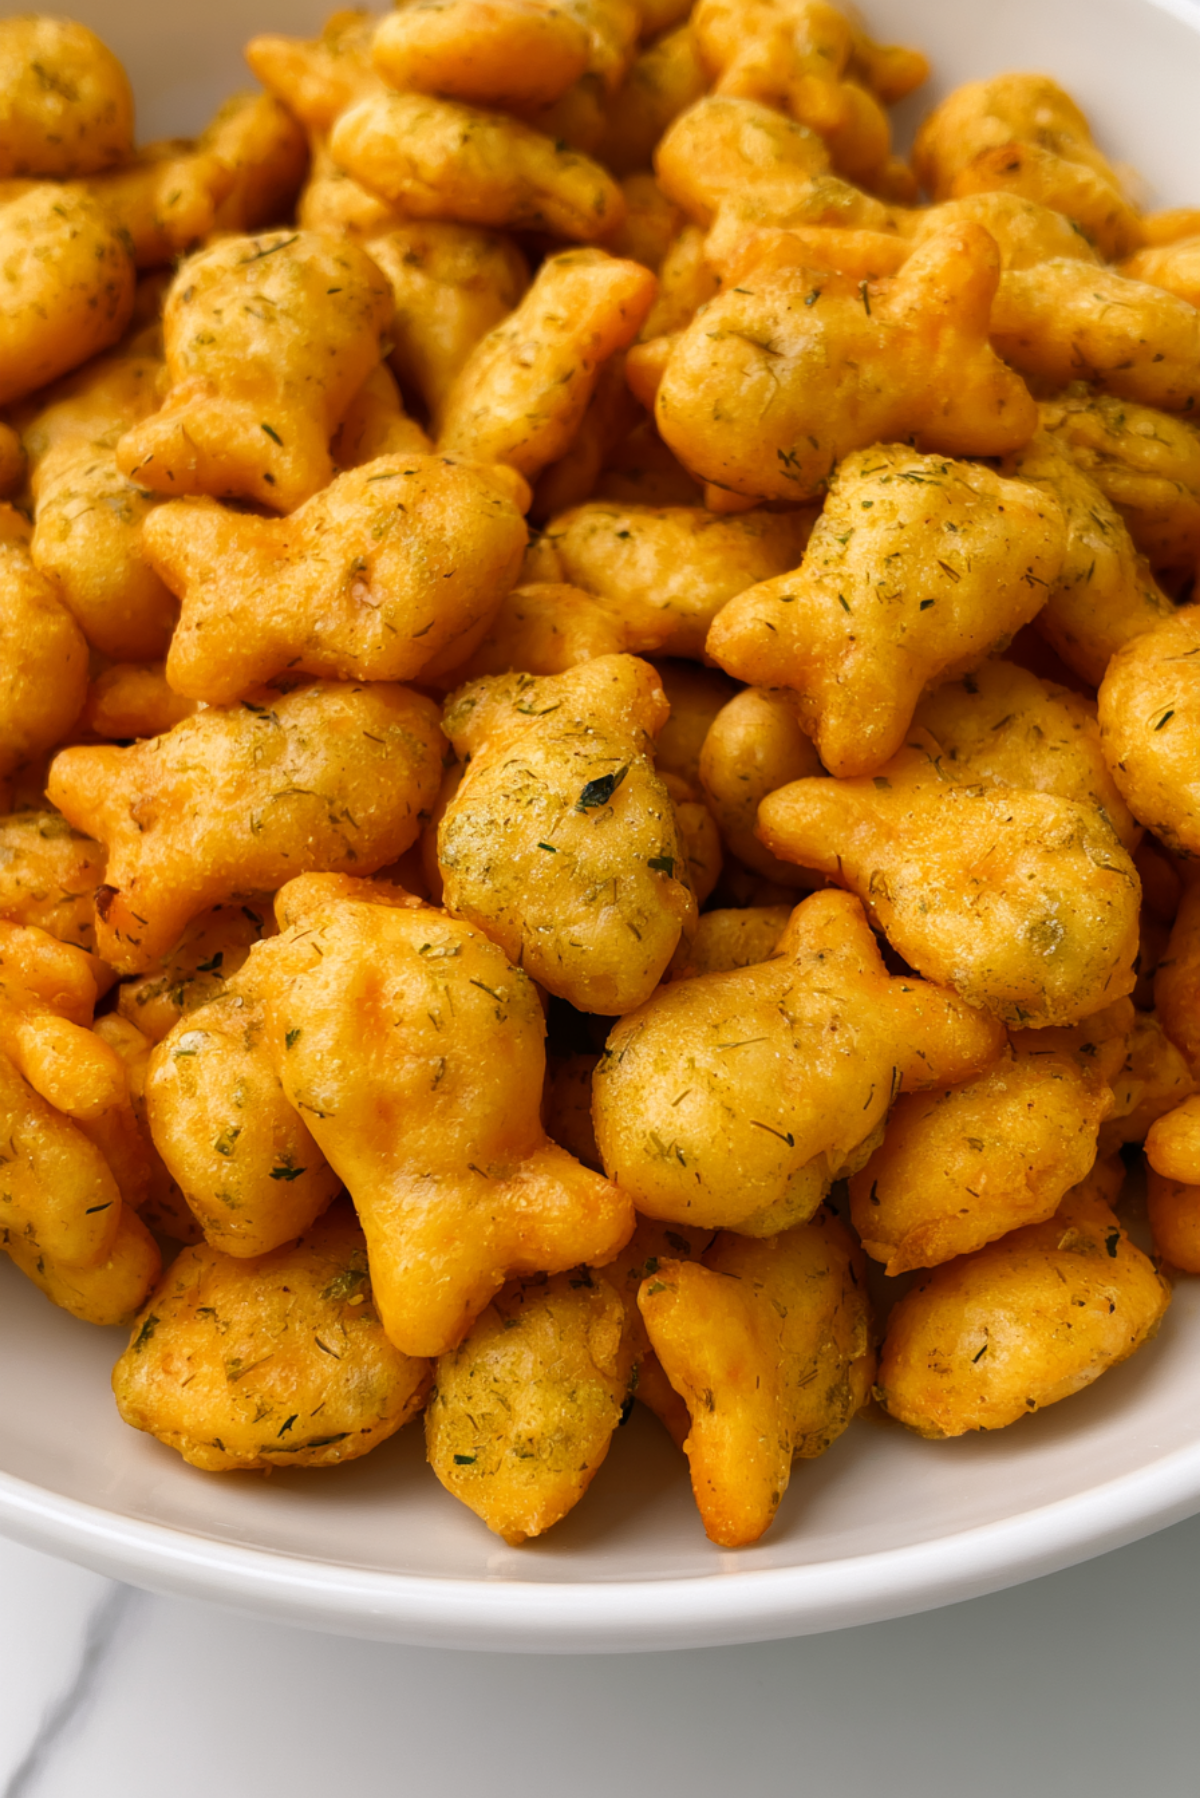
Mini Toasted Ravioli
There is something downright magical about the moment crispy breadcrumbs meet melted cheese, and that is exactly what happens with mini toasted ravioli. These little golden bites are crunchy on the outside, gooey and rich on the inside, and they disappear from the platter faster than you can refill it. Picture warm cheese pulling apart with every dip into marinara, a savory crunch that crackles with each bite, and that toasty parmesan aroma drifting through your kitchen. Whether you are hosting game night or just craving something indulgent, this recipe turns simple pantry staples into the kind of appetizer everyone fights over.
Why Mini Toasted Ravioli Always Steal the Show
There is a reason these little bites vanish within minutes of hitting the table. They combine the comfort of pasta with the satisfying crunch of a fried snack, and that contrast is what makes people come back for seconds and thirds. Trust me, you are going to love how something this simple can feel so special.
Recipe Origin or Trivia
This dish has roots tracing back to St. Louis, Missouri, where it became a beloved Italian American restaurant staple. Legend has it that a cook accidentally dropped ravioli into hot oil instead of a pot of boiling water, and the happy accident turned into a local classic nicknamed “T-ravs.” It quickly spread beyond St. Louis kitchens and into appetizer menus everywhere, proving that some of the best recipes come from delicious mistakes.
Why You Will Keep Coming Back to This Recipe
This one’s a total game changer for anyone who loves a reliable, crowd-friendly appetizer. Here is why it earns a permanent spot in your recipe rotation.
- Versatile: These bites work as a party appetizer, a game day snack, or even a fun side dish alongside pasta night.
- Budget-Friendly: Made with a bag of store-bought ravioli and pantry staples, this recipe delivers restaurant-quality flavor without a restaurant price tag.
- Quick and Easy: From start to finish, you are looking at about twenty to twenty five minutes, most of which is hands-off frying or baking time.
- Customizable: Swap the ravioli filling, change up the breadcrumb seasoning, or adjust the dipping sauce to make it your own.
- Crowd-Pleasing: Cheesy, crunchy, and dippable bites are basically guaranteed to disappear at any gathering.
- Make-Ahead Friendly: Bread the ravioli ahead of time and freeze them so you always have a quick appetizer on standby.
- Great for Leftovers: Reheated in the oven or air fryer, leftovers crisp right back up and taste just as good the next day.
Tips That Make You Look Like a Pro
Let me tell you, a few small adjustments make a huge difference here. Keep these tips in mind for the crispiest, most flavorful results.
- Freeze the ravioli for about an hour before breading. It keeps the filling from leaking out during frying and helps the breadcrumbs stick better.
- Use one hand for wet ingredients and one for dry. This keeps the breading process clean and prevents clumpy fingers.
- Press the breadcrumbs gently onto each ravioli so the coating clings tightly instead of falling off in the oil.
- Keep your frying oil around 350 degrees Fahrenheit. Too hot and the coating burns before the inside warms through, too cool and the ravioli turn greasy.
- Fry in small batches so the oil temperature stays steady and every piece browns evenly.
Tools You Will Want On Hand
A few simple tools make this recipe come together smoothly. Nothing fancy is required, just the basics every home cook likely already owns.
Deep skillet or heavy pot: Gives you enough depth for the oil to fully coat each ravioli while frying.
Deep-fry thermometer: Helps you keep the oil at a steady temperature so the ravioli cook evenly without burning.
Shallow dishes or pie plates: Perfect for setting up your egg wash and breadcrumb stations side by side.
Slotted spoon or spider strainer: Makes lifting the ravioli out of the hot oil quick and safe.
Baking sheet lined with paper towels: Lets excess oil drain off immediately after frying so the coating stays crisp.
Ingredients You Will Need For Mini Toasted Ravioli
These ingredients work together in beautiful harmony, balancing creamy cheese filling, crunchy golden coating, and rich savory seasoning in every bite.
- Cheese ravioli (fresh or frozen), 20 ounces: The star of the dish, offering a soft, cheesy center inside that crispy shell.
- Large eggs, 2: Helps the breadcrumb coating cling tightly to each piece of ravioli.
- Milk, 2 tablespoons: Loosens the egg wash slightly so it coats the ravioli more evenly.
- Italian style breadcrumbs, 1 cup: Brings the signature crunchy, herby exterior that makes this dish so addictive.
- Grated parmesan cheese, ¼ cup, plus more for topping: Adds a salty, nutty depth right into the coating itself.
- Dried parsley, 1 teaspoon: Lends a touch of color and herbal freshness to the breading.
- Garlic powder, ½ teaspoon: Rounds out the seasoning with a warm, savory note.
- Salt, ½ teaspoon: Balances and enhances every other flavor in the dish.
- Black pepper, ¼ teaspoon: Adds a gentle background heat that keeps the flavor interesting.
- Vegetable or canola oil, for frying (about 2 cups): A neutral oil with a high smoke point, ideal for achieving that golden crunch.
- Marinara sauce, 1 cup, for serving: The classic dipping companion that ties the whole dish together.
- Fresh parsley, chopped, for garnish: Adds a fresh, vibrant finishing touch right before serving.
Easy Ingredient Swaps
Sometimes you need to work with what is already in your kitchen, and that is perfectly fine here. These swaps keep the dish just as delicious.
- Cheese ravioli: Swap for spinach ricotta or mushroom ravioli for a different flavor twist.
- Italian breadcrumbs: Use plain breadcrumbs mixed with a pinch of dried oregano and basil if that is what you have on hand.
- Milk: Substitute with water or a plant-based milk in a pinch.
- Vegetable oil: Canola or light olive oil both work well for frying.
- Marinara sauce: A garlic aioli or warm alfredo also makes a delicious dipping option.
A Closer Look at the Star Ingredients
A couple of ingredients truly carry this dish, and giving them a little extra attention pays off.
Cheese ravioli: The soft, melty filling inside is what makes every bite feel indulgent, especially once it is wrapped in a crisp golden shell.
Italian breadcrumbs: These give the dish its signature crunch and herby aroma, turning simple pasta into something that feels like a proper appetizer.
Let’s Get Cooking
Now for the fun part, turning these simple ingredients into golden, crispy bites of joy. Just follow along step by step and you will have a platter ready in no time.
- Preheat Your Equipment: Heat about two inches of vegetable oil in a deep skillet or heavy pot over medium heat until it reaches around 350 degrees Fahrenheit.
- Combine Ingredients: In a shallow dish, whisk together the eggs and milk until smooth. In a separate shallow dish, mix the breadcrumbs, parmesan, dried parsley, garlic powder, salt, and pepper.
- Prepare Your Cooking Vessel: Line a baking sheet with paper towels and set it near the stove so it is ready the moment the ravioli finish frying.
- Assemble the Dish: Dip each ravioli into the egg mixture, letting the excess drip off, then coat thoroughly in the breadcrumb mixture, pressing gently so the coating sticks.
- Cook to Perfection: Fry the ravioli in small batches for about one to two minutes per side, turning carefully, until deeply golden brown all over.
- Finishing Touches: Transfer the fried ravioli to the paper towel lined baking sheet to drain briefly, then sprinkle immediately with extra parmesan while they are still warm.
- Serve and Enjoy: Arrange the ravioli on a platter with a bowl of warm marinara sauce, sprinkle with fresh parsley, and serve right away while they are warm and crispy.
Texture and Flavor at Their Best
What makes this dish so satisfying is the contrast in every single bite. The shell delivers a crackling crunch that gives way almost instantly to a soft, cheesy center, while the parmesan in the breading adds a subtle salty depth that builds with every bite. Dipping into warm marinara brings a bright, tangy note that cuts through the richness, keeping you reaching for just one more.
Helpful Tips and Tricks
A few small habits can take this appetizer from good to unforgettable.
- Keep an eye on oil temperature throughout frying, since it naturally drops as you add more ravioli.
- Serve immediately after frying for the best crunch, since the coating softens the longer it sits.
- Warm the marinara sauce before serving so the temperature contrast with the crispy ravioli feels just right.
- Use a wire rack instead of paper towels if you want to keep the bottoms extra crisp.
What to Avoid
A few common missteps can turn a great batch into a disappointing one, so keep these in mind.
- Skipping the freezing step: Unfrozen ravioli can burst open in the hot oil, so freeze them beforehand for the best results.
- Overcrowding the pan: Adding too many pieces at once drops the oil temperature and leads to soggy, unevenly cooked ravioli.
- Skipping the egg wash: Without it, the breadcrumbs will not adhere properly and will fall off during frying.
- Frying at too low a temperature: This leads to greasy, pale ravioli instead of a crisp golden shell.
Nutrition Facts
Servings: 6
Calories per serving: 310
Note: These are approximate values and may vary depending on the specific brands and ingredients used.
Preparation Time
Prep Time: 15 minutes
Cook Time: 10 minutes
Total Time: 25 minutes
Make-Ahead and Storage Tips
This recipe is wonderfully flexible when it comes to planning ahead. Bread the ravioli up to a day in advance and store them in an airtight container in the refrigerator until you are ready to fry. For longer storage, place the breaded, uncooked ravioli on a baking sheet, freeze until solid, then transfer to a freezer bag for up to three months, frying or baking straight from frozen with a few extra minutes added to the cook time. Leftover cooked ravioli keep well in the refrigerator for up to four days, and reheating them in the oven or air fryer brings back most of that original crunch far better than a microwave would.
How to Serve
These little bites shine brightest with a warm bowl of marinara for dipping, but they are just as good alongside a simple green salad for a light meal. For parties, arrange them on a large platter with toothpicks and a few dipping sauce options like garlic aioli or spicy arrabbiata so guests can mix and match.
Creative Leftover Transformations
Leftover toasted ravioli do not have to be reheated the same way twice. Chop them up and toss them into a hearty soup for added texture, layer them into a casserole dish with extra marinara and mozzarella for a quick baked pasta night, or crumble a few over a Caesar salad in place of croutons for a fun crunchy twist.
Additional Tips
A little extra care goes a long way with this dish. Always taste your breadcrumb mixture before coating the ravioli, since seasoning levels can vary between brands. If you want an extra cheesy finish, toss the warm ravioli in finely grated parmesan the moment they come out of the oil so it melts slightly into the coating.
Make It a Showstopper
For a presentation that feels a little more special, arrange the ravioli in a circular pattern on a wooden board with a small bowl of marinara in the center, then scatter fresh basil leaves and a light dusting of parmesan over the top. A drizzle of good olive oil right before serving adds a glossy, restaurant-style finish.
Variations to Try
There are so many directions you can take this dish depending on your mood.
- Swap in spinach and ricotta ravioli for a lighter, veggie-forward version.
- Add a pinch of red pepper flakes to the breadcrumb mixture for a subtle kick.
- Try baking instead of frying at 400 degrees Fahrenheit for about twelve minutes for a lighter option.
- Use the air fryer at 375 degrees Fahrenheit for about eight minutes, flipping halfway through.
- Serve with a creamy vodka sauce instead of classic marinara for a richer dipping experience.
FAQ’s
- Can I use frozen ravioli straight from the freezer?
Yes, starting from frozen actually helps keep the cheese filling intact during frying. - Do I have to fry these, or can I bake them?
Baking works well too, simply place the breaded ravioli on a greased baking sheet and bake at 400 degrees Fahrenheit until golden, flipping halfway through. - What type of ravioli works best?
Cheese ravioli is classic, but any filling you enjoy will work beautifully in this recipe. - How do I keep the breading from falling off?
Make sure the ravioli are well coated in egg before pressing on the breadcrumbs, and freeze them briefly before frying. - Can I make these ahead of time for a party?
Absolutely, bread them up to a day ahead and refrigerate, or freeze them for longer storage. - What oil is best for frying?
A neutral oil with a high smoke point, like vegetable or canola oil, works best. - Why did my ravioli burst open while frying?
This usually happens when the ravioli were not frozen beforehand, allowing the filling to leak out under heat. - Can I air fry these instead of deep frying?
Yes, the air fryer gives a lighter version with a similar crispy texture in less time. - What sauce pairs best with these?
Warm marinara is the classic choice, though garlic aioli and spicy arrabbiata are excellent alternatives. - How long do leftovers last?
Stored in an airtight container in the refrigerator, leftovers stay good for up to four days.
Conclusion
Mini toasted ravioli are proof that the simplest ingredients can turn into something truly special with just a little crunch and a lot of love. Whether you are serving them at a party or sneaking a few straight off the baking sheet, they are bound to become one of those recipes you return to again and again. Give them a try, and do not be surprised when the platter empties faster than you expected.
Print
Mini Toasted Ravioli
- Prep Time: 15 minutes
- Cook Time: 5 minutes
- Total Time: 20 minutes
- Yield: 4 servings 1x
- Category: Appetizer
- Method: Frying
- Cuisine: Italian-American
- Diet: Vegetarian
Description
A crispy, golden Midwestern classic appetizer featuring mini cheese-filled ravioli pockets double-coated in seasoned Italian panko breadcrumbs and cooked to crunchy perfection.
Ingredients
- 1 package Frozen Mini Cheese Ravioli
- 0.5 cups All Purpose Flour
- 2 Large Fresh Eggs
- 1 cup Fine Italian Breadcrumbs
- 0.25 cups Finely Grated Parmesan Cheese
- 1 teaspoon Dried Italian Seasoning
- 2 tablespoons Chopped Fresh Parsley
Instructions
- Set your cooking oil or air fryer to 370 degrees Fahrenheit and line your baking pan with parchment paper.
- Set up your three shallow bowls in a neat row, placing the flour in the first, whisked eggs in the second, and seasoned breadcrumbs in the third.
- Take the mini pasta pieces straight from the freezer, ensuring they are separated and free of heavy frost crystals.
- Roll each pasta pocket in the flour, dip completely into the egg wash, and coat thoroughly in the seasoned crumbs.
- Lower the breaded pieces into the hot basket in small batches, cooking for three to four minutes until beautifully golden-brown.
- Lift the hot treats out, place them on paper towels to drain, and instantly shower them with grated parmesan cheese.
- Pile the crispy pockets high into a serving dish, garnish with fresh green parsley, and serve immediately alongside warm marinara.
Notes
- Cook the pasta pockets directly from their frozen state to ensure they maintain their structural shape and do not tear.
- Always apply the grated parmesan cheese immediately after cooking so the heat melts it perfectly into the textured crust.
- Shake off any excess flour and egg wash during assembly to prevent heavy, soggy patches in the final breading.
Nutrition
- Serving Size: 1 cup
- Calories: 280
- Sugar: 2g
- Sodium: 460mg
- Fat: 12g
- Saturated Fat: 4.5g
- Unsaturated Fat: 6g
- Trans Fat: 0g
- Carbohydrates: 31g
- Fiber: 2g
- Protein: 11g
- Cholesterol: 65mg
Keywords: mini toasted ravioli, crispy breaded pasta, St Louis toasted ravioli, easy party appetizers