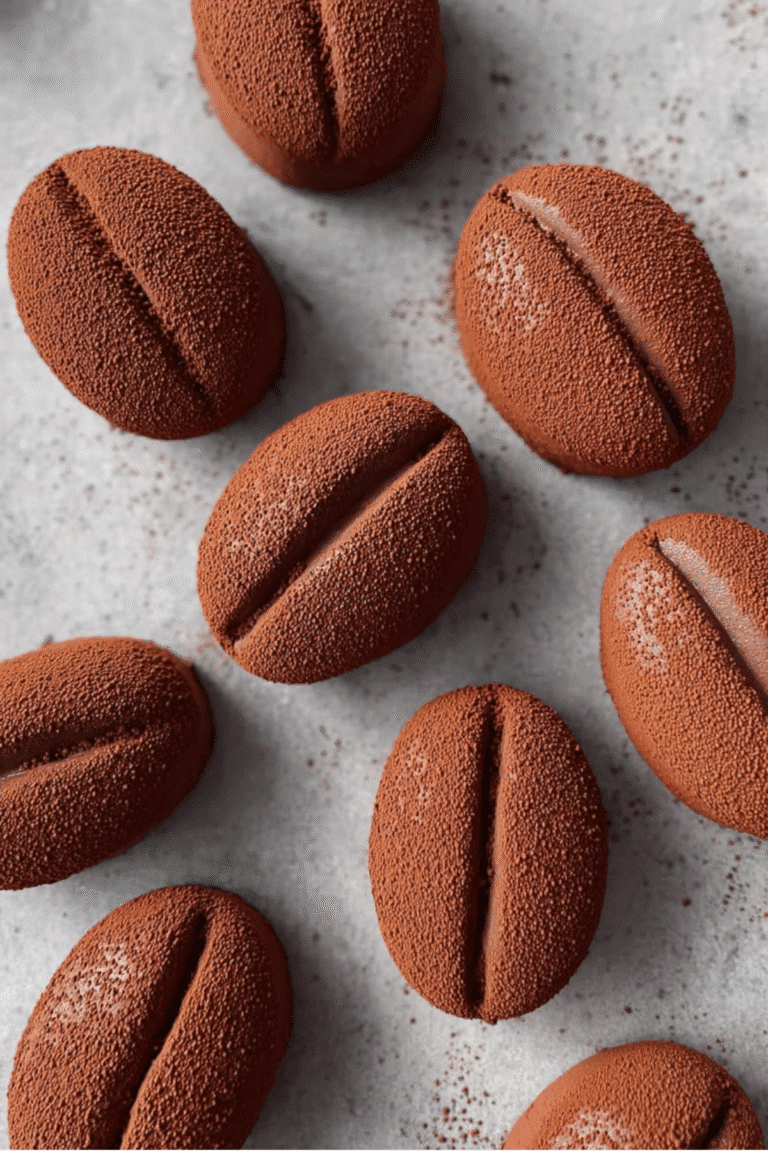
Chocolate Banana Date Truffles
There is something quietly magical about blending simple ingredients and ending up with something this rich, this satisfying. The first time I made these little bites, I remember thinking how something so naturally sweet could feel so indulgent. Soft, chewy, slightly fudgy, and kissed with deep cocoa flavor, these are the kind of treats you keep reaching for without even realizing it.
And now, let’s ease into what makes them so special.
A Sweet Bite That Feels Like a Treat and a Secret
These truffles have that perfect balance, the kind that makes you pause after the first bite. The natural sweetness from the dates melts into the creamy banana, while cocoa brings that deep chocolatey note we all crave. Each bite feels rich but not heavy, satisfying but not overwhelming.
They are the kind of snack you make once, and suddenly they become part of your weekly routine. Trust me, you’re going to love this.
A Little Backstory Behind These Naturally Sweet Delights
While these aren’t tied to one specific traditional dish, they take inspiration from whole-food desserts that have been around for generations. Many cultures have used dates as a natural sweetener, long before refined sugar became common.
Blending fruits, nuts, and cocoa into small bites is something that has evolved in modern kitchens, especially for those looking for simple, wholesome treats. And honestly, this one feels like a perfect meeting point between tradition and modern convenience.
Why This Recipe Just Works Every Time
There is a reason this one keeps coming back into rotation.
Versatile: You can enjoy these as a snack, dessert, or even a quick energy bite before heading out.
Budget-Friendly: All the ingredients are simple and easy to find, and a little goes a long way.
Quick and Easy: No baking, no complicated steps, just mix, shape, and chill.
Customizable: You can tweak the nuts, adjust sweetness, or add a hint of spice.
Crowd-Pleasing: Everyone from kids to adults ends up loving these little bites.
Make-Ahead Friendly: They store beautifully, so you can prepare them in advance.
Great for Leftovers: If you somehow have extras, they stay just as good the next day.
Tips From the Kitchen That Make All the Difference
Before we jump in, here are a few small things that really elevate the final result.
- Use very soft dates, if they feel dry, soak them briefly in warm water
- Mash the banana well so it blends smoothly into the mixture
- Pulse the nuts to a slightly coarse texture for a better bite
- Chill the mixture if it feels too soft before shaping
Tools That Make the Process Smooth and Easy
Let’s gather what you need, nothing fancy here.
Food Processor: Helps break everything down into a smooth, sticky mixture.
Mixing Bowl: Useful for combining and adjusting textures.
Spatula: Makes scraping and mixing easier.
Baking Tray or Plate: For placing the truffles while they set.
Ingredients That Come Together Beautifully
Now, let’s look at what brings all that flavor together.
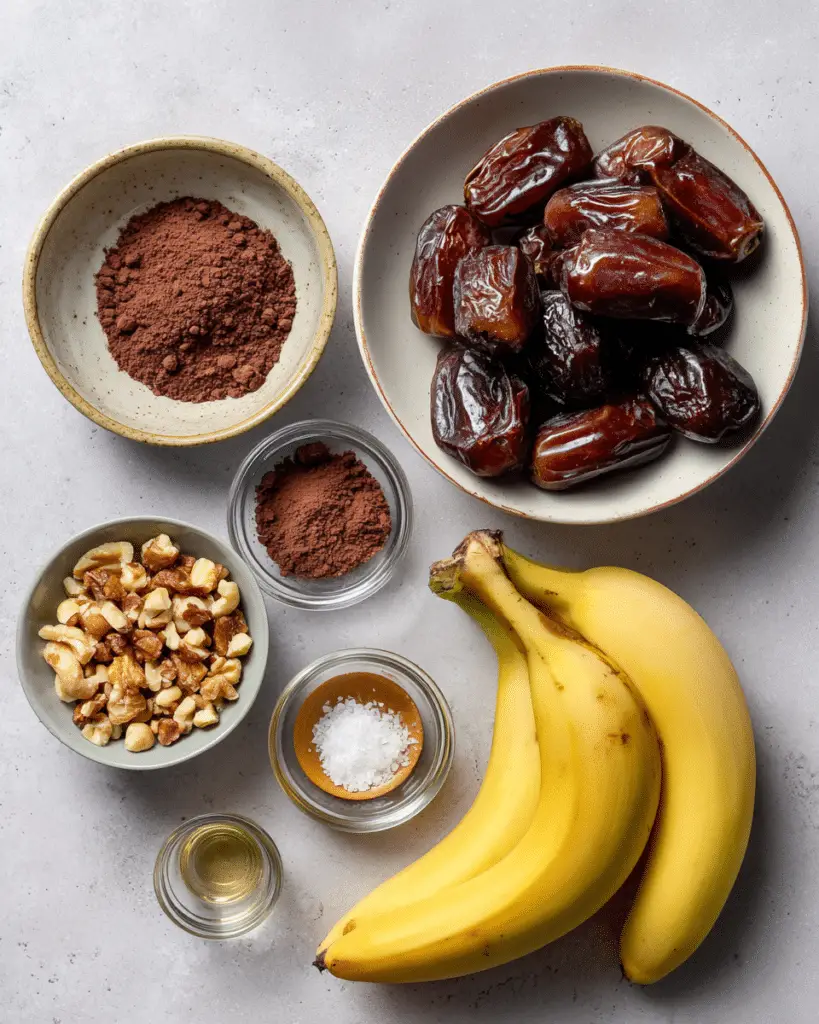
- Pitted Dates: 1 cup, naturally sweet and sticky, they form the base and hold everything together
- Ripe Banana: 1 medium, adds moisture and a creamy texture
- Cocoa Powder: 2 tablespoons, gives that deep chocolate flavor
- Chopped Nuts: 1/2 cup, adds crunch and richness
- Vanilla Extract: 1 teaspoon, enhances the sweetness and aroma
- Salt: a pinch, balances and sharpens the flavors
Simple Swaps If You Want to Change Things Up
Sometimes you want to play around a little, and that works perfectly here.
Dates: You can use dried figs or raisins for a slightly different sweetness
Banana: Applesauce works as a milder alternative
Cocoa Powder: Carob powder can be used if you prefer
Nuts: Swap with seeds for a nut-free version
The Stars of the Show
Some ingredients really shine here.
Pitted Dates: They are the heart of the recipe, providing both sweetness and structure
Cocoa Powder: This is what transforms everything into a chocolatey treat
Let’s Get Rolling in the Kitchen
Alright, now let’s dive into the process, step by step.
- Preheat Your Equipment: No oven needed here, but prepare your tray or plate for the truffles
- Combine Ingredients: Add dates, banana, cocoa powder, chopped nuts, vanilla extract, and salt into a food processor
- Prepare Your Cooking Vessel: Blend until the mixture becomes sticky and well combined
- Assemble the Dish: Scoop small portions and roll them into even balls
- Cook to Perfection: No cooking required, just ensure they hold their shape
- Finishing Touches: Place them on a tray and chill in the fridge for at least 30 minutes
- Serve and Enjoy: Enjoy them chilled or at room temperature
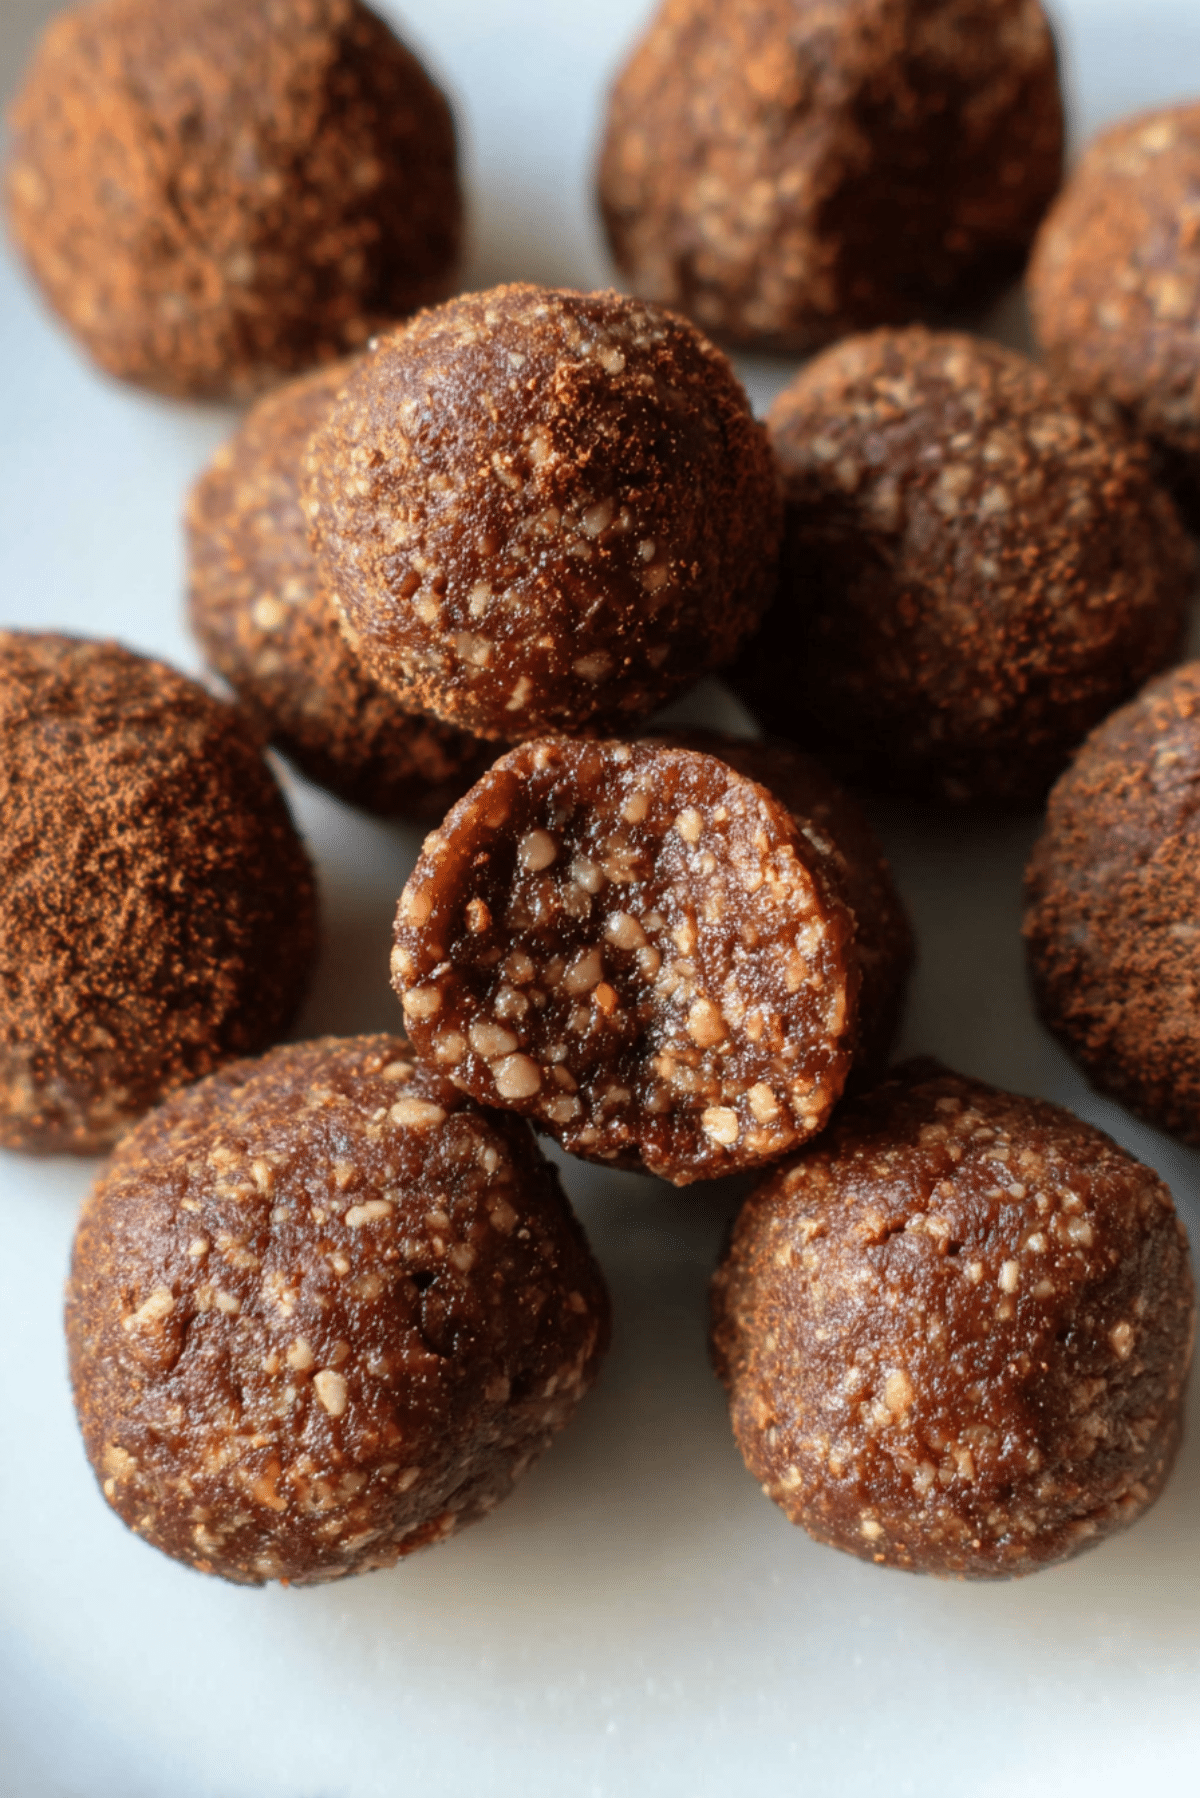
The Texture and Flavor You Will Notice First
The moment you bite in, you get that soft, chewy center with tiny bits of crunch from the nuts. The cocoa brings a deep richness, while the banana keeps everything smooth and slightly creamy. It is a mix of textures that just works, and every bite feels balanced.
A Few Helpful Tips to Make It Even Better
- Chill your hands slightly before rolling to prevent sticking
- Add a little extra cocoa if you want a stronger chocolate flavor
- Keep sizes uniform for even texture and presentation
What to Watch Out For While Making Them
- If the mixture is too wet, add a bit more chopped nuts
- If it is too dry, add a small amount of mashed banana
- Avoid over-processing, which can make the texture too smooth
A Quick Look at the Nutrition
Servings: 12
Calories per serving: 90
Note: These are approximate values.
Time Breakdown So You Can Plan Ahead
Prep Time: 15 minutes
Cook Time: 0 minutes
Total Time: 15 minutes
Make Them Ahead and Store Them Right
These truffles are perfect for prepping in advance. Store them in an airtight container in the fridge for up to 5 days. You can also freeze them for longer storage, just let them sit out for a few minutes before eating.
How to Serve Them for Maximum Enjoyment
Serve them slightly chilled for a firmer bite or at room temperature for a softer texture. They pair beautifully with coffee, tea, or even as a quick grab-and-go snack.
Turning Leftovers Into Something New
If you have extras, try crumbling them over yogurt or blending them into a smoothie. They can even be pressed into a base for a quick no-bake dessert.
Extra Little Tips That Go a Long Way
Keep your ingredients fresh, especially the banana. Taste the mixture before shaping and adjust sweetness if needed. Small tweaks make a big difference.
Make Them Look As Good As They Taste
Roll them evenly and consider dusting lightly with cocoa powder for a polished look. Presentation makes them even more inviting.
Fun Ways to Switch Things Up
Try adding a pinch of cinnamon for warmth
Mix in shredded coconut for extra texture
Coat them in crushed nuts for a crunchy exterior
Add a few chocolate chips for extra indulgence
FAQ’s
1. Can I make these without a food processor?
Yes, but it will take more effort to mash and combine everything smoothly.
2. Are these freezer friendly?
Absolutely, they freeze very well and keep their texture.
3. Can I skip the banana?
Yes, but you will need another moist ingredient like applesauce.
4. How long do they last?
Up to 5 days in the fridge.
5. Can I make them nut-free?
Yes, just replace nuts with seeds.
6. Are they very sweet?
They are naturally sweet but not overwhelming.
7. Can I add protein powder?
Yes, just adjust moisture if needed.
8. Do they melt at room temperature?
No, they stay firm but soften slightly.
9. Can kids enjoy these?
Yes, they are a great kid-friendly snack.
10. Can I double the recipe?
Of course, it scales very easily.
Conclusion
There is something deeply satisfying about creating a treat that feels indulgent while staying simple and wholesome. These little bites are proof that you do not need complicated steps or ingredients to make something truly delicious. Let me tell you, it is worth every bite, and once you try them, they might just become your new favorite go-to snack.
Print
Chocolate Banana Date Truffles
- Prep Time: 15 minutes
- Cook Time: 0 minutes
- Total Time: 15 minutes
- Yield: 12 truffles 1x
- Category: Dessert
- Method: No-Bake
- Cuisine: Modern
- Diet: Vegetarian
Description
Soft, chewy chocolate banana date truffles made with wholesome ingredients, naturally sweet and rich with a deep cocoa flavor, perfect for a quick no-bake treat.
Ingredients
- 1 cup pitted dates
- 1 medium ripe banana
- 2 tablespoons cocoa powder
- 1/2 cup chopped nuts
- 1 teaspoon vanilla extract
- a pinch of salt
Instructions
- Prepare a tray or plate for placing the truffles.
- Add pitted dates, banana, cocoa powder, chopped nuts, vanilla extract, and salt into a food processor.
- Blend until the mixture becomes sticky and well combined.
- Scoop small portions and roll them into even balls.
- Place the truffles onto the prepared tray.
- Chill in the refrigerator for at least 30 minutes until firm.
- Serve chilled or at room temperature.
Notes
- If dates are dry, soak them briefly in warm water before using.
- Adjust cocoa powder for a stronger chocolate flavor.
- Add more nuts if the mixture feels too soft.
- Store in an airtight container in the fridge for up to 5 days.
Nutrition
- Serving Size: 1 truffle
- Calories: 90
- Sugar: 10g
- Sodium: 5mg
- Fat: 3g
- Saturated Fat: 0.5g
- Unsaturated Fat: 2.3g
- Trans Fat: 0g
- Carbohydrates: 15g
- Fiber: 2g
- Protein: 2g
- Cholesterol: 0mg
Keywords: chocolate banana date truffles, no bake truffles, healthy chocolate snack, date energy balls