Crispy Beef Cones (12 cones)
There is something incredibly satisfying about biting into a golden, crispy shell and discovering a warm, cheesy, savory filling inside. These crispy beef cones bring that exact moment to life. The crunch gives way to juicy beef, melted cheese, and a hint of herbs that make every bite feel like a little celebration. Trust me, you are going to love this, especially when dipped into that creamy sauce on the side.
Why These Little Crispy Bites Steal the Show
As soon as these come out of the oven or fryer, the aroma alone is enough to gather everyone around the kitchen. The combination of textures and flavors is what makes them truly special.
The outer layer is perfectly crisp, while the inside stays juicy and rich. Each cone feels like a complete bite-sized experience, easy to grab and impossible to stop eating. This one is a total game changer for snacks, parties, or even casual dinners.
A Bite with a Story Behind It
These cones take inspiration from classic stuffed pastries and finger foods found across many cultures. From Mediterranean filled pastries to Asian-style rolls, the idea of wrapping savory fillings in dough has always been a favorite.
Over time, cooks started experimenting with shapes and textures, and that is how fun variations like cones came into play. They are not just delicious, they are also playful and perfect for sharing.
Why This Recipe Works Every Single Time
Before we dive deeper, let me tell you why this recipe is such a reliable go-to.
Versatile: You can serve these as appetizers, snacks, or even a light meal with a side salad.
Budget-Friendly: Simple ingredients like ground beef and cheese make this easy on your wallet.
Quick and Easy: The steps are straightforward, and you can have these ready in no time.
Customizable: Swap herbs, add spices, or try different cheeses to make it your own.
Crowd-Pleasing: Everyone loves crispy, cheesy bites, no exceptions here.
Make-Ahead Friendly: You can prep them in advance and cook when needed.
Great for Leftovers: They reheat beautifully and stay delicious.
Pro Tips from My Kitchen to Yours
Now that you are excited, here are a few insider tricks to make sure everything turns out just right.
- Do not overfill the cones, it makes sealing harder and can cause leaks
- Seal the edges tightly with a bit of water or egg wash
- Keep oil at a steady temperature if frying, so they crisp evenly
- Let them rest briefly after cooking so the filling settles perfectly
Kitchen Tools You Will Want Ready
Before starting, gather everything so the process feels smooth and enjoyable.
Mixing Bowl: For combining the beef and seasonings evenly.
Spoon or Spatula: Helps mix and portion the filling.
Brush: Useful for sealing and lightly oiling the wrappers.
Baking Tray or Frying Pan: Depending on your cooking method.
Tongs: Makes flipping and handling easier and safer.
Ingredients That Bring It All Together
And now let us talk about the heart of the recipe, the ingredients that make each bite unforgettable.
- Ground Beef: 1 pound, rich and juicy, forms the savory base
- Shredded Mozzarella Cheese: 1 cup, melts beautifully and adds creaminess
- Fresh Parsley: 2 tablespoons, finely chopped, brings freshness and color
- Egg Roll Wrappers: 12 pieces, creates that crispy outer shell
- Garlic Powder: 1 teaspoon, adds depth and aroma
- Onion Powder: 1 teaspoon, enhances the savory flavor
- Salt: 1 teaspoon, balances everything
- Black Pepper: 1/2 teaspoon, adds a gentle kick
- Olive Oil: 2 tablespoons, helps achieve that golden crisp texture
- Mayonnaise: 1/2 cup, base for the creamy dip
- Chopped Pickles: 2 tablespoons, gives the dip a tangy twist
Easy Swaps If You Want to Switch Things Up
Sometimes you want to tweak things a little, and that is totally fine.
Ground Beef: Try ground chicken or turkey for a lighter option
Mozzarella Cheese: Swap with cheddar or a cheese blend
Parsley: Use cilantro or green onions instead
Mayonnaise: Greek yogurt works for a lighter dip
Spotlight on Key Ingredients
Let us take a moment to appreciate what really makes these cones shine.
Ground Beef: The heart of the filling, juicy and packed with flavor when seasoned right.
Mozzarella Cheese: That stretchy, melty texture that pulls everything together and makes each bite irresistible.

Let’s Get Cooking Step by Step
Now comes the fun part, bringing everything together in your kitchen.
- Preheat Your Equipment: Preheat your oven to 375°F if baking, or heat oil in a pan if frying.
- Combine Ingredients: In a bowl, mix ground beef, garlic powder, onion powder, salt, black pepper, and parsley until well combined.
- Prepare Your Cooking Vessel: Lightly grease a baking tray or ensure your oil is hot and ready.
- Assemble the Dish: Place a small amount of filling and cheese onto each wrapper, roll into cone shapes, and seal the edges tightly.
- Cook to Perfection: Bake for 15 to 18 minutes until golden, or fry until crispy and browned.
- Finishing Touches: Mix mayonnaise and chopped pickles for a quick dipping sauce.
- Serve and Enjoy: Serve warm with the dip on the side and enjoy every crunchy bite.
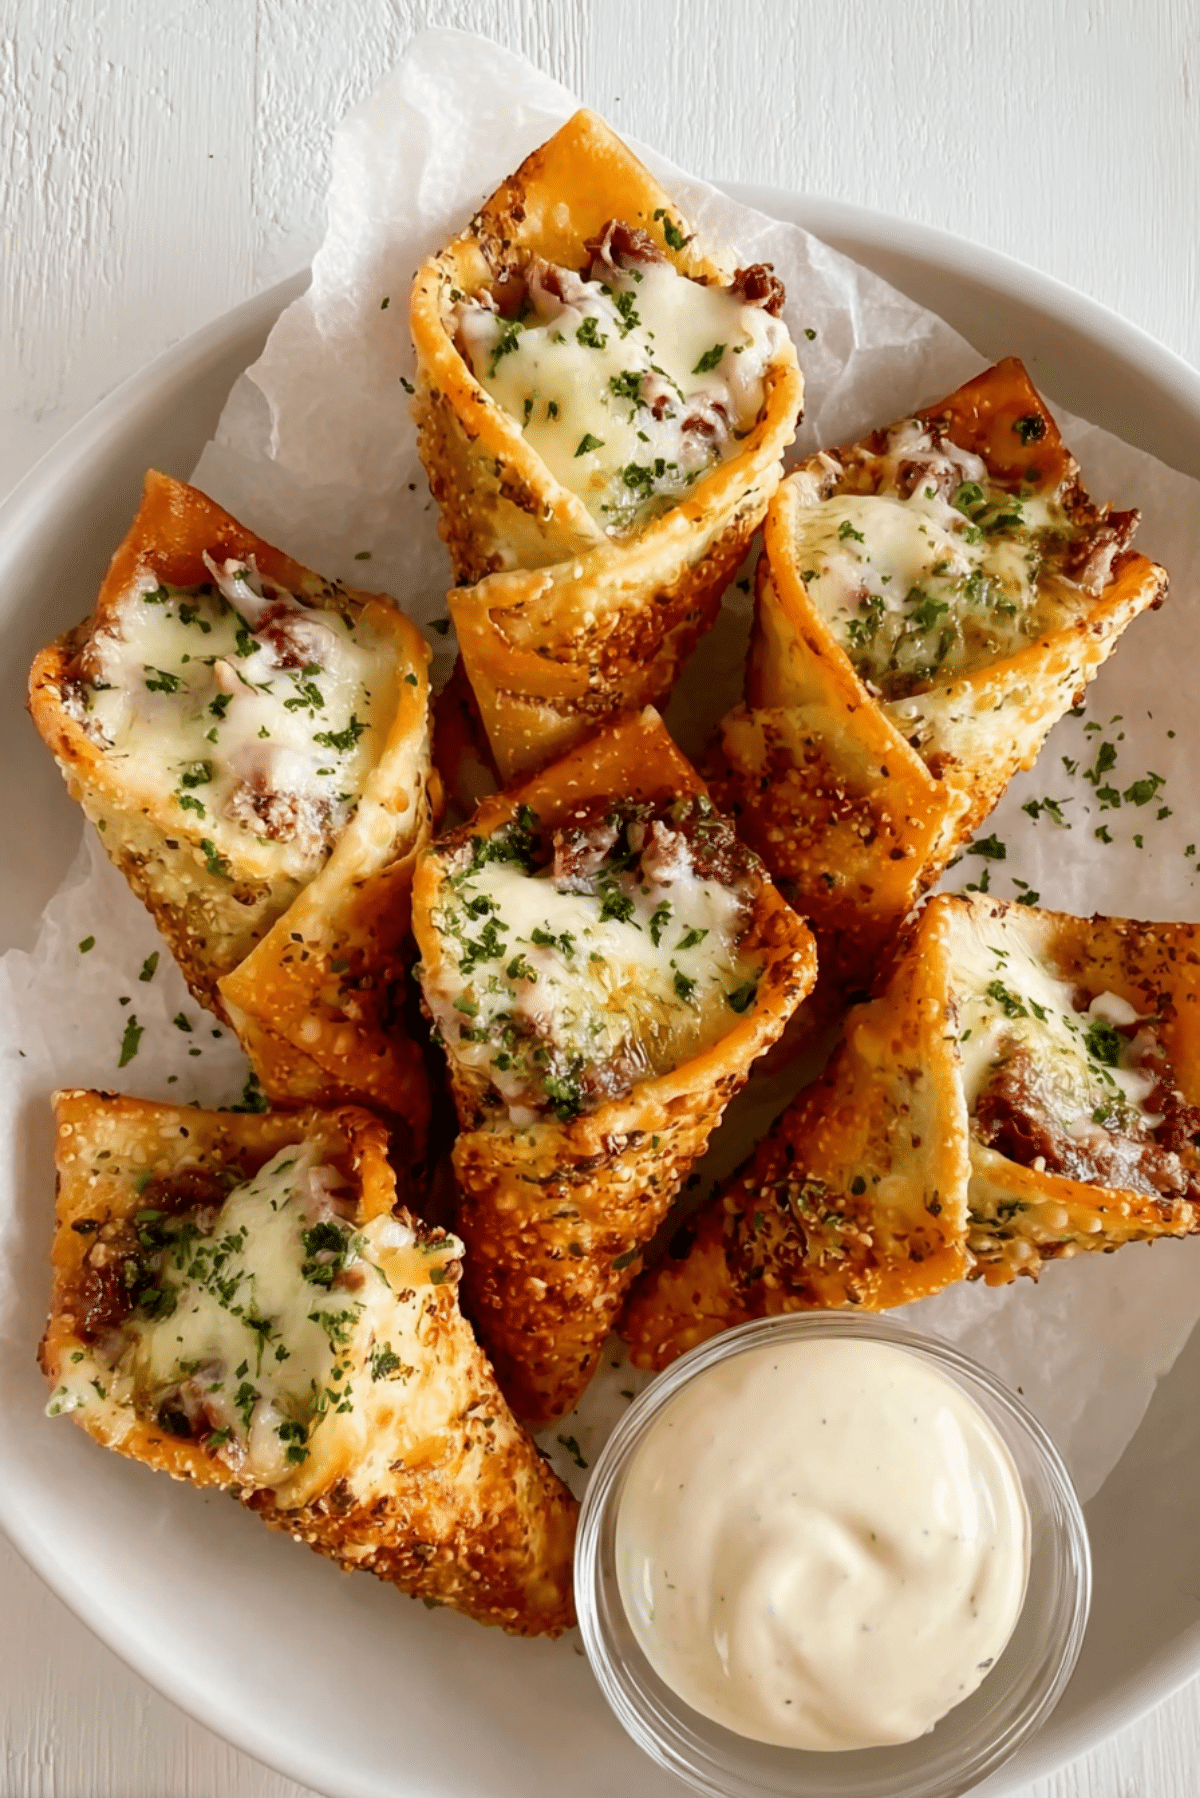
The Magic of Texture and Flavor
What makes these cones truly unforgettable is the contrast. The outside is crisp and golden, while the inside stays tender and juicy. The cheese melts into the beef, creating a rich and creamy center, while the herbs add a fresh note that balances everything beautifully.
Helpful Tips for Even Better Results
If you want to take things up a notch, keep these in mind.
- Chill the filling slightly before assembling for easier handling
- Use a light brush of oil for extra crispiness when baking
- Serve immediately for the best texture
What to Avoid for Perfect Results
Even simple recipes have a few pitfalls, so here is what to watch out for.
- Overstuffing the cones, which can cause them to burst
- Not sealing edges properly, leading to filling leaks
- Cooking at too low a temperature, resulting in soggy texture
Nutritional Snapshot You Should Know
Servings: 12 cones
Calories per serving: 180
Note: These are approximate values.
Timing Everything Just Right
Prep Time: 20 minutes
Cook Time: 18 minutes
Total Time: 38 minutes
Make-Ahead and Storage Tips
If you are planning ahead, you can assemble the cones and store them in the fridge for up to a day before cooking. Once cooked, keep leftovers in an airtight container and refrigerate for up to three days.
Reheat in the oven to bring back that crisp texture. Freezing is also an option, just freeze before cooking and bake straight from frozen with a slightly longer cooking time.
How to Serve These Crispy Delights
Serve these cones on a platter with the creamy dip in the center. Add a fresh salad or some crunchy veggies on the side to balance the richness. They also pair beautifully with a light soup or as part of a party spread.
Creative Ways to Use Leftovers
Leftovers are never boring with this recipe.
Turn them into wraps with fresh greens, chop them into a salad for added crunch, or serve them alongside rice for a quick meal. Let me tell you, it is worth every bite even the next day.
Extra Tips for Maximum Flavor
A little extra attention can make a big difference.
Add a pinch of chili flakes for heat, mix in a bit of grated cheese into the beef for extra richness, or brush with garlic oil before baking for deeper flavor.
Make It Look as Good as It Tastes
Presentation matters more than you think. Arrange the cones neatly on parchment paper, sprinkle fresh herbs on top, and place the dip in a small bowl for a clean, inviting look.
Fun Variations to Try Next Time
Feel like experimenting, here are a few ideas.
Try a spicy version with chili sauce, go Mediterranean with feta and herbs, make a cheesy overload version with multiple cheeses, or even a veggie version with mushrooms and spinach.
FAQ’s
1. Can I bake instead of fry?
Yes, baking works great and still gives a crispy result.
2. Can I prepare them in advance?
Absolutely, assemble ahead and cook when ready.
3. What other dips work well?
Garlic yogurt or spicy ketchup are great options.
4. Can I freeze them?
Yes, freeze before cooking for best results.
5. How do I keep them crispy?
Reheat in the oven instead of the microwave.
6. Can I use different wrappers?
Spring roll wrappers also work well.
7. Is there a vegetarian option?
Yes, replace beef with sautéed vegetables.
8. How do I seal them properly?
Use a bit of water or egg wash on the edges.
9. Can I air fry them?
Yes, air fry at 375°F until golden.
10. How do I prevent sogginess?
Avoid overcrowding and cook at the right temperature.
Conclusion
These crispy beef cones are one of those recipes that instantly become a favorite. They are fun to make, even more fun to eat, and perfect for just about any occasion. Once you try them, you will keep coming back for more, and honestly, I cannot blame you.
Print
Crispy Beef Cones (12 cones)
- Prep Time: 20 minutes
- Cook Time: 18 minutes
- Total Time: 38 minutes
- Yield: 12 cones 1x
- Category: Appetizer
- Method: Baking or Frying
- Cuisine: Fusion
- Diet: Low Lactose
Description
Golden crispy cones filled with seasoned beef, melted cheese, and fresh herbs, served with a creamy tangy dip. Perfect for parties, snacks, or a fun dinner.
Ingredients
- 1 pound ground beef
- 1 cup shredded mozzarella cheese
- 2 tablespoons fresh parsley, finely chopped
- 12 egg roll wrappers
- 1 teaspoon garlic powder
- 1 teaspoon onion powder
- 1 teaspoon salt
- 1/2 teaspoon black pepper
- 2 tablespoons olive oil
- 1/2 cup mayonnaise
- 2 tablespoons chopped pickles
Instructions
- Preheat your oven to 375°F or heat oil in a pan if frying.
- In a mixing bowl, combine ground beef, garlic powder, onion powder, salt, black pepper, and chopped parsley until evenly mixed.
- Lightly grease a baking tray or prepare hot oil for frying.
- Place a small amount of the beef mixture and shredded mozzarella onto each wrapper, roll into cone shapes, and seal the edges tightly.
- Bake for 15 to 18 minutes until golden and crispy, or fry until evenly browned and crisp.
- In a small bowl, mix mayonnaise and chopped pickles to create the dipping sauce.
- Serve warm with the creamy dip on the side and enjoy.
Notes
- Do not overfill the cones to prevent breaking during cooking.
- Seal edges well using water or egg wash.
- For extra crispiness, lightly brush cones with oil before baking.
- Reheat in the oven to maintain crisp texture.
Nutrition
- Serving Size: 1 cone
- Calories: 180
- Sugar: 1g
- Sodium: 320mg
- Fat: 11g
- Saturated Fat: 4g
- Unsaturated Fat: 6g
- Trans Fat: 0g
- Carbohydrates: 12g
- Fiber: 1g
- Protein: 9g
- Cholesterol: 25mg
Keywords: crispy beef cones, beef appetizers, cheese stuffed cones, party snacks, easy finger food