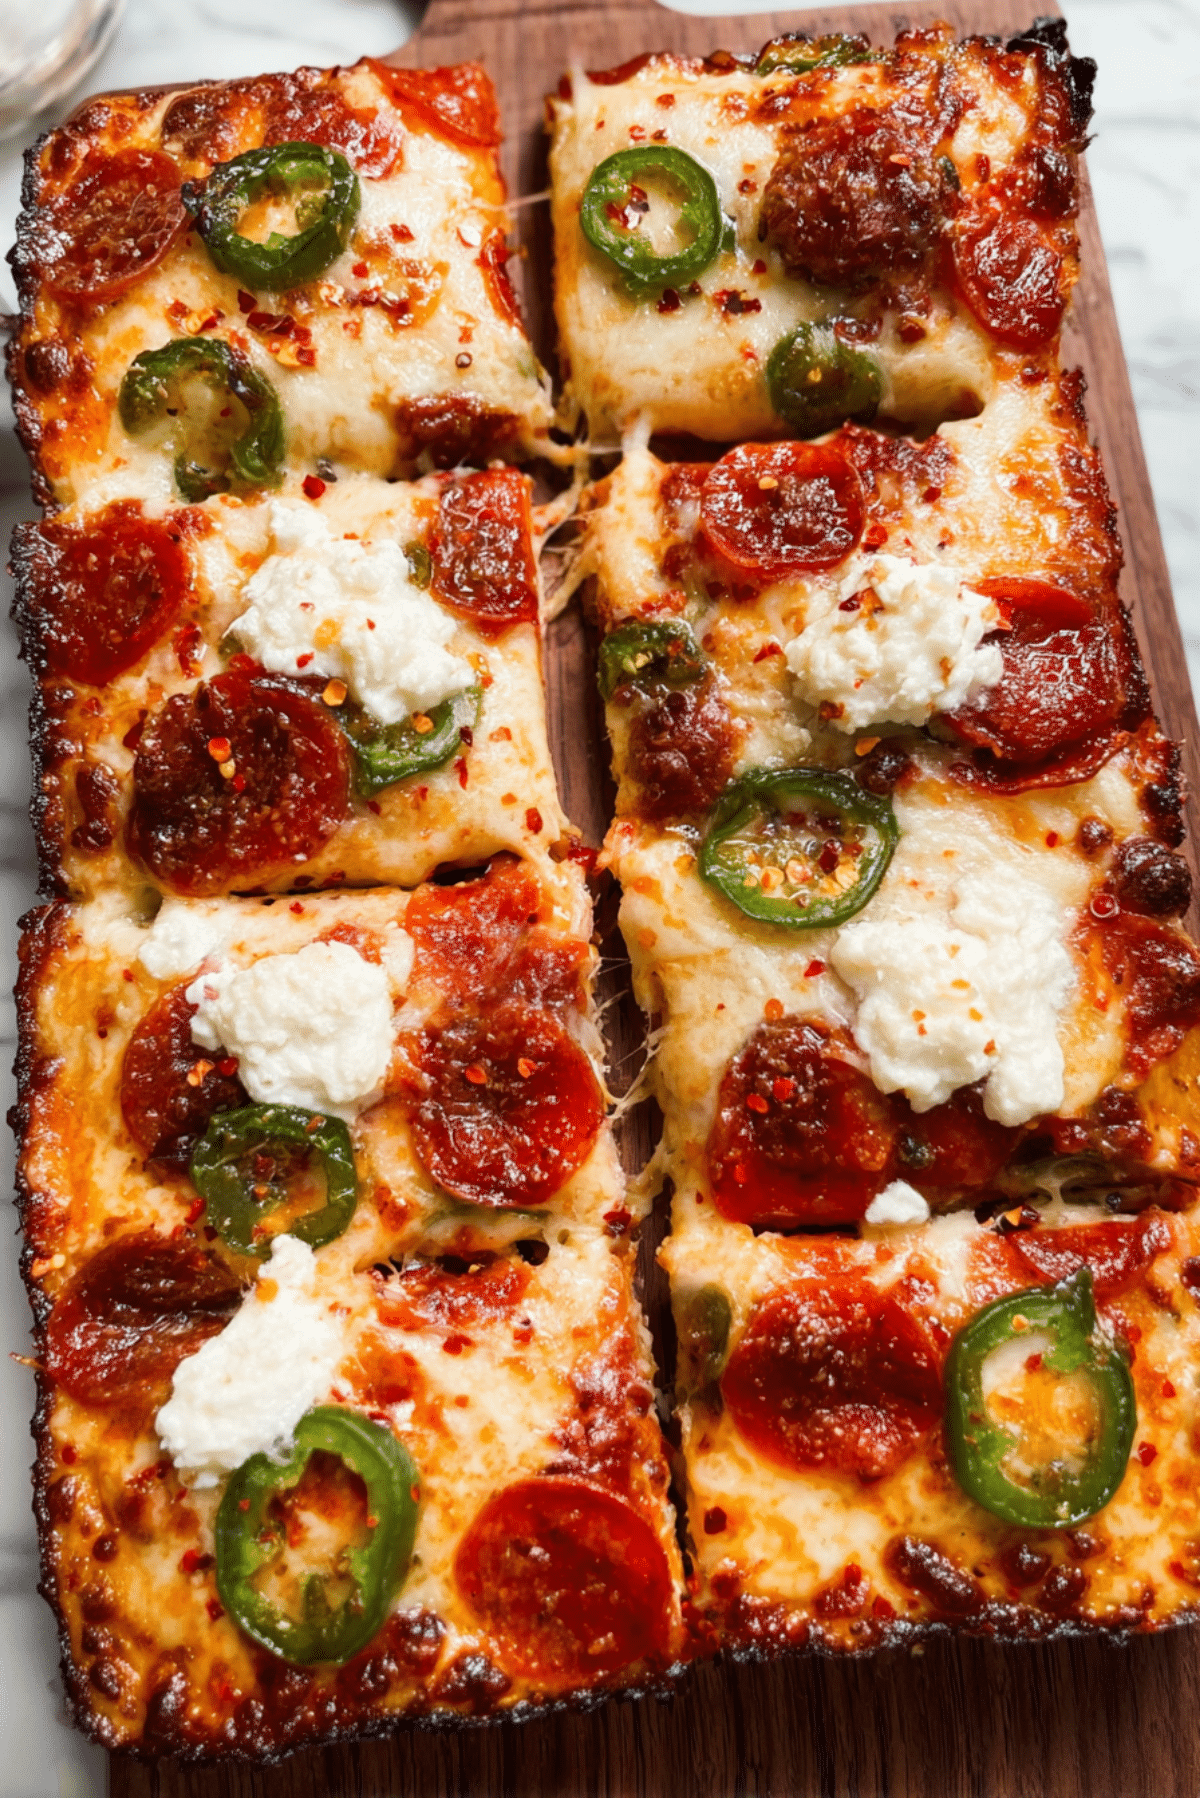
Detroit-Style Pizza
There is something ridiculously satisfying about pulling a tray of thick, cheesy pizza from the oven and hearing that quiet crackle from the caramelized edges. This one is bold, saucy, crispy around the sides, and fluffy in the middle, which is pretty much everything you want when pizza night needs to feel a little special. Trust me, you’re going to love this, because every bite brings buttery crust, gooey cheese, spicy jalapeño, and those rich little pockets of sauce together in the best way.
Why This Pan Pizza Always Steals the Show
Some pizzas are all about a thin crisp base, but this version goes in a completely different direction, and honestly, that is part of the magic. The crust bakes up airy and golden, the cheese melts right to the edges, and the toppings settle into every corner so each square feels loaded and satisfying.
It is the kind of pizza that looks a little dramatic when you set it on the table, and that is exactly why people love it. You get those iconic browned edges, a soft interior, and enough texture contrast to make every bite interesting. This one’s a total game-changer, especially when you want homemade pizza that feels hearty and a little indulgent.
A Slice with Deep Roots and Big Personality
Before we get into the practical details, it helps to know why this style feels so different from the usual round pie. Detroit-style pizza comes from Michigan, where it became known for its rectangular shape, thick crust, and those famous crispy cheese edges that bake right against the pan.
Traditionally, it is made in a deep rectangular pan, and the toppings are layered in a way that helps the crust stay light while the cheese browns beautifully around the sides. The sauce often lands on top instead of underneath everything, which gives the finished pie its signature look and a brighter tomato flavor in each bite. It is a regional classic with real personality, and let me tell you, it’s worth every bite.
Reasons This Recipe Earns a Permanent Spot in Your Rotation
This pizza has a way of winning people over fast, and once you make it at home, it is easy to see why.
Versatile: You can keep it classic or switch up the toppings depending on what you love most. It handles heat, extra cheese, and veggie add-ins really well.
Budget-Friendly: The ingredient list is made from simple pantry basics plus a few fridge staples. You get a bakery-style result without paying takeout prices.
Quick and Easy: The dough is straightforward, and the assembly is relaxed and beginner-friendly. Once everything is in the pan, the oven does the heavy lifting.
Customizable: You can adjust the spice, the cheese blend, or the toppings without ruining the structure. It is very forgiving, which makes it perfect for home cooks.
Crowd-Pleasing: Thick slices, melty cheese, and bold flavor are hard to resist. This is the kind of dish that disappears fast at family dinners or casual gatherings.
Make-Ahead Friendly: The dough can be mixed ahead, and the toppings can be prepped in advance. That means less scrambling when it is time to cook.
Great for Leftovers: The slices reheat beautifully, especially in the oven or air fryer. The crust stays crisp, and the cheese turns melty all over again.
Pro Tips That Make a Good Pizza Taste Bakery-Level Good
A few small details can take this from good homemade pizza to something that feels seriously memorable.
- Oil the pan generously: This helps create that crisp, golden underside and keeps the edges from sticking.
- Let the dough relax fully: A well-rested dough spreads more easily and bakes up lighter, with that airy interior you want.
- Push cheese close to the edges: This is how you get those caramelized corners that make this style so special.
- Use the sauce in spoonfuls over the top: It keeps the crust from feeling heavy and gives the pizza its signature look.
- Cool for a few minutes before slicing: That short rest helps the cheese settle and makes the squares neater to cut.
The Kitchen Gear That Makes the Process Smoother
Now that the technique is starting to come together, here are the tools that make the whole experience easier and more enjoyable.
9×13-inch metal baking pan: This gives the pizza its classic rectangular shape and helps the crust bake evenly.
Large mixing bowl: You will need this for bringing the dough together and giving it room to rise.
Rubber spatula or wooden spoon: Handy for mixing the dough, especially since it starts a little sticky.
Measuring cups and spoons: Accurate measurements make a big difference in dough texture and overall balance.
Small bowls: These help keep toppings organized so assembly feels quick and easy.
Offset spatula or butter knife: Useful for loosening those cheesy edges from the pan after baking.
Pizza cutter or sharp chef’s knife: For slicing clean, satisfying squares without dragging the toppings around.
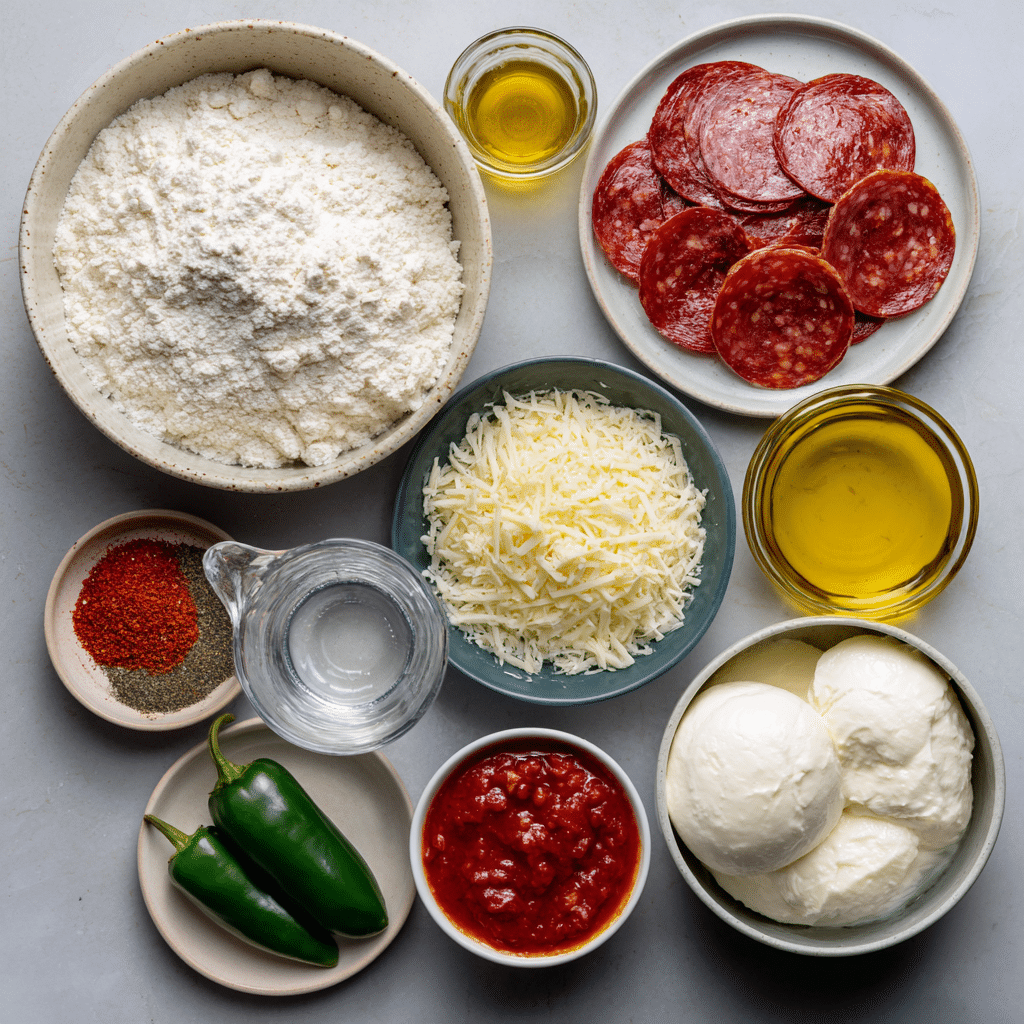
The Ingredients That Build All That Flavor
The beauty of this pizza is how a few humble ingredients come together into something that feels bold, savory, and deeply comforting. Each part plays its own role, from the fluffy dough to the rich sauce and those crispy, cheesy edges.
- Bread flour: 3 1/4 cups. This gives the crust its chewy structure and helps create that airy, pan-baked texture.
- Instant yeast: 2 1/4 teaspoons. It lifts the dough and helps it rise into a light, pillowy base.
- Fine salt: 1 1/2 teaspoons. This seasons the dough and keeps the flavor from falling flat.
- Warm water: 1 1/4 cups. It hydrates the flour and helps the yeast get to work.
- Olive oil: 3 tablespoons, divided. This keeps the dough supple and helps the crust turn crisp and golden in the pan.
- Low-moisture mozzarella cheese: 12 ounces, cut into cubes or thick shreds. This melts smoothly and creates those irresistible cheesy edges.
- Whole-milk ricotta: 1/2 cup. Small dollops add creamy richness and a soft contrast to the crisp crust.
- Pizza sauce: 3/4 cup. This brings bright tomato flavor and that classic striped, spooned-over-top finish.
- Beef pepperoni: 3 ounces, sliced. It adds savory depth and a little spicy, meaty bite.
- Jalapeño: 1 medium, thinly sliced. This gives the pizza fresh heat and a pop of color.
- Grated Parmesan cheese: 2 tablespoons. A final sprinkle adds salty nuttiness and a little extra finish.
- Red pepper flakes: 1/2 teaspoon. This adds a light kick and a touch of warmth across the top.
Easy Swaps When You Want to Make It Your Own
Once you know the core ingredients, it becomes really easy to adapt this pizza to your taste without losing what makes it special.
Bread flour: All-purpose flour, though the crust will be a little softer.
Whole-milk ricotta: Fresh mozzarella pieces or small spoonfuls of whipped cottage cheese.
Beef pepperoni: Turkey pepperoni or sautéed mushrooms.
Jalapeño: Mild green bell pepper or banana pepper.
Pizza sauce: Crushed seasoned tomatoes reduced slightly on the stove.
Parmesan cheese: Pecorino Romano for a sharper, saltier finish.
The Two Ingredients That Quietly Do the Heavy Lifting
Some ingredients do more than their share of the work, and in this pizza, two of them really define the final result.
Low-moisture mozzarella: This is the ingredient that gives you that stretchy melt and those crisp, deeply golden edge bits that everybody fights over first.
Olive oil: It might seem simple, but it is essential for the pan-fried effect on the crust. It helps the bottom turn crisp while the inside stays soft and airy.
Let’s Get This Pizza in the Oven
And now let’s dive into the part everyone waits for, the actual making of it. The process is simple, relaxed, and honestly pretty fun once you see how quickly it all comes together.
- Preheat Your Equipment: Preheat your oven to 475°F. Lightly coat a 9×13-inch metal baking pan with 2 tablespoons of the olive oil, making sure the bottom and corners are well covered.
- Combine Ingredients: In a large mixing bowl, stir together the bread flour, instant yeast, and fine salt. Pour in the warm water and the remaining 1 tablespoon olive oil, then mix until a shaggy dough forms. Keep mixing for 2 to 3 minutes until no dry flour remains.
- Prepare Your Cooking Vessel: Transfer the sticky dough to the oiled pan and turn it once so the surface is lightly coated. Press it gently toward the corners as much as it will go without tearing, then let it rest for 10 minutes. Come back and press again until it fills the pan more evenly.
- Assemble the Dish: Scatter the mozzarella all over the dough, making sure some reaches the edges of the pan. Add small dollops of ricotta, then layer on the beef pepperoni and jalapeño slices. Spoon the pizza sauce over the top in stripes or little pools rather than spreading it edge to edge.
- Cook to Perfection: Bake for 18 to 20 minutes, until the crust is puffed, the cheese is bubbling, and the edges are deeply golden and crisp.
- Finishing Touches: Remove the pan from the oven and immediately sprinkle over the grated Parmesan and red pepper flakes. Let the pizza rest for 5 minutes, then run an offset spatula around the edges to loosen it.
- Serve and Enjoy: Lift the pizza carefully from the pan, transfer it to a cutting board, and slice into 8 rectangular pieces. Serve warm while the cheese is still gooey and the edges are crackly.
What Makes the Texture and Flavor So Good
This is where everything really pays off. The bottom of the crust turns crisp from the oil, while the inside stays light and fluffy, almost like focaccia’s pizza-loving cousin. Around the edges, the cheese caramelizes into those dark golden bits that bring a slightly toasty, savory crunch.
Then you get the contrast from the toppings. The mozzarella melts into stretchy richness, the ricotta adds creamy little pockets, and the sauce lands in bright tangy spoonfuls that cut through the richness beautifully. Add in spicy jalapeño and savory beef pepperoni, and the whole thing feels balanced, bold, and completely craveable.
Helpful Tricks for Your Best Batch Yet
A few simple habits can make the whole process easier and help the pizza turn out beautifully the first time.
- Use room temperature cheese: It melts more evenly and helps the top cook at the same pace as the crust.
- Do not overload the sauce: A little goes a long way here, and too much can weigh the dough down.
- Press the dough gently: If it springs back, let it rest for a few minutes instead of forcing it.
- Bake on a lower oven rack: This can help the underside brown more deeply if your oven runs cool.
Common Pitfalls, and How to Dodge Them
Even a forgiving pizza has a few things that can trip you up, so it helps to know what to watch for.
- Do not use a dry pan: Without enough oil, you miss out on the signature crisp bottom and the dough may stick.
- Do not rush the dough: If it has not relaxed enough, it will fight you when you try to spread it.
- Do not bury the edges in sauce: The cheese needs space to crisp and brown along the sides.
- Do not slice immediately: Give it a short rest so the cheese sets a bit and the slices hold together better.
A Quick Look at the Nutrition
Before you go back for another square, here is a rough idea of what each serving brings to the table.
Servings: 8
Calories per serving: 420
Note: These are approximate values.
How Long You’ll Need from Start to Finish
This pizza feels impressive, but the timeline is very manageable, which is one more reason it is so easy to love.
Prep Time: 25 minutes
Cook Time: 20 minutes
Total Time: 45 minutes
Smart Make-Ahead and Storage Ideas
If you want to get ahead, the dough can be mixed earlier in the day and kept covered in the refrigerator until you are ready to press it into the pan. Just let it sit at room temperature for a bit so it relaxes and becomes easier to spread.
Leftover slices keep well in an airtight container in the fridge for up to 4 days. For longer storage, wrap individual slices tightly and freeze them for up to 2 months. Reheat in a hot oven or air fryer so the crust gets crisp again. The microwave works in a pinch, but the texture will be softer.
The Best Ways to Serve It
This pizza is rich, cheesy, and full of character, so it loves fresh, bright sides that keep the meal balanced. A crisp green salad with a tangy vinaigrette works beautifully, and so does a simple bowl of marinated olives or roasted vegetables.
For a casual dinner, serve it with sparkling water, lemonade, or iced tea and let the pizza be the main event. If you are feeding a group, cut the slices a little smaller and treat it like party food. It disappears fast that way.
Leftovers That Feel Like a Whole New Meal
One of the best things about this pizza is that the extras do not feel boring the next day. In fact, they can be even better when you get creative.
Try chopping a slice into bite-size pieces and crisping it in a skillet for a pizza hash. You can also warm a slice and top it with a fried egg for a weekend brunch situation that feels wildly satisfying. Another good move is cutting cold slices into strips and serving them with a little extra warm sauce on the side for dipping.
Extra Notes That Make Home Cooking Easier
Sometimes the smallest details make the whole recipe feel smoother and more relaxed.
If your dough feels too sticky, resist the urge to dump in a lot of extra flour. An oiled hand works better and keeps the crust light. Use a metal pan if possible, because it helps with browning. And do not skip loosening the edges while the pizza is still warm, that step makes removing it from the pan much easier.
Simple Ways to Make It Look Restaurant-Worthy
Presentation matters, especially with a pizza this dramatic. Slice it into even rectangles and arrange them slightly apart on a wooden board so those crisp edges are easy to see. A light sprinkle of Parmesan over the top adds contrast, and a few visible jalapeño slices make the whole tray look vibrant and inviting.
You can also spoon a tiny extra touch of warm sauce over a couple of slices just before serving if you want that glossy, just-baked look. It does not take much to make this feel like a total centerpiece.
Fun Variations to Try Next Time
Once you have the base method down, it opens the door to all kinds of delicious twists.
Spicy hot honey version: Drizzle a little hot honey over the baked pizza for a sweet and fiery finish.
Veggie-loaded version: Swap the beef pepperoni for sautéed mushrooms, red onion, and roasted red peppers.
Extra cheesy version: Use a blend of mozzarella and provolone for even more melt and stretch.
Herb-forward version: Add a pinch of dried oregano to the sauce and finish with chopped fresh basil after baking.
Milder family version: Skip the jalapeño and use sweet bell pepper for color without the heat.
FAQ’s
1. Can I make the dough ahead of time?
Yes, absolutely. You can mix the dough earlier in the day and refrigerate it, covered, until you are ready to use it. Let it sit out for 20 to 30 minutes before pressing it into the pan.
2. What if I do not have a 9×13-inch pan?
A similar rectangular metal pan works best, though the thickness may vary slightly. Try to avoid glass if you want the crispiest bottom.
3. Why is the dough so sticky?
That sticky texture is normal and actually helps create the airy crumb. Use oiled hands instead of extra flour when handling it.
4. Can I use store-bought dough?
Yes, though the texture may be a little different. Choose a dough that can handle pan baking and still rise nicely.
5. Do I have to put the sauce on top?
Not strictly, but it is one of the things that gives this style its classic look and balanced flavor. It also helps keep the crust from getting soggy.
6. How do I get the edges really crispy?
Make sure the cheese reaches close to the pan edges and do not skimp on the oil. Baking until deeply golden also makes a huge difference.
7. Can I make it less spicy?
Of course. Just leave out the jalapeño and red pepper flakes, or swap the jalapeño for mild bell pepper.
8. What cheese works best here?
Low-moisture mozzarella is reliable and easy to find. It melts well and browns nicely around the edges.
9. How should I reheat leftovers?
The oven or air fryer is best because it brings the crust back to life. A few minutes at a high temperature usually does the trick.
10. Can I freeze baked slices?
Yes, and they reheat surprisingly well. Wrap them tightly, freeze them flat, and reheat straight from frozen in the oven.
Conclusion
This pizza has everything going for it, crispy edges, fluffy crust, bold sauce, gooey cheese, and just enough heat to keep things interesting. It feels a little nostalgic, a little dramatic, and very, very satisfying. Once you pull that golden pan from the oven and cut into those thick cheesy squares, you will see why people get hooked on this style so quickly. Make it once, share it with people you like, and do not be surprised when it becomes a regular request.
Print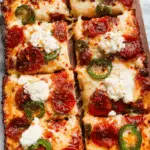
Detroit-Style Pizza
- Prep Time: 25 minutes
- Cook Time: 20 minutes
- Total Time: 45 minutes
- Yield: 8 slices 1x
- Category: Main Course
- Method: Baking
- Cuisine: American
- Diet: Kosher
Description
A thick, airy pan pizza with crispy cheese edges, mozzarella, ricotta, beef pepperoni, jalapeno, and spoonfuls of bright tomato sauce baked until golden and bubbly.
Ingredients
- 3 1/4 cups bread flour
- 2 1/4 teaspoons instant yeast
- 1 1/2 teaspoons fine salt
- 1 1/4 cups warm water
- 3 tablespoons olive oil, divided
- 12 ounces low-moisture mozzarella cheese, cut into cubes or thick shreds
- 1/2 cup whole-milk ricotta
- 3/4 cup pizza sauce
- 3 ounces beef pepperoni, sliced
- 1 medium jalapeno, thinly sliced
- 2 tablespoons grated Parmesan cheese
- 1/2 teaspoon red pepper flakes
Instructions
- Preheat the oven to 475°F. Coat a 9×13-inch metal baking pan with 2 tablespoons of the olive oil.
- In a large bowl, mix the bread flour, instant yeast, and fine salt. Add the warm water and remaining 1 tablespoon olive oil, then stir until a shaggy dough forms. Mix for 2 to 3 minutes until no dry flour remains.
- Transfer the dough to the oiled pan and turn once to coat. Press it gently toward the corners, then let it rest for 10 minutes. Press again until it fills the pan more evenly.
- Scatter the mozzarella over the dough, making sure some reaches the edges. Add small dollops of ricotta, then top with the beef pepperoni and jalapeno slices. Spoon the pizza sauce over the top in stripes or small pools.
- Bake for 18 to 20 minutes, until the crust is puffed, the cheese is bubbling, and the edges are deeply golden and crisp.
- Remove from the oven and sprinkle with the grated Parmesan cheese and red pepper flakes. Let rest for 5 minutes.
- Loosen the edges with a spatula, transfer to a cutting board, and slice into 8 rectangular pieces. Serve warm.
Notes
- Use room temperature cheese for more even melting.
- Do not overload the sauce or the crust may become heavy.
- Use oiled hands to handle the sticky dough instead of adding too much extra flour.
- Reheat leftovers in the oven or air fryer for the crispiest texture.
Nutrition
- Serving Size: 1 slice
- Calories: 420
- Sugar: 3g
- Sodium: 780mg
- Fat: 20g
- Saturated Fat: 9g
- Unsaturated Fat: 9g
- Trans Fat: 0g
- Carbohydrates: 39g
- Fiber: 2g
- Protein: 18g
- Cholesterol: 38mg
Keywords: Detroit-style pizza, pan pizza, thick crust pizza, beef pepperoni pizza, jalapeno pizza, homemade pizza