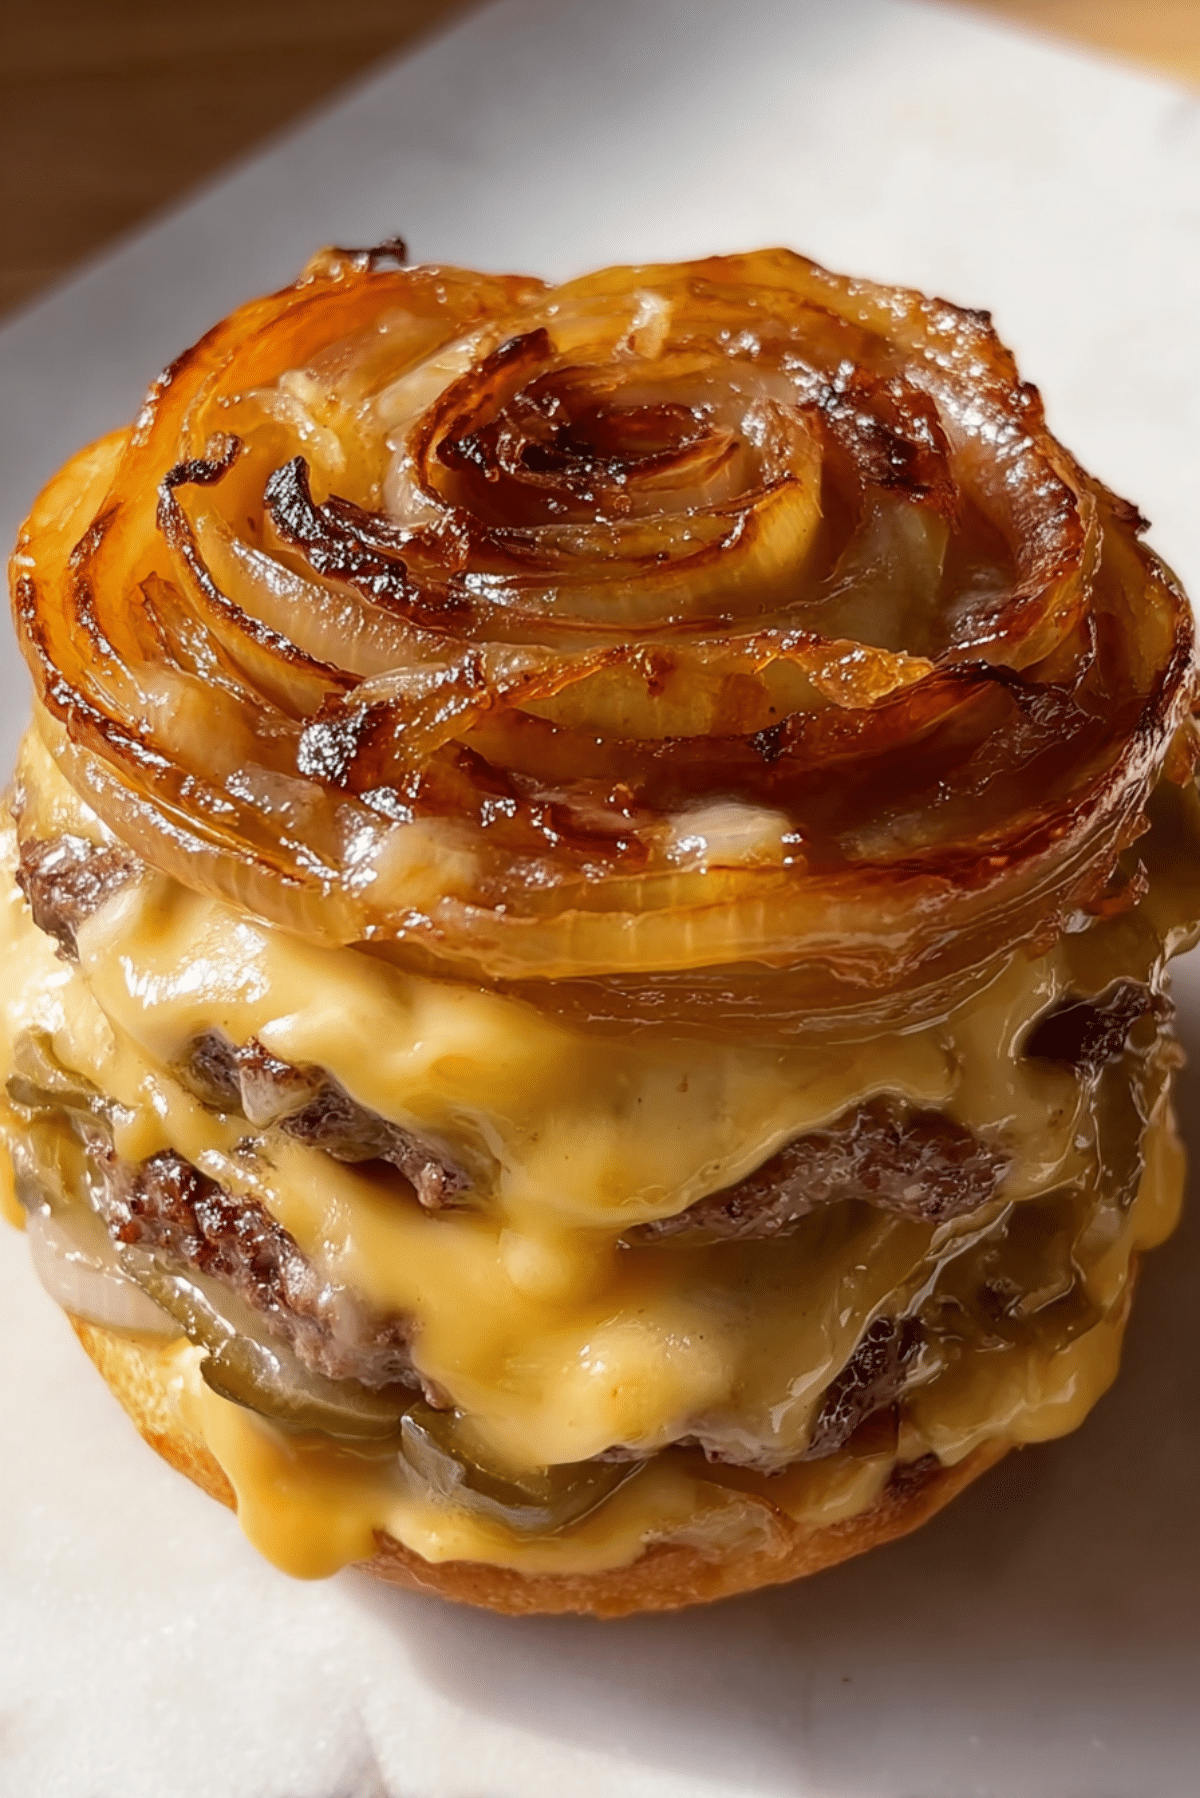
Flying Dutchman Burger from In-N-Out
There is something almost rebellious about ordering a burger without the bun. The first time I tried the Flying Dutchman Burger from In-N-Out, I remember thinking, this is either going to be too simple or absolutely genius. Let me tell you, it is worth every bite. Two juicy beef patties, perfectly melted American cheese in between, nothing else to distract you. It is rich, savory, and unapologetically indulgent. Trust me, you are going to love this.
And now that you can already imagine that glossy melted cheese and that deep seared crust, let’s talk about why this bunless beauty has such a loyal following.
Why This Bunless Classic Wins Every Time
There is a reason this simple burger has become a quiet favorite. Without the bun, every bite is focused on pure flavor. You taste the caramelized beef, the creamy cheese, and that satisfying salty finish.
It is low in carbs, high in protein, and surprisingly filling. This one is a total game changer if you are craving something hearty but want to skip the bread. It feels almost secret menu, even though it is wonderfully straightforward.
And now, let’s take a little step back and see where this creation fits in the bigger burger story.
A Little Secret Menu History
The Flying Dutchman Burger from In-N-Out is part of the brand’s famous not so secret menu. While the chain itself keeps things simple with a tight menu, customers over the years have customized orders that became legends in their own right.
This particular burger strips everything down to the essentials. No bun, no vegetables, just beef and cheese. It reflects that classic West Coast fast food culture, where quality ingredients and consistency matter most. It is proof that sometimes less really is more.
And speaking of simplicity, that is exactly what makes this recipe so reliable in your own kitchen.
Why You Can Count On This Recipe Every Single Time
Once you see how easy it is to recreate this at home, you will wonder why you did not try sooner.
Versatile: You can enjoy it plain and classic, or add onions or a slice of tomato on the side without changing the heart of the dish.
Budget-Friendly: Ground beef and sliced cheese are affordable staples, making this a wallet friendly indulgence.
Quick and Easy: From start to finish, you are looking at under 20 minutes. It is perfect for busy weeknights.
Customizable: Adjust the thickness of the patties or the amount of cheese to suit your taste.
Crowd-Pleasing: Even bun lovers appreciate the bold flavor of perfectly cooked beef and melted cheese.
Make-Ahead Friendly: You can shape the patties ahead of time and keep them chilled until ready to cook.
Great for Leftovers: Extra patties can be reheated and served over salad or alongside roasted vegetables the next day.
Now that you are convinced this is a keeper, let me share a few insider tricks to make it truly restaurant level.
Pro Tips for That Perfect Sear
A great burger is all about technique, especially when the ingredients are this simple.
- Use ground beef with enough fat, around 80 percent lean and 20 percent fat, so the patties stay juicy.
- Do not overwork the meat when shaping the patties, gently form them so they stay tender.
- Press a small indentation in the center of each patty before cooking, this helps them cook evenly.
- Let the patties rest for a couple of minutes after cooking so the juices redistribute.
And before we head into the kitchen, let’s make sure you have the right tools ready.
Essential Tools for Burger Perfection
Having the right equipment makes this process effortless.
Cast Iron Skillet: Holds heat beautifully and creates that deep brown crust.
Spatula: A sturdy metal spatula helps you flip the patties cleanly.
Mixing Bowl: For gently shaping your beef patties.
Tongs: Useful for adjusting patties and handling hot cheese slices if needed.
With tools in place, let’s gather the ingredients that make this classic shine.
Ingredients You Will Need For This Classic
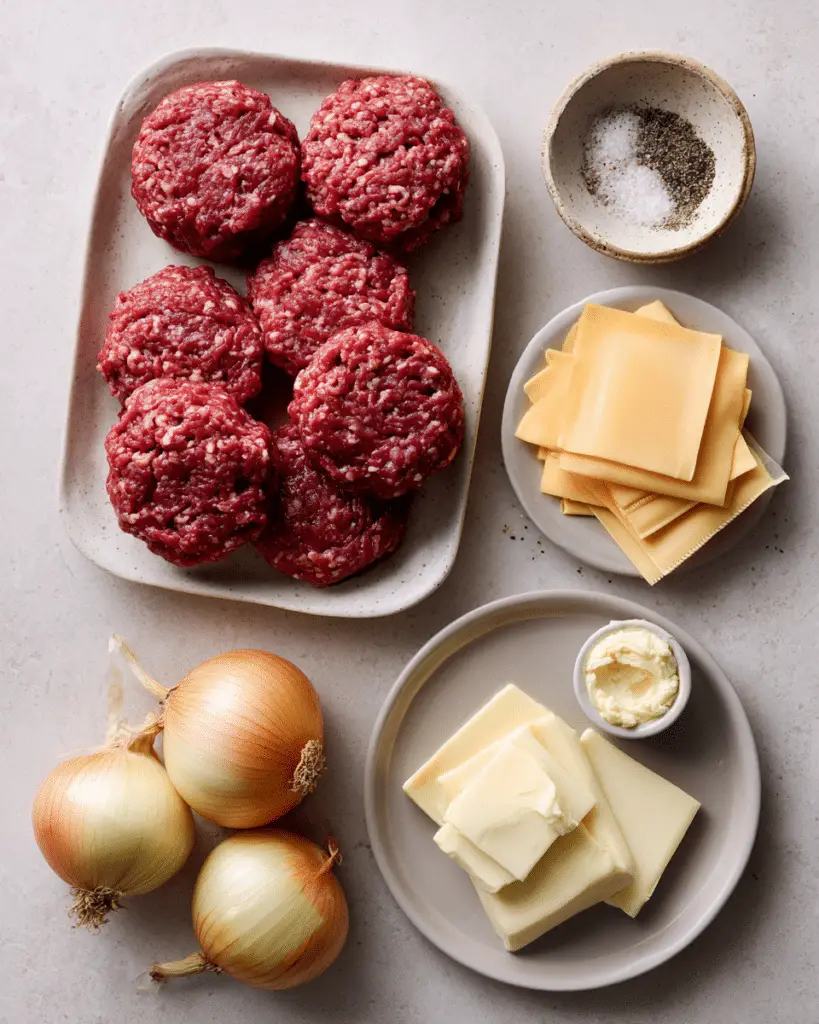
When a recipe has only a few ingredients, each one plays a big role. Quality matters here.
- Ground Beef: 1 pound, 80 percent lean, this provides the rich, juicy base.
- American Cheese Slices: 4 slices, about 20 grams each, these melt smoothly and create that signature creamy layer.
- Salt: 1 teaspoon, enhances the natural beef flavor.
- Black Pepper: 1/2 teaspoon, adds subtle warmth and depth.
Simple, right? And now let’s explore how flexible this can be.
Easy Swaps If You Want to Experiment
Sometimes you want to play a little in the kitchen.
Ground Beef: You can use ground turkey for a lighter option, though the flavor will be milder.
American Cheese: Cheddar or Colby Jack can work, just choose one that melts well.
Black Pepper: Try white pepper for a slightly different aromatic note.
But there are two ingredients that truly define this burger.
The Stars of the Show
Ground Beef: This is the heart of the dish. The fat content ensures juicy patties with a beautifully caramelized crust.
American Cheese: Its meltability is unmatched, creating that creamy layer that binds the patties together.
Now comes the fun part, cooking it.
Let’s Get Cooking
This is where everything comes together in the most satisfying way.
- Preheat Your Equipment: Heat a cast iron skillet over medium high heat until hot but not smoking.
- Combine Ingredients: In a mixing bowl, gently combine the ground beef with salt and black pepper. Do not overmix.
- Prepare Your Cooking Vessel: Lightly oil the skillet if needed, though the beef fat will usually be enough.
- Assemble the Dish: Divide the beef into four equal portions and shape into thin patties about 1/2 inch thick.
- Cook to Perfection: Place patties in the hot skillet and cook for about 3 to 4 minutes per side, until a deep brown crust forms. In the last minute of cooking, place one slice of cheese on each patty so it melts. Stack two patties with melted cheese facing inward to form each burger.
- Finishing Touches: Let the stacked patties rest for 2 minutes so the cheese settles and the juices redistribute.
- Serve and Enjoy: Serve immediately while hot and gooey.
And now let’s talk about what makes that first bite so unforgettable.
The Magic of Texture and Flavor
When you bite into this burger, you get that slight crust on the outside of the patties, followed by juicy, tender beef inside. The cheese melts into every crevice, adding creaminess that balances the savory richness.
The salt sharpens the beef flavor, while the pepper gives a gentle warmth. There is no bun to soften the experience, so every texture stands out clearly and boldly.
Extra Tips for Best Results
If you want to take it from good to unforgettable, keep these in mind.
- Use room temperature beef for more even cooking.
- Avoid pressing down on the patties while cooking, it squeezes out precious juices.
- Cook in batches if needed, overcrowding the pan lowers the heat.
Common Mistakes and How to Fix Them
Even simple recipes have a few traps.
- Overcooking the patties, which makes them dry. Stick to the timing and watch for that crust.
- Using very lean beef, which can lead to less flavor and dryness. Choose 80 percent lean.
- Skipping the resting time, which helps keep the burger juicy.
Nutrition Breakdown You Should Know
Servings: 2
Calories per serving: 620
Note: These are approximate values.
Time Needed to Make It Happen
Prep Time: 10 minutes
Cook Time: 8 minutes
Total Time: 18 minutes
Make-Ahead and Storage Tips
If you want to prep ahead, shape the patties and store them in the refrigerator for up to 24 hours, separated by parchment paper.
Leftovers can be stored in an airtight container in the fridge for up to 3 days. Reheat gently in a skillet over medium heat to maintain texture. Freezing cooked patties is possible, just wrap them tightly and freeze for up to 2 months, then thaw overnight before reheating.
Serving Ideas to Complete the Plate
Serve this burger alongside crisp lettuce leaves, sliced tomatoes, or a fresh salad for contrast. Roasted vegetables or a simple side of sautéed mushrooms pair beautifully.
If you want to keep it classic, add grilled onions on top and let them melt slightly into the cheese.
Turn Leftovers into Something New
Chop leftover patties and toss them into scrambled eggs for a hearty breakfast.
Slice and serve over a salad with a simple vinaigrette.
Crumble into a lettuce wrap with fresh vegetables for a quick lunch.
Extra Little Details That Make a Difference
Season the patties right before cooking to avoid drawing out moisture.
Use high heat for that signature crust, but adjust if your pan gets too hot.
Let the cheese fully melt before stacking for the best texture.
Make It Look Restaurant Worthy
Stack the patties neatly so the cheese peeks out just slightly. Serve on a clean white plate to highlight the rich brown crust and golden cheese.
A sprinkle of freshly cracked pepper on top adds visual appeal and aroma.
Fun Variations to Try
Add grilled onions between the patties for extra sweetness.
Top with a slice of tomato and lettuce for a lighter feel.
Add a slice of pepper jack cheese for a mild kick.
Serve with a fried egg on top for a brunch inspired twist.
FAQ’s
Q1: Can I cook this on a grill?
Yes, you can grill the patties over medium high heat for similar timing.
Q2: Can I make it dairy free?
You can use a dairy free cheese alternative that melts well.
Q3: Is this keto friendly?
Yes, it is low in carbohydrates and high in protein.
Q4: Can I freeze raw patties?
Yes, wrap them tightly and freeze for up to 2 months.
Q5: What beef is best?
80 percent lean ground beef gives the best balance of flavor and juiciness.
Q6: Can I add seasoning?
You can add garlic powder or onion powder if desired.
Q7: How do I keep patties from shrinking?
Make a small indentation in the center before cooking.
Q8: What pan works best?
A cast iron skillet gives the best crust.
Q9: Can I double the recipe?
Absolutely, just cook in batches.
Q10: Why is it called Flying Dutchman?
It is a name from the secret style menu culture and has become iconic among fans.
Conclusion
The Flying Dutchman Burger from In-N-Out proves that simple ingredients, when treated right, can create something unforgettable. Juicy beef, melted cheese, and nothing in the way. This one is bold, satisfying, and surprisingly easy to make at home. Give it a try, and I promise, you will be hooked after the first bite.
Print
Flying Dutchman Burger from In-N-Out
- Prep Time: 10 minutes
- Cook Time: 8 minutes
- Total Time: 18 minutes
- Yield: 2 servings 1x
- Category: Main Course
- Method: Stovetop
- Cuisine: American
- Diet: Low Calorie
Description
A bold, bunless burger made with two juicy beef patties and perfectly melted American cheese stacked together for a rich, savory bite that is low in carbs and high in flavor.
Ingredients
- 1 pound ground beef, 80 percent lean
- 4 slices American cheese, about 20 grams each
- 1 teaspoon salt
- 1/2 teaspoon black pepper
Instructions
- Preheat Your Equipment: Heat a cast iron skillet over medium high heat until hot but not smoking.
- Combine Ingredients: In a mixing bowl, gently combine the ground beef with salt and black pepper without overmixing.
- Prepare Your Cooking Vessel: Lightly oil the skillet if needed, though the natural fat from the beef is usually enough.
- Assemble the Dish: Divide the beef into four equal portions and shape into thin patties about 1/2 inch thick.
- Cook to Perfection: Place patties in the hot skillet and cook for 3 to 4 minutes per side until a deep brown crust forms. During the last minute of cooking, place one slice of cheese on each patty to melt. Stack two patties with melted cheese facing inward to form each burger.
- Finishing Touches: Let the stacked patties rest for 2 minutes so the juices redistribute and the cheese settles.
- Serve and Enjoy: Serve immediately while hot and melted.
Notes
- Use 80 percent lean beef for the best balance of flavor and juiciness.
- Avoid pressing down on the patties while cooking to keep them tender.
- Let the patties rest briefly before serving for maximum juiciness.
Nutrition
- Serving Size: 1 burger
- Calories: 620
- Sugar: 2g
- Sodium: 980mg
- Fat: 48g
- Saturated Fat: 20g
- Unsaturated Fat: 24g
- Trans Fat: 1.5g
- Carbohydrates: 3g
- Fiber: 0g
- Protein: 44g
- Cholesterol: 165mg
Keywords: Flying Dutchman Burger from In-N-Out, bunless burger, low carb burger, beef and cheese burger, keto burger