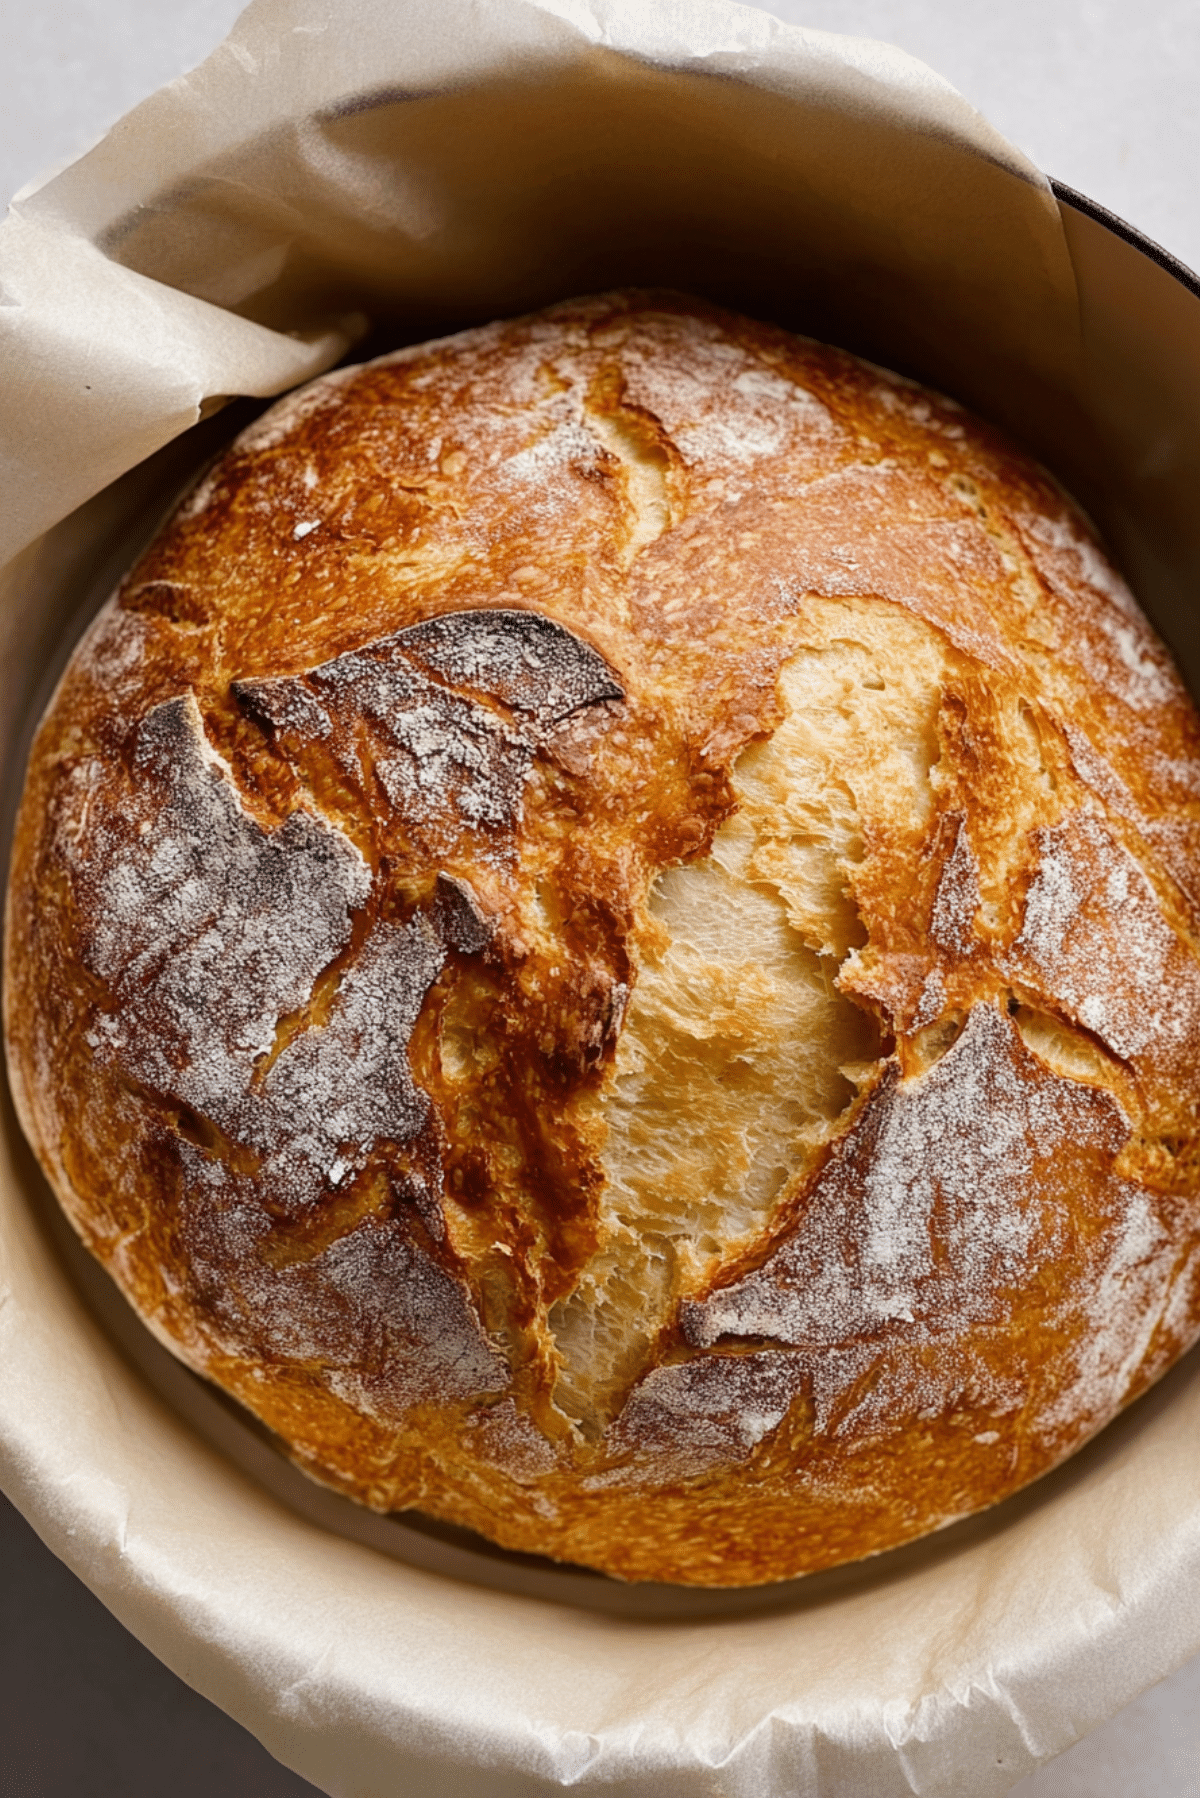
No-Knead Artisan Bread
There is something almost magical about pulling a golden, crackly loaf from the oven, especially when you know you barely touched the dough. The smell alone, warm and toasty with that subtle hint of fermentation, fills the whole kitchen and makes you feel like a true baker. Trust me, you’re going to love this. This one’s a total game-changer, especially if kneading dough has ever intimidated you. Let me tell you, it’s worth every bite.
Why This Simple Loaf Wins Every Time
Some recipes ask for complicated steps and special skills, but this one feels like a quiet little secret. You stir, you wait, and the dough does most of the work for you. The result is a crusty exterior that shatters slightly under your knife and a soft, airy interior with beautiful holes that look straight out of a bakery window.
It feels rustic, honest, and deeply satisfying. And now let’s dive into where this beloved style of bread comes from.
A Humble Method With Old-World Roots
The idea of long fermentation bread goes back centuries. Before mixers and fancy equipment, bakers relied on time. Slow rising allowed natural yeast activity to develop flavor and texture without heavy labor. This modern no-knead method became popular in home kitchens because it mirrors those traditional techniques, just simplified for busy lives.
The long rest creates that slightly tangy aroma and chewy crumb that feels almost European in character. It is simple flour, water, yeast, and salt, yet the transformation feels dramatic.
Why This Recipe Is So Reliable and Loved
This loaf keeps showing up in kitchens for good reason.
Versatile: It pairs beautifully with soups, stews, salads, or just a swipe of butter. It works for everyday dinners and special gatherings alike.
Budget-Friendly: With only four pantry staples, you can create something that tastes bakery quality without spending much at all.
Quick and Easy: Active work takes just minutes. The dough rests while you live your life.
Customizable: Add herbs, roasted garlic, or seeds if you like. The base dough welcomes creativity.
Crowd-Pleasing: That crisp crust and soft interior win people over instantly.
Make-Ahead Friendly: The long fermentation actually improves flavor, so planning ahead works in your favor.
Great for Leftovers: Day old slices make incredible toast or homemade croutons.
And now that you know why it works so well, let’s talk like a pro about making it even better.
Pro Tips for Bakery-Level Results
A few small details make a big difference.
- Use room temperature water so the yeast activates gently.
- Let the dough rest undisturbed for the full time, patience builds flavor.
- Preheat your baking vessel thoroughly, a hot surface creates that beautiful crust.
- Avoid adding too much extra flour when shaping, the dough should stay slightly sticky.
Those little adjustments create a loaf that looks and tastes professional.
Essential Tools for Success
Before we begin mixing, here are the simple tools that make the process smooth.
Large Mixing Bowl: Big enough to allow the dough to expand comfortably during fermentation.
Wooden Spoon or Spatula: For stirring the shaggy dough together evenly.
Dutch Oven or Heavy Oven-Safe Pot: This traps steam, which helps develop that crisp crust.
Clean Kitchen Towel: For covering the dough while it rises.
Now that the tools are ready, let’s look at the ingredients that make the magic happen.
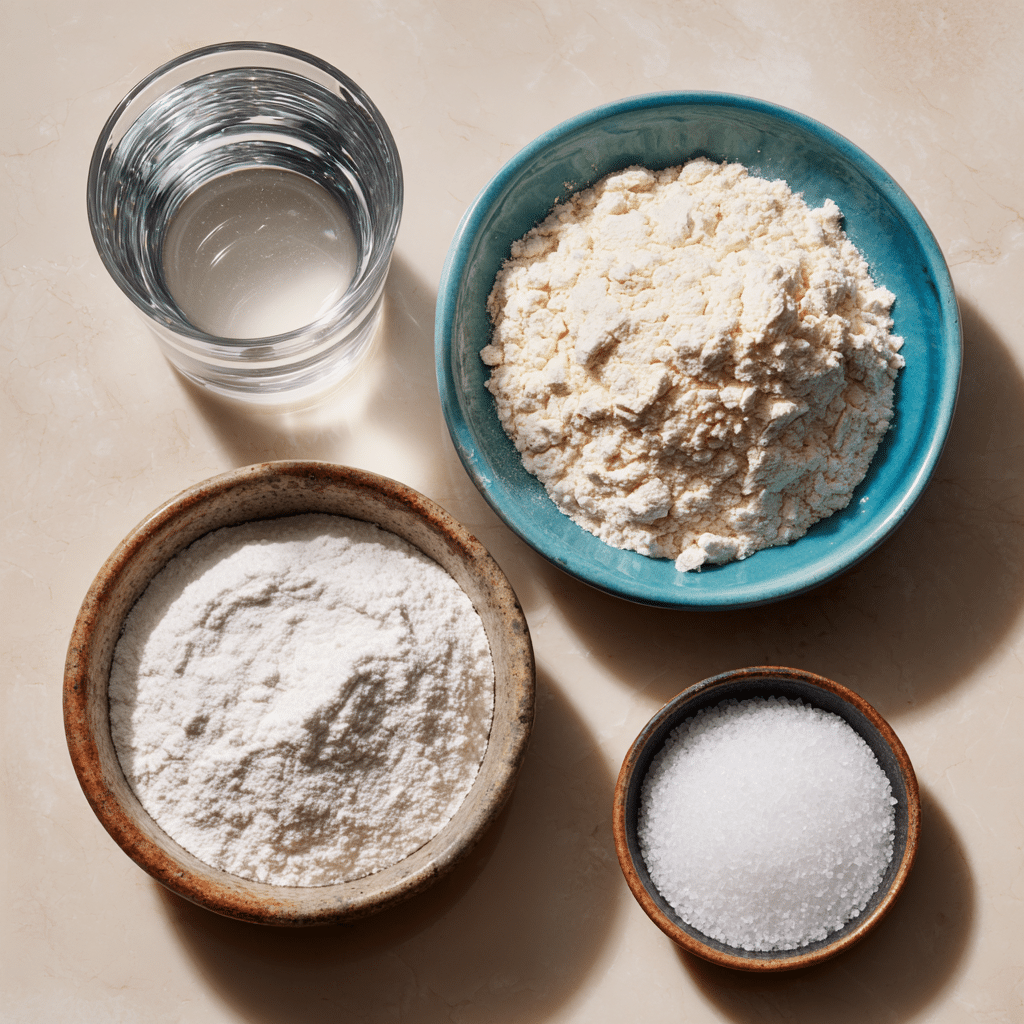
The Four Simple Ingredients That Create Magic
There is something beautiful about how basic ingredients can transform with time and heat.
- All-Purpose Flour: 3 cups, 360 grams. This forms the structure and gives the loaf its chewy crumb.
- Warm Water: 1 ½ cups, 360 milliliters. Hydrates the flour and activates the yeast.
- Active Dry Yeast: ½ teaspoon, about 2 grams. A small amount goes a long way during the long rise.
- Salt: 1 ½ teaspoons, about 9 grams. Enhances flavor and strengthens the dough.
Simple, balanced, and perfectly measured.
Easy Ingredient Swaps If Needed
Sometimes you work with what you have.
All-Purpose Flour: Substitute with bread flour for an even chewier texture.
Active Dry Yeast: Instant yeast works in the same quantity.
Salt: Sea salt or kosher salt can be used, just measure carefully.
And while we are here, let’s spotlight the stars.
Spotlight on the Key Ingredients
All-Purpose Flour: This is the backbone of the loaf, creating structure while still allowing that tender interior.
Active Dry Yeast: Though used in a tiny amount, it slowly ferments the dough, building flavor and those beautiful air pockets.
Now, it is time for the part you have been waiting for.
Let’s Bake This Beautiful Loaf Together
The process feels almost too simple, but follow these steps closely.
- Preheat Your Equipment: Place your Dutch oven with lid inside the oven and preheat to 450°F, 230°C, for at least 30 minutes before baking.
- Combine Ingredients: In a large mixing bowl, stir together the flour, yeast, and salt. Pour in the warm water and mix until a shaggy, sticky dough forms.
- Prepare Your Cooking Vessel: After the dough has risen for 12 to 18 hours at room temperature, lightly flour a surface and gently shape the dough into a round.
- Assemble the Dish: Carefully remove the hot Dutch oven, place the dough inside on parchment if desired, and cover with the lid.
- Cook to Perfection: Bake covered for 30 minutes, then remove the lid and bake another 10 to 15 minutes until deeply golden brown.
- Finishing Touches: Remove the loaf and let it cool on a wire rack for at least 30 minutes before slicing.
- Serve and Enjoy: Slice with a sharp knife and enjoy the crisp crust and airy crumb.
The Secret Behind That Crust and Crumb
The trapped steam inside the covered pot creates a humid environment, allowing the loaf to expand fully before the crust sets. That is how you get those dramatic splits on top. As the lid comes off, the crust turns deeply golden and crisp. Inside, the crumb stays soft, slightly chewy, and filled with airy holes.
It is rustic, hearty, and full of flavor developed slowly over time.
Helpful Baking Tips for Even Better Results
If you want to refine your loaf even more, keep these in mind.
- Let the bread cool completely before slicing, this protects the crumb structure.
- Use parchment paper for easy transfer into the hot pot.
- Do not rush the fermentation, longer rising deepens the flavor.
Common Mistakes and How to Avoid Them
Even simple recipes need a little care.
- Do not add too much extra flour when shaping, the dough should remain soft.
- Do not skip preheating the pot, it is essential for crust formation.
- Do not cut into the loaf too early, steam needs time to settle.
Nutritional Overview
Servings: 12 slices
Calories per serving: 150
Note: These are approximate values.
Time Commitment Breakdown
Prep Time: 10 minutes
Cook Time: 45 minutes
Total Time: 55 minutes active, plus 12 to 18 hours rising
Make-Ahead and Storage Advice
You can prepare the dough the night before and bake the next day. Store the baked loaf at room temperature in a paper bag for up to 2 days. For longer storage, slice and freeze in an airtight container for up to 2 months. Reheat slices in a toaster or warm oven to revive that crust.
Serving Ideas to Elevate Every Slice
Serve it alongside hearty soups, olive oil and balsamic dip, or creamy spreads. Toasted slices with avocado or soft cheese feel like a café treat at home. It also makes a beautiful base for sandwiches.
Reinventing Leftovers Creatively
Turn day old slices into crunchy croutons. Blend into breadcrumbs. Make thick slices for French toast. The texture holds up beautifully.
Extra Tips for Consistent Success
Score the top lightly for decorative cracks. Use a kitchen scale for precise flour measurement. Keep your kitchen at a moderate room temperature for steady fermentation.
Make It a Stunning Centerpiece
Present the loaf on a wooden board with a bread knife beside it. Light flour dusting on top gives it that bakery charm. The golden crust alone makes it feel special.
Fun Variations to Experiment With
- Add 1 tablespoon dried rosemary for an herbal twist.
- Stir in ½ cup shredded cheese for extra richness.
- Mix in ¼ cup sunflower seeds for crunch.
- Replace ½ cup flour with whole wheat flour for deeper flavor.
FAQ’s
Q1: Can I use instant yeast instead of active dry?
Yes, use the same quantity and mix it directly with the flour.
Q2: Why is my dough so sticky?
This is normal. High hydration creates the airy crumb.
Q3: Can I shorten the rise time?
Long fermentation builds flavor, so it is best not to rush it.
Q4: Do I need a Dutch oven?
A heavy covered pot works best for trapping steam.
Q5: Why did my bread turn out dense?
The dough may not have risen long enough.
Q6: Can I double the recipe?
Yes, but bake loaves separately for best results.
Q7: How do I know it is done?
The crust should be deep golden and the loaf should sound hollow when tapped.
Q8: Can I add herbs?
Absolutely, dried herbs mix in easily with the flour.
Q9: Is this suitable for vegetarians?
Yes, it contains no animal products.
Q10: How should I slice it?
Use a serrated knife and gentle sawing motion.
Conclusion
There is something deeply comforting about baking bread at home, especially when it feels this simple. The crisp crust, the soft interior, and that irresistible aroma make the whole experience unforgettable. Trust me, once you try this, it will become a staple in your kitchen. Let me tell you, it is worth every bite.
Print
No-Knead Artisan Bread
- Prep Time: 10 minutes
- Cook Time: 45 minutes
- Total Time: 55 minutes active, plus 12 to 18 hours rising
- Yield: 12 slices 1x
- Category: Bread
- Method: Baking
- Cuisine: European-inspired
- Diet: Vegetarian
Description
This no-knead artisan bread delivers a crisp golden crust and a soft, airy interior with minimal effort. With just four pantry staples and a long, slow rise, you get bakery-style flavor and texture right at home.
Ingredients
- 3 cups all-purpose flour (360 grams)
- 1 1/2 cups warm water (360 milliliters)
- 1/2 teaspoon active dry yeast (about 2 grams)
- 1 1/2 teaspoons salt (about 9 grams)
Instructions
- Place a Dutch oven with its lid inside the oven and preheat to 450°F (230°C) for at least 30 minutes before baking.
- In a large mixing bowl, stir together the flour, active dry yeast, and salt. Pour in the warm water and mix until a shaggy, sticky dough forms.
- Cover the bowl with a clean kitchen towel and let the dough rise at room temperature for 12 to 18 hours, until doubled in size and bubbly.
- Lightly flour a work surface and gently shape the dough into a round without overworking it.
- Carefully remove the hot Dutch oven from the oven. Place the dough inside, using parchment paper if desired, and cover with the lid.
- Bake covered for 30 minutes. Remove the lid and bake for an additional 10 to 15 minutes, until the crust is deep golden brown.
- Remove the bread from the pot and cool on a wire rack for at least 30 minutes before slicing and serving.
Notes
- For a chewier texture, substitute bread flour for all-purpose flour in the same quantity.
- Do not skip preheating the Dutch oven, as it helps create the crisp crust.
- Allow the bread to cool completely before slicing to maintain its airy crumb structure.
Nutrition
- Serving Size: 1 slice
- Calories: 150
- Sugar: 0.5 g
- Sodium: 290 mg
- Fat: 0.5 g
- Saturated Fat: 0.1 g
- Unsaturated Fat: 0.3 g
- Trans Fat: 0 g
- Carbohydrates: 31 g
- Fiber: 1 g
- Protein: 5 g
- Cholesterol: 0 mg
Keywords: no-knead artisan bread, crusty homemade bread, easy bread recipe, dutch oven bread