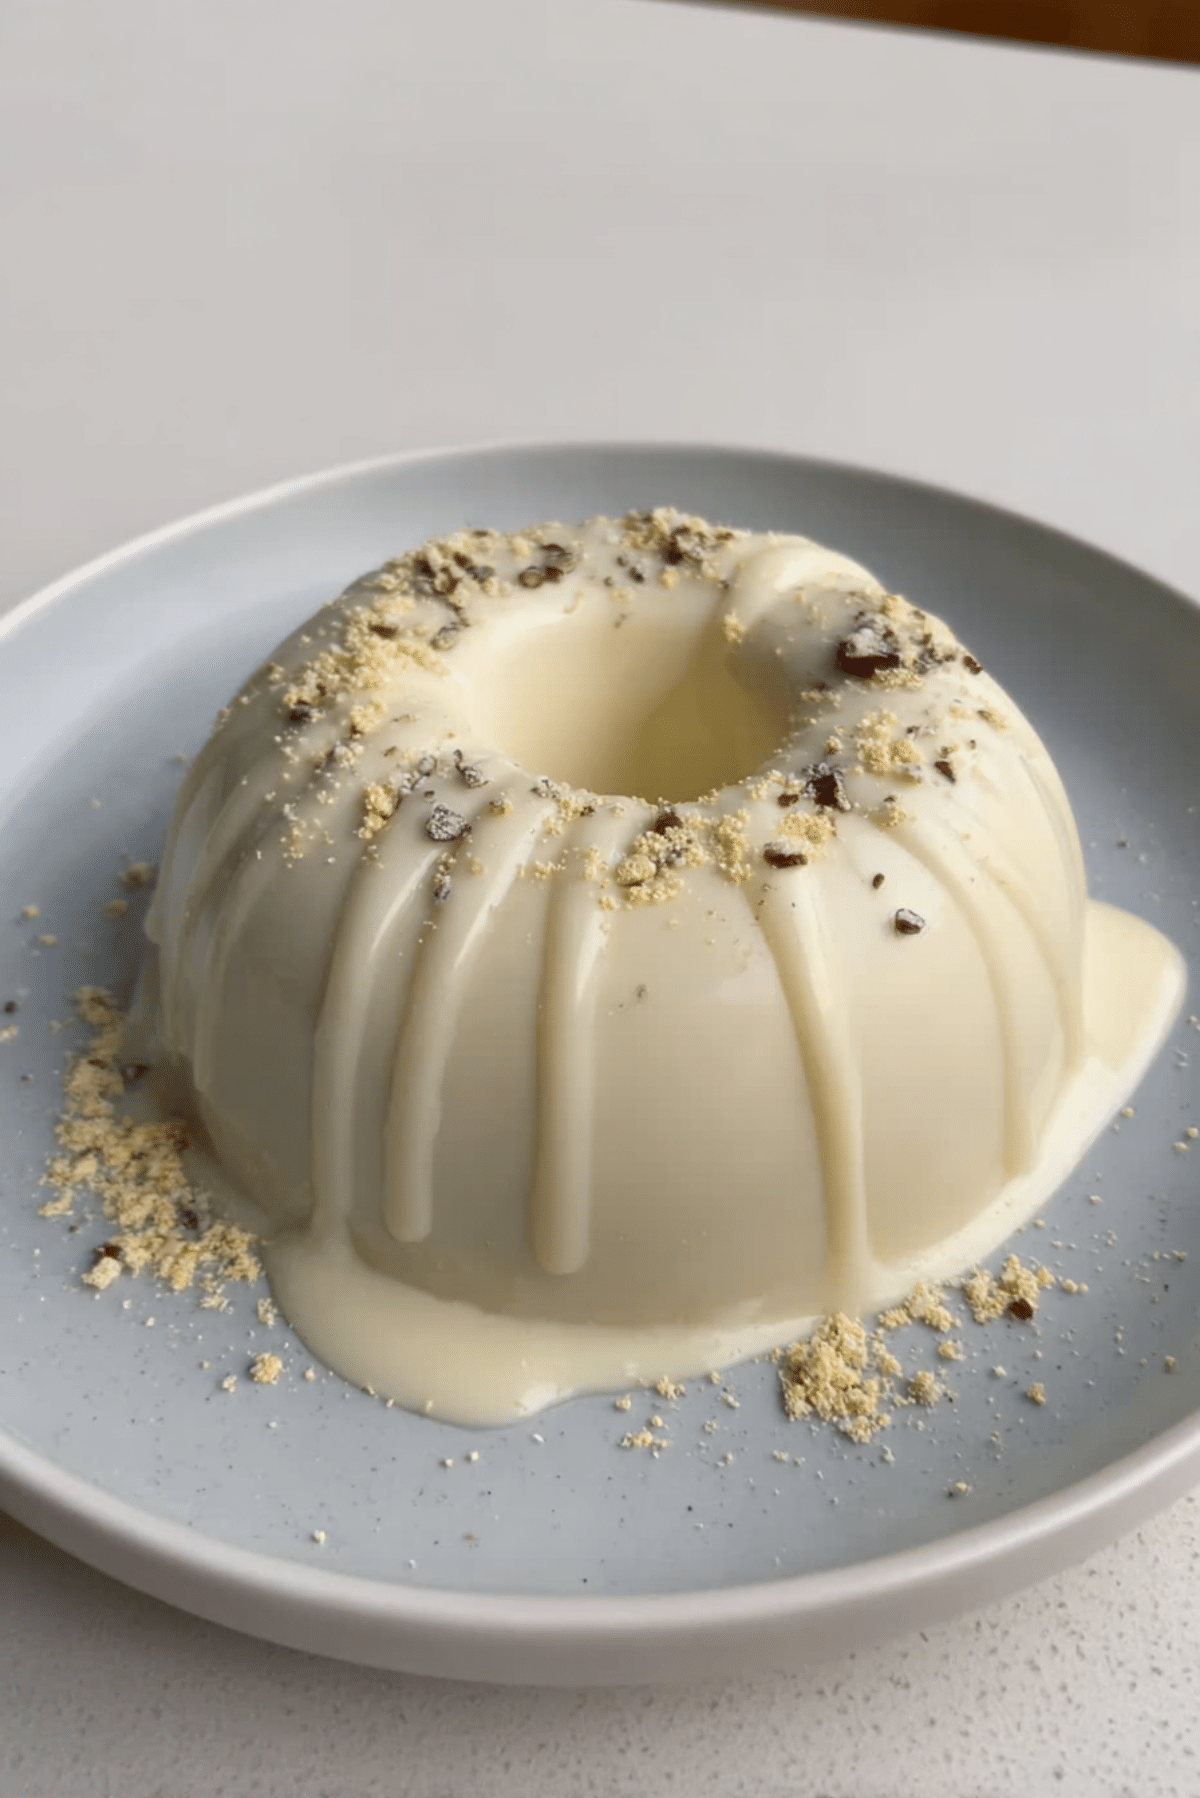
Giant White Chocolate Bonbon
There’s something magical about cracking through a thin, glossy white chocolate shell to discover a velvety, melt-in-your-mouth center. This giant white chocolate bonbon feels like unwrapping a treasure, one luxurious bite at a time. Smooth, creamy, and delicately sweet, it’s the kind of treat that feels like it came straight from a high-end chocolate boutique but surprise, it’s made right in your own kitchen.
Why This Giant White Chocolate Bonbon Steals the Spotlight
Whether you’re crafting a showstopper for a special occasion or simply indulging a sweet craving, this bonbon hits all the right notes. It’s creamy, elegant, and totally irresistible, with a silky interior that melts on the tongue and a shell that snaps gently between your teeth.
A Bit of Bonbon History
Bonbons have French roots, dating back to the 17th century when they were offered as luxurious little confections at royal courts. The name comes from the French word “bon,” meaning “good”—and trust me, they live up to it. Originally made with sugar-coated nuts or fruits, modern bonbons evolved into the chocolate-drenched gems we love today, often filled with ganache, caramel, or other rich centers.
Why You’ll Love Making This One at Home
Here’s why this recipe belongs in your repertoire:
Versatile: You can switch up the filling flavors or chocolate coating to suit any mood or event.
Budget-Friendly: Far cheaper than purchasing gourmet chocolates, especially when you’re making a big one.
Quick and Easy: Minimal ingredients, no special molds required, and straightforward steps.
Customizable: Add crushed nuts, dried fruit, or even a hint of citrus zest to the filling.
Crowd-Pleasing: Its luxurious look and taste always impress guests.
Make-Ahead Friendly: Prep the center and coat later, or keep it chilled until ready to serve.
Great for Leftovers: Slice it up and add to desserts, or simply snack on pieces throughout the week.
Pro Secrets for Chocolate Perfection
To take your bonbon game to the next level, keep these expert tips in mind:
- Use high-quality white chocolate with at least 30% cocoa butter for smooth melting and proper setting.
- Make sure your cream and butter are room temperature to prevent seizing when mixed.
- Chill the filling well before coating so it holds shape under the warm chocolate.
- Use a double boiler or microwave in short bursts to melt chocolate slowly and evenly.
- For the gold dust, use a soft brush or fine sieve to apply for an elegant finish.
Essential Tools for Success
Keep it simple. Just a few basic tools will do:
Mixing Bowl: For blending the creamy filling to a silky texture.
Heatproof Bowl + Saucepan: To melt your white chocolate gently over steam.
Spatula: Helps you get every last bit of filling and chocolate out.
Parchment Paper: Keeps your work surface clean and prevents sticking.
Spoon or Small Scoop: To shape the filling easily before chilling.
Ingredients You’ll Need for This Giant Treat
Every element plays a role in building flavor and texture. Here’s what you’ll need:
- White Chocolate: 12 ounces, finely chopped. This forms the luscious outer shell.
- Heavy Cream: 1/4 cup. Adds richness to the filling for that melt-in-your-mouth feel.
- Unsalted Butter: 2 tablespoons. Gives the center its soft, creamy body.
- Powdered Sugar: 1/3 cup. Lightly sweetens the filling without graininess.
- Vanilla Extract: 1 teaspoon. Enhances all the other flavors and adds depth.
- Edible Gold Dust: For garnish. A touch of luxury to finish your bonbon.
Ingredient Swaps You Can Count On
Running low or need to adjust? Try these:
White Chocolate: Milk chocolate or dark chocolate for a bolder flavor.
Heavy Cream: Coconut cream for a dairy-free twist.
Unsalted Butter: Use margarine or vegan butter for a plant-based version.
Powdered Sugar: Blend granulated sugar until fine if needed.
Vanilla Extract: Almond extract for a nutty hint.
Ingredient Spotlight
White Chocolate: Choose real white chocolate that lists cocoa butter as a primary ingredient. It melts beautifully and gives the perfect snap.
Heavy Cream: The richness here ensures the filling stays luscious and doesn’t turn chalky or dry.

Let’s Make It Together
And now, let’s dive into the fun part the actual making. It’s simpler than you think!
- Preheat Your Equipment:
No need to preheat an oven, but make sure your double boiler setup or microwave-safe bowl is ready to go. - Combine Ingredients:
In a saucepan over low heat, combine heavy cream and butter until melted. Remove from heat, then stir in powdered sugar and vanilla extract until smooth. - Prepare Your Cooking Vessel:
Line a small bowl or mold with parchment paper. Pour in the filling mixture and chill in the fridge until firm (about 30 minutes). - Assemble the Dish:
Once the filling is firm, shape it into a dome or ball. Melt the white chocolate in a heatproof bowl over simmering water or in the microwave, stirring until smooth. - Cook to Perfection:
Pour or spoon melted white chocolate over the chilled filling to coat completely. Let set in the fridge for another 20 minutes. - Finishing Touches:
Once set, dust lightly with edible gold powder using a soft brush or fine sieve. - Serve and Enjoy:
Slice into wedges or break apart and enjoy the creamy, dreamy layers in every bite.
Texture and Flavor Magic
The first thing you’ll notice is the smooth snap of the white chocolate shell. Then comes the rich, creamy center sweet but balanced, with a kiss of vanilla and buttery softness. Each bite feels like it melts effortlessly, yet offers just enough texture contrast to keep things interesting.
Smart Kitchen Tips to Make it Easier
Here are a few tips to make the process even smoother:
- Use gloves when shaping the filling to prevent melting from your hands.
- If the chocolate seizes, add a teaspoon of coconut oil to smooth it out.
- Double the batch and make mini bonbons too same base, more variety.
Common Pitfalls and How to Avoid Them
Keep an eye out for these mistakes:
- Chocolate Overheating: Heat it gently and stir often to prevent burning.
- Runny Filling: Chill the mixture well before shaping.
- Uneven Coating: Pour chocolate slowly and rotate the bonbon for an even finish.
- Gold Dust Clumps: Use a dry brush or sifter for a light, even touch.
Nutritional Breakdown
Servings: 8 slices
Calories per serving: 245
Note: These are approximate values.
Timing is Everything
Prep Time: 15 minutes
Cook Time: 10 minutes
Total Time: 25 minutes
Storage and Make-Ahead Tips
You can absolutely make this bonbon ahead of time. Simply store it in an airtight container in the fridge for up to 5 days. You can also freeze it for longer storage just wrap tightly in plastic and thaw in the fridge overnight before serving.
Serving It Up
Slice it like a cake and serve on dessert plates with fresh berries or a drizzle of raspberry coulis. It also pairs beautifully with coffee, tea, or even a scoop of vanilla ice cream.
Leftover Magic
Turn leftovers into:
- Crumbled topping for cupcakes or ice cream
- Stirred into hot milk for a white chocolate drink
- Layered into a trifle or parfait for texture and creaminess
Extra Touches for Success
- Use a silicone mold if you want a perfectly round bonbon.
- Warm your knife before slicing for clean cuts.
- Add a sprinkle of sea salt for contrast against the sweetness.
Make It a Showstopper
To really wow, place your bonbon on a marble board, slice a wedge slightly, and scatter some gold-dusted crumbs around. Add a few fresh berries or edible flowers for that final flourish.
Variations to Try
- Citrus Zest Twist: Add orange or lemon zest to the filling for brightness.
- Nutty Crunch: Stir in crushed pistachios or almonds.
- Berry Center: Spoon a bit of raspberry jam into the center before shaping.
- Spiced Delight: Add a pinch of cardamom or cinnamon for warmth.
- Coffee Kick: Mix instant espresso into the filling for a mocha vibe.
FAQ’s
Q1: Can I make this without gold dust?
A1: Absolutely. It’s just for flair. You can skip it or use a sprinkle of powdered sugar.
Q2: How long does the bonbon last in the fridge?
A2: It stays fresh for up to 5 days in an airtight container.
Q3: Can I make this dairy-free?
A3: Yes, use dairy-free chocolate, vegan butter, and coconut cream.
Q4: Do I need a special mold?
A4: Nope! A small bowl lined with parchment works perfectly.
Q5: Can I freeze the bonbon?
A5: Yes, wrap it well and freeze for up to a month. Thaw overnight in the fridge.
Q6: What if I don’t have vanilla extract?
A6: Almond extract or even maple syrup can be a great sub.
Q7: My chocolate shell cracked. What went wrong?
A7: It may have set too quickly or unevenly. Try coating in two thin layers instead of one thick one.
Q8: Can I make smaller bonbons from this recipe?
A8: Totally! Just divide the filling and coat each piece individually.
Q9: How do I get the glossy finish on the shell?
A9: Use quality chocolate and let it set slowly at room temp before chilling.
Q10: Is this recipe gluten-free?
A10: Yes, there are no gluten-containing ingredients involved.
Conclusion
This giant white chocolate bonbon is the kind of dessert that makes people say “wow” before they even taste it and then again after the first bite. Whether you’re gifting it, sharing it, or savoring it solo, it’s a sweet indulgence that feels extra special. Trust me, you’re going to love this.
Print
Giant White Chocolate Bonbon
- Prep Time: 15 minutes
- Cook Time: 10 minutes
- Total Time: 25 minutes
- Yield: 1 large bonbon (serves 8) 1x
- Category: Dessert
- Method: No-Bake
- Cuisine: French-inspired
- Diet: Vegetarian
Description
A luxurious and creamy giant white chocolate bonbon with a smooth filling and glossy shell, finished with a touch of edible gold. Perfect for special occasions or a rich personal treat.
Ingredients
- 12 ounces white chocolate, finely chopped
- 1/4 cup heavy cream
- 2 tablespoons unsalted butter
- 1/3 cup powdered sugar
- 1 teaspoon vanilla extract
- Edible gold dust, for garnish
Instructions
- In a small saucepan, heat the heavy cream and butter over low heat until melted.
- Remove from heat and stir in powdered sugar and vanilla extract until smooth.
- Line a small bowl or mold with parchment paper and pour in the filling. Chill until firm (about 30 minutes).
- Shape the chilled filling into a dome or ball.
- Melt the white chocolate in a heatproof bowl over simmering water or in the microwave, stirring until smooth.
- Coat the chilled filling completely with melted white chocolate. Let set in the fridge for 20 minutes.
- Dust with edible gold using a soft brush or sifter before serving.
Notes
- Use high-quality white chocolate with at least 30% cocoa butter for the best results.
- Chill the filling thoroughly before coating to maintain shape.
- Warm your knife slightly before slicing for clean cuts.
- Store leftovers in the fridge for up to 5 days or freeze for longer storage.
Nutrition
- Serving Size: 1 slice
- Calories: 245
- Sugar: 20g
- Sodium: 25mg
- Fat: 17g
- Saturated Fat: 11g
- Unsaturated Fat: 5g
- Trans Fat: 0g
- Carbohydrates: 22g
- Fiber: 0g
- Protein: 2g
- Cholesterol: 20mg
Keywords: white chocolate bonbon, homemade bonbon, no-bake dessert, giant bonbon, special occasion treat