No Knead Bread Rolls
There is something quietly magical about pulling a tray of warm bread rolls out of the oven, especially when you barely had to knead a thing. The crust comes out lightly golden and crisp, while the inside stays soft, airy, and just begging to be torn apart. Trust me, you’re going to love this. It is simple, comforting, and feels like a little win in the kitchen every single time.
Why These Soft and Golden Rolls Feel Like Home
It all starts with the aroma. As the dough bakes, your kitchen fills with that warm, slightly toasty scent that feels like a hug. These rolls have a delicate crisp exterior, then you break one open and the inside is fluffy and tender. This one’s a total game-changer because it gives you bakery-style bread without the effort you might expect.
And now let’s talk about where this style of baking comes from, because there is a little story behind it.
A Simple Tradition Rooted in Time
No knead bread became popular as a way to simplify traditional bread-making methods that often required time and strength. Home bakers wanted something easier, something more forgiving, and that is exactly what this method delivers. While classic bread techniques go back centuries, this modern approach makes it accessible to anyone, even if it is your very first time baking.
And now that you know the story behind it, let’s look at why this recipe works so well every single time.
Why You’ll Keep Coming Back to This Recipe
There is a reason these rolls quickly become a favorite in many kitchens.
Versatile: These rolls pair beautifully with soups, salads, or even a simple spread of butter and jam. They fit into almost any meal without effort.
Budget-Friendly: The ingredients are simple pantry staples, so you do not need anything fancy to get amazing results.
Quick and Easy: No kneading means less work and less time spent shaping dough. It is perfect for busy days.
Customizable: You can easily add herbs, garlic, or even a sprinkle of seeds on top for a different twist.
Crowd-Pleasing: Soft, warm bread is always a hit. Everyone reaches for seconds.
Make-Ahead Friendly: The dough can rest and develop flavor while you focus on other things.
Great for Leftovers: If you somehow have extras, they toast beautifully the next day.
And now let’s move into a few expert tips that will make your rolls turn out just right.
Little Secrets That Make a Big Difference
Even simple recipes benefit from a few insider tricks.
- Let the dough rest long enough so it develops those airy bubbles inside.
- Use warm water, not hot, to activate the yeast gently.
- Do not over-handle the dough when shaping, keep it light and airy.
- Bake until the tops are deeply golden for that perfect texture contrast.
Now that you are feeling confident, let’s check what tools you will need before getting started.
Tools That Make Baking Smooth and Easy
Having the right tools makes the process feel effortless.
Mixing Bowl: A large bowl gives the dough space to rise comfortably.
Wooden Spoon or Spatula: Perfect for combining everything without overworking the dough.
Baking Tray: Holds the rolls and helps them bake evenly.
Parchment Paper: Prevents sticking and makes cleanup simple.
Kitchen Towel: Helps cover the dough while it rests.
And now let’s gather the ingredients that bring everything together.
Ingredients That Create Soft and Fluffy Rolls
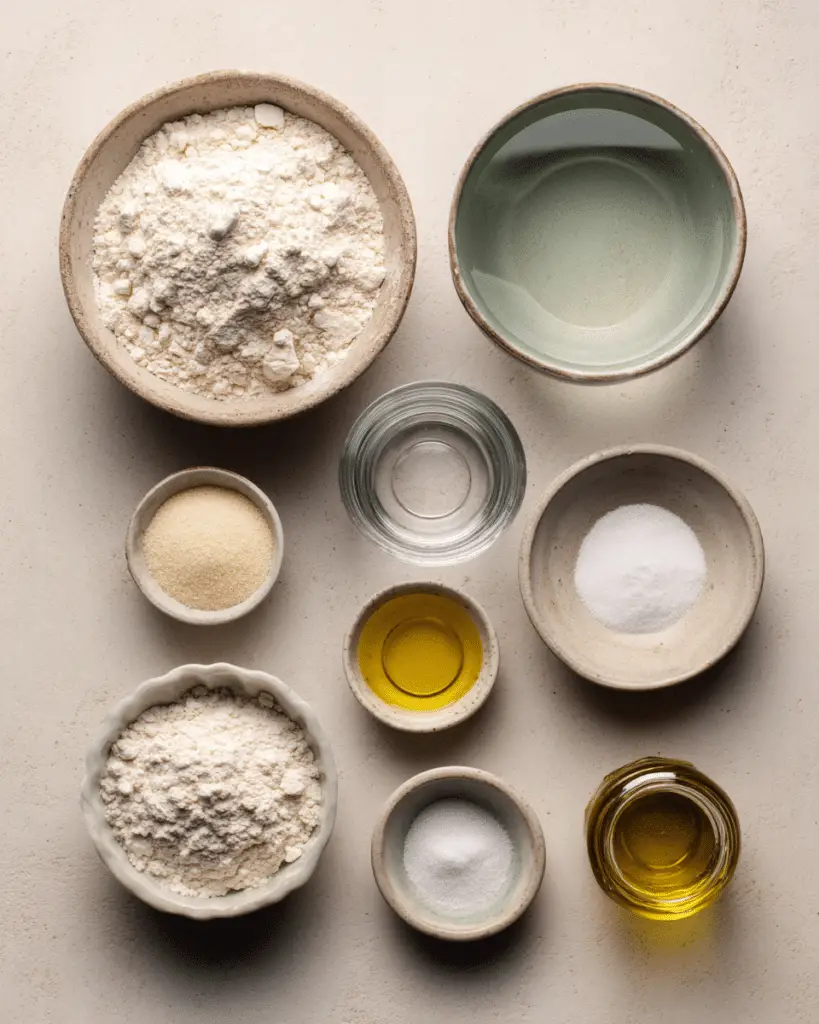
There is something satisfying about how a few simple ingredients can turn into something so comforting.
- All-Purpose Flour: 3 cups, forms the structure and gives the rolls their soft crumb.
- Warm Water: 1 1/2 cups, activates the yeast and hydrates the dough.
- Instant Yeast: 2 teaspoons, helps the dough rise and become airy.
- Salt: 1 teaspoon, enhances flavor and balances the dough.
- Sugar: 1 tablespoon, feeds the yeast and adds a subtle sweetness.
- Olive Oil: 2 tablespoons, adds moisture and a soft texture.
And now let’s talk about how you can adjust things if needed.
Easy Swaps You Can Try
Sometimes you want to tweak things a little, and that works beautifully here.
All-Purpose Flour: Whole wheat flour for a nuttier taste.
Olive Oil: Melted butter for a richer flavor.
Sugar: Honey for a slightly deeper sweetness.
Instant Yeast: Active dry yeast, just dissolve it first in warm water.
And now, let’s highlight a couple of key ingredients that truly make this recipe shine.
The Stars of the Recipe
Instant Yeast: This is what brings the dough to life, creating that light, airy texture we all love.
Olive Oil: Adds softness and keeps the rolls tender even after they cool.
Now comes the fun part, bringing everything together.
Let’s Bake These Soft Rolls Together
This is where the magic happens, and it is easier than you might think.
- Preheat Your Equipment: Set your oven to 375°F and line a baking tray with parchment paper.
- Combine Ingredients: In a large bowl, mix flour, yeast, salt, and sugar. Add warm water and olive oil, then stir until a sticky dough forms.
- Prepare Your Cooking Vessel: Lightly grease the bowl and cover it with a towel.
- Assemble the Dish: Let the dough rest for about 1 hour until it doubles in size. Then gently shape into small rolls.
- Cook to Perfection: Place the rolls on the tray and bake for 20 minutes until golden brown.
- Finishing Touches: Let them cool slightly so the texture sets perfectly.
- Serve and Enjoy: Serve warm and enjoy that soft, fluffy bite.
And now let’s take a moment to appreciate the texture and flavor.
A Perfect Balance of Texture and Flavor
Each roll has a gentle crisp on the outside that gives way to a soft and airy interior. The flavor is simple yet comforting, slightly savory with just a hint of sweetness. It is the kind of bread that does not need much, yet pairs with everything.
And now, a few helpful tips to make things even smoother.
Helpful Tips for the Best Results
- Keep your dough slightly sticky, it helps create a softer texture.
- Do not rush the rise time, patience makes better bread.
- Space the rolls evenly so they bake uniformly.
Now let’s make sure you avoid a few common mistakes.
Common Mistakes to Watch Out For
- Using water that is too hot can kill the yeast, keep it warm, not hot.
- Adding too much flour can make the rolls dense.
- Skipping the resting time can lead to flat, heavy rolls.
And now, let’s quickly go over the nutrition and timing details.
Nutrition Snapshot
Servings: 8
Calories per serving: 180
Note: These are approximate values.
Time Breakdown
Prep Time: 10 minutes
Cook Time: 20 minutes
Total Time: 30 minutes
And now let’s talk about storing and making ahead.
Make-Ahead and Storage Tips
You can prepare the dough ahead of time and let it rest in the fridge overnight. Once baked, store the rolls in an airtight container at room temperature for up to two days. For longer storage, freeze them and reheat in the oven to bring back that fresh texture.
And now let’s explore how to serve them.
Serving Ideas to Make Them Shine
Serve these rolls warm with butter, alongside a hearty soup, or as a base for mini sandwiches. They also work beautifully with dips and spreads for a casual gathering.
And if you have leftovers, here is how to transform them.
Turn Leftovers Into Something New
Slice and toast them for breakfast, turn them into mini sliders, or use them as a base for garlic bread. Let me tell you, it is worth every bite.
And now, a few final tips to make things even easier.
Extra Tips for Success
Keep your ingredients at room temperature for better mixing. Always check your oven temperature, as slight differences can affect baking. And most importantly, enjoy the process.
And now, let’s make your rolls look as good as they taste.
Make Them Look Bakery-Worthy
Brush the tops lightly with oil before baking for a glossy finish. A small dusting of flour adds that rustic touch. Arrange them neatly for a clean presentation.
And now, let’s explore a few fun variations.
Variations to Try
Add garlic and herbs for a savory twist. Mix in shredded cheese for a richer bite. Try adding seeds on top for texture. Or even make them slightly sweet with a touch of cinnamon and sugar.
FAQ’s
Q1: Can I use active dry yeast instead?
Yes, just dissolve it in warm water before mixing.
Q2: Why is my dough too sticky?
It should be slightly sticky, but you can add a little flour if needed.
Q3: Can I make the dough ahead?
Yes, refrigerate it overnight for deeper flavor.
Q4: How do I know they are done baking?
They should be golden brown on top.
Q5: Can I freeze them?
Yes, they freeze well and reheat nicely.
Q6: Can I add toppings?
Absolutely, seeds or herbs work great.
Q7: What if my rolls are dense?
They may not have risen long enough.
Q8: Can I use whole wheat flour?
Yes, but expect a denser texture.
Q9: How should I reheat them?
Warm them in the oven for best results.
Q10: Can I double the recipe?
Yes, just keep the proportions the same.
Conclusion
There is something deeply satisfying about baking your own bread, especially when it is this simple. These rolls bring comfort, warmth, and a little bit of joy to your table. Give them a try, and you will see just how easy and rewarding it can be.
Print
No Knead Bread Rolls
- Prep Time: 10 minutes
- Cook Time: 20 minutes
- Total Time: 30 minutes
- Yield: 8 rolls 1x
- Category: Bread
- Method: Baking
- Cuisine: International
- Diet: Vegetarian
Description
Soft, fluffy no knead bread rolls with a golden crust and airy interior, perfect for any meal with minimal effort.
Ingredients
- 3 cups all-purpose flour
- 1 1/2 cups warm water
- 2 teaspoons instant yeast
- 1 teaspoon salt
- 1 tablespoon sugar
- 2 tablespoons olive oil
Instructions
- Preheat your oven to 375°F and line a baking tray with parchment paper.
- In a large bowl, combine flour, instant yeast, salt, and sugar. Add warm water and olive oil, then mix until a sticky dough forms.
- Lightly grease the bowl, cover it with a towel, and let the dough rest for 1 hour until doubled in size.
- Gently shape the dough into small rolls without overworking it.
- Place the rolls onto the prepared baking tray, spacing them evenly.
- Bake for 20 minutes until the tops are golden brown.
- Remove from the oven, let cool slightly, then serve warm.
Notes
- Keep the dough slightly sticky for the best soft texture.
- Do not use hot water as it can kill the yeast.
- Let the dough rise fully for a light and airy result.
- Store leftovers in an airtight container or freeze for longer storage.
Nutrition
- Serving Size: 1 roll
- Calories: 180
- Sugar: 1g
- Sodium: 150mg
- Fat: 4g
- Saturated Fat: 0.5g
- Unsaturated Fat: 3g
- Trans Fat: 0g
- Carbohydrates: 30g
- Fiber: 1g
- Protein: 5g
- Cholesterol: 0mg
Keywords: no knead bread rolls, easy bread recipe, homemade rolls, soft bread rolls, quick baking