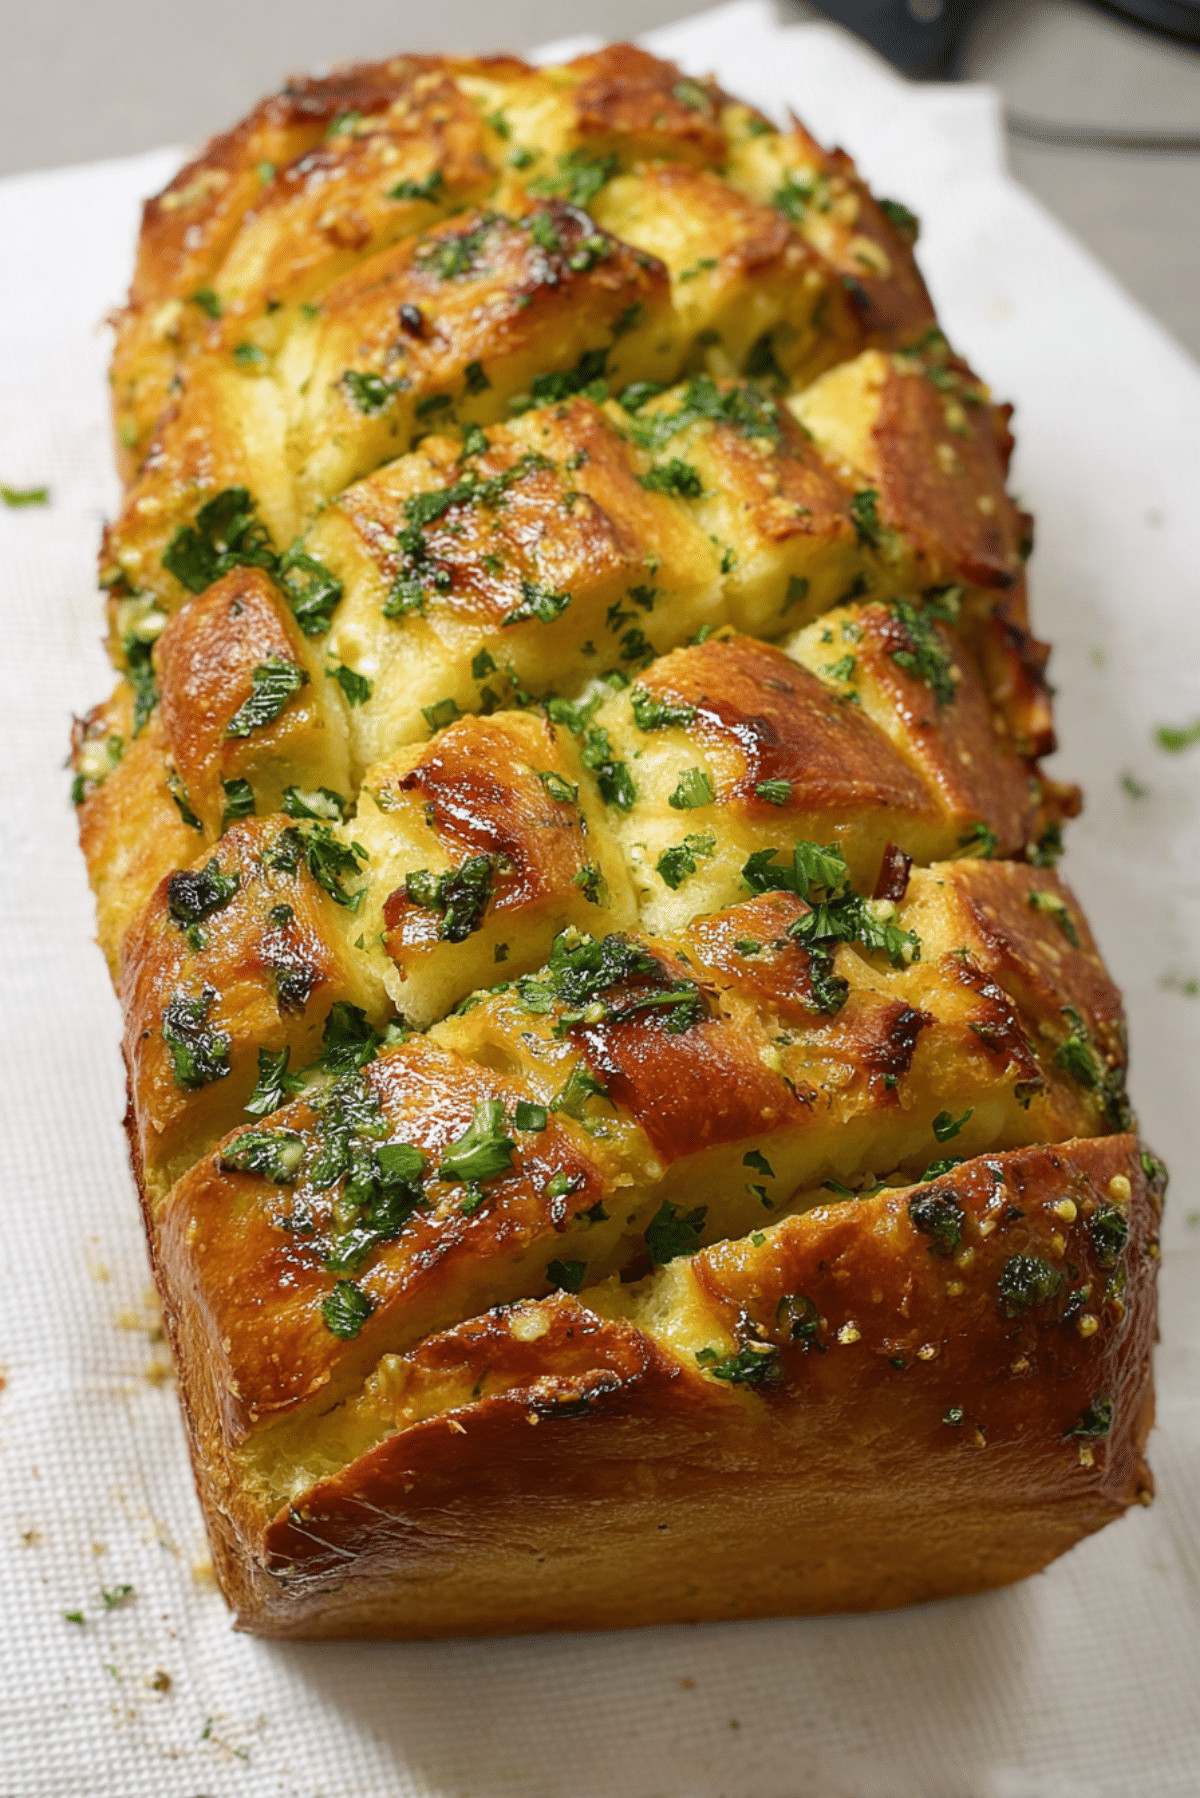
Pull Apart Garlic Bread
There is something almost magical about a warm loaf of pull apart garlic bread sitting on the table, golden and glistening, just waiting to be torn into. The aroma of butter, garlic, and fresh herbs fills the kitchen in the most comforting way. Trust me, you’re going to love this. Each piece pulls away soft and fluffy, with crispy edges and gooey cheese tucked in between, and let me tell you, it’s worth every bite.
Why This Bread Always Steals the Show
You know those recipes that instantly make everyone gather around the table? This is one of them. It is not just about the flavor, it is the experience of pulling apart each piece and enjoying that buttery, garlicky goodness.
The outside turns beautifully golden and slightly crisp, while the inside stays tender and airy. Add melted cheese and herbs, and suddenly it becomes the kind of bread people cannot stop reaching for.
A Little Backstory Behind This Comfort Favorite
Pull apart bread has roots in classic homemade loaves, but this version takes inspiration from garlic bread that many of us grew up loving. Over time, bakers started slicing loaves into sections, stuffing them with flavorful fillings, and baking them into something even more indulgent.
Now it is a modern comfort food favorite, often served at gatherings, family dinners, or even as a centerpiece for sharing. It brings people together, and honestly, that is what good food is all about.
Why This Recipe Works Every Single Time
Before we dive into the process, let me share why this one is such a keeper.
Versatile: You can serve it as a side, snack, or even turn it into a full meal with a few tweaks.
Budget-Friendly: Most of the ingredients are pantry staples, so no need for anything fancy.
Quick and Easy: The steps are simple and very forgiving, even if you are new to baking.
Customizable: You can add herbs, swap cheeses, or adjust the garlic level to your taste.
Crowd-Pleasing: Everyone loves it, from kids to adults, no exceptions.
Make-Ahead Friendly: You can prepare it ahead and bake when needed.
Great for Leftovers: It reheats beautifully and stays delicious.
Pro Tips From My Kitchen to Yours
Before we start mixing and baking, here are a few insider tips that make all the difference.
- Let your dough rise in a warm spot, it helps create that soft, airy texture.
- Do not skimp on the butter and garlic mixture, this is where all the flavor comes from.
- Slice the loaf carefully, you want deep cuts but not all the way through.
- Use freshly grated cheese for better melting and flavor.
Tools You Will Want Within Reach
Getting your tools ready makes everything smoother, so here is what you will need.
Mixing Bowl: For combining and kneading the dough.
Loaf Pan: Helps shape and bake the bread evenly.
Sharp Knife: Essential for making clean cuts in the dough.
Pastry Brush: Perfect for spreading that buttery garlic mixture.
Measuring Cups and Spoons: Accuracy keeps everything consistent.
Ingredients That Make It Irresistible
Now let’s take a look at what brings all that flavor together. Each ingredient plays its own little role in creating the perfect loaf.
- All-Purpose Flour: 3 cups, forms the base and gives structure to the bread.
- Warm Milk: 1 cup, activates the yeast and adds softness.
- Granulated Sugar: 2 tablespoons, helps feed the yeast and adds a subtle sweetness.
- Active Dry Yeast: 2 1/4 teaspoons, gives the bread its rise and fluffiness.
- Unsalted Butter: 1/2 cup melted, creates richness and that signature flavor.
- Garlic: 4 cloves minced, delivers that bold, aromatic kick.
- Fresh Parsley: 2 tablespoons chopped, adds freshness and color.
- Mozzarella Cheese: 1 1/2 cups shredded, melts into gooey perfection.
- Salt: 1 teaspoon, enhances all the flavors.
- Eggs: 2 large, help bind and enrich the dough.
Easy Swaps If You Want to Change Things Up
Sometimes you want to tweak things a little, and that is totally fine.
Milk: Use warm water or plant-based milk.
Mozzarella: Try cheddar or a blend for a sharper taste.
Parsley: Swap with basil or oregano.
Butter: Use olive oil for a slightly lighter version.
Spotlight on the Stars of the Recipe
Let’s give a little extra love to the key ingredients that really shine here.
Garlic: This is the heart of the flavor, rich, aromatic, and absolutely essential.
Mozzarella Cheese: It melts into every layer, giving that irresistible stretchy texture.

Let’s Get Baking Together
Alright, now let’s dive into the fun part. Here are the steps you are going to follow.
- Preheat Your Equipment: Preheat your oven to 350°F and lightly grease a loaf pan.
- Combine Ingredients: In a bowl, mix warm milk, sugar, and yeast. Let it sit until foamy, then add eggs, flour, and salt. Mix into a soft dough.
- Prepare Your Cooking Vessel: Grease your loaf pan and set it aside, ready for the dough.
- Assemble the Dish: Roll the dough, cut into sections, and layer each piece with melted butter, garlic, parsley, and cheese.
- Cook to Perfection: Place the layered dough into the pan and bake for about 30 minutes until golden brown.
- Finishing Touches: Brush with extra melted butter and sprinkle more parsley on top.
- Serve and Enjoy: Let it cool slightly, then pull apart and enjoy every warm, cheesy bite.
The Magic of Texture and Flavor
What makes this bread unforgettable is the contrast in textures. The outer crust is lightly crisp, while the inside stays soft and fluffy. The butter seeps into every layer, carrying garlic and herbs deep into the bread. Then you get that melted cheese, stretchy and rich, tying everything together in the most satisfying way.
Helpful Tips to Get It Just Right
A few small things can make a big difference, so keep these in mind.
- Use fresh garlic for the best flavor.
- Do not overbake, you want it golden, not dry.
- Let it rest for a few minutes before serving.
- Add extra cheese between layers for more indulgence.
Common Mistakes to Avoid
Even simple recipes can go wrong if you are not careful, so here is what to watch for.
- Cutting all the way through the dough instead of leaving the base intact.
- Using cold milk, which can prevent the yeast from activating.
- Skipping the resting time, which affects texture.
- Adding too little filling, which reduces flavor.
Nutrition Snapshot You Should Know
Servings: 8
Calories per serving: 320
Note: These are approximate values.
Time Breakdown for Planning
Prep Time: 20 minutes
Cook Time: 30 minutes
Total Time: 50 minutes
Make It Ahead and Store It Smartly
If you are planning ahead, you can assemble the loaf and keep it in the fridge before baking. Once baked, store leftovers in an airtight container at room temperature for a day or refrigerate for longer freshness.
To reheat, simply warm it in the oven for a few minutes until soft and heated through.
Serving Ideas That Make It Even Better
Serve it alongside soups, pasta dishes, or salads. It also works beautifully as a party appetizer. You can even pair it with dips like marinara or creamy sauces for extra flavor.
Turn Leftovers Into Something New
If you somehow have leftovers, here are some fun ideas.
Use pieces for mini sandwiches, toast them for crunchy bites, or turn them into cheesy croutons for salads.
A Few Extra Tips for Success
Keep your ingredients at room temperature for better mixing. Taste your garlic butter before using it, and adjust seasoning if needed. And always bake until that perfect golden color appears.
Make It Look as Good as It Tastes
For a beautiful presentation, brush the top with butter right after baking and sprinkle fresh herbs. Serve it on a wooden board for that rustic, inviting look.
Fun Variations to Try Next Time
Try adding cooked spinach for a veggie twist. Mix in chili flakes for a bit of heat. Use different cheeses for unique flavors. Add caramelized onions for sweetness. Or even turn it into a stuffed version with layers of fillings.
FAQ’s
Q1: Can I make the dough ahead of time?
Yes, you can prepare it and refrigerate overnight.
Q2: Can I freeze this bread?
Yes, wrap it tightly and freeze before or after baking.
Q3: What if I do not have a loaf pan?
You can shape it freeform on a baking tray.
Q4: Can I use instant yeast?
Yes, just mix it directly with the dry ingredients.
Q5: How do I keep it soft?
Store it properly and avoid overbaking.
Q6: Can I add other fillings?
Absolutely, get creative with flavors.
Q7: Is it okay to skip cheese?
Yes, but it will be less rich and gooey.
Q8: How do I know it is done?
It should be golden brown and sound hollow when tapped.
Q9: Can I use whole wheat flour?
Yes, but the texture will be denser.
Q10: How long does it stay fresh?
Best enjoyed the same day, but good for up to two days.
Conclusion
There is something truly special about making and sharing this pull apart garlic bread. It is simple, comforting, and packed with flavor in every bite. Whether you are serving it for a gathering or just treating yourself, this one’s a total game-changer. Give it a try, and enjoy every warm, buttery piece.
Print
Pull Apart Garlic Bread
- Prep Time: 20 minutes
- Cook Time: 30 minutes
- Total Time: 50 minutes
- Yield: 8 servings 1x
- Category: Side Dish
- Method: Baking
- Cuisine: American
- Diet: Vegetarian
Description
Soft, buttery pull apart garlic bread loaded with melted cheese, fresh herbs, and rich garlic flavor, perfect for sharing and guaranteed to impress.
Ingredients
- 3 cups all-purpose flour
- 1 cup warm milk
- 2 tablespoons granulated sugar
- 2 1/4 teaspoons active dry yeast
- 1/2 cup unsalted butter, melted
- 4 cloves garlic, minced
- 2 tablespoons fresh parsley, chopped
- 1 1/2 cups mozzarella cheese, shredded
- 1 teaspoon salt
- 2 large eggs
Instructions
- Preheat your oven to 350°F and lightly grease a loaf pan.
- In a mixing bowl, combine warm milk, sugar, and yeast. Let sit until foamy, then add eggs, flour, and salt. Mix into a soft dough.
- Prepare the loaf pan by greasing it and setting aside.
- Roll out the dough, cut into sections, and layer each piece with melted butter, garlic, parsley, and cheese.
- Place the layered dough into the pan and bake for 30 minutes until golden brown.
- Brush with additional melted butter and sprinkle extra parsley on top.
- Let cool slightly, then pull apart and serve warm.
Notes
- Use fresh garlic for the best flavor
- Do not overbake to keep the bread soft
- Let the bread rest before serving for easier pulling
- Add extra cheese between layers for a richer result
Nutrition
- Serving Size: 1 serving
- Calories: 320
- Sugar: 4g
- Sodium: 280mg
- Fat: 14g
- Saturated Fat: 8g
- Unsaturated Fat: 5g
- Trans Fat: 0g
- Carbohydrates: 38g
- Fiber: 2g
- Protein: 9g
- Cholesterol: 65mg
Keywords: pull apart garlic bread, cheesy garlic bread, homemade bread, garlic butter bread, baked bread recipe