Red Velvet Cheesecake Brownies
There is something almost magical about the moment when rich chocolate meets creamy cheesecake. The deep red color catches your eye first, then the aroma of cocoa and vanilla starts to drift through the kitchen. And once you take that first bite, the fudgy brownie and smooth cheesecake swirl melt together in the most satisfying way. Trust me, you’re going to love this. These red velvet cheesecake brownies are bold, beautiful, and completely irresistible.
They look impressive enough for a celebration, yet the process feels cozy and simple. Let me tell you, it’s worth every bite.
The Dessert That Combines Two Classics in One Pan
Brownies already have a reputation for being comforting and indulgent. Now imagine that dense chocolate base blended with silky cheesecake swirls that bake into soft, creamy ribbons across the top.
The result is pure dessert harmony. The red velvet flavor brings gentle cocoa notes, a hint of tang, and a soft velvety crumb. The cheesecake layer adds richness and a delicate sweetness that balances everything beautifully. Every square has contrast, color, and flavor that keeps you reaching for another piece.
A Little Story Behind the Famous Red Velvet Flavor
Red velvet desserts have been adored for decades. Their signature color and subtle cocoa flavor made them a bakery favorite long before they became a viral internet sensation.
Originally popular in American bakeries in the early twentieth century, red velvet cakes stood out for their soft crumb and vibrant color. Over time, bakers began experimenting with the flavor in different desserts. Cookies, cupcakes, and eventually these irresistible brownie bars started appearing in home kitchens everywhere.
Combining that iconic flavor with cheesecake creates a dessert that feels both nostalgic and fresh at the same time.
Why This Recipe Works So Well Every Time
Before we start baking, it helps to know why this recipe is such a keeper. These brownies are simple, reliable, and surprisingly flexible.
Versatile: These bars fit almost any occasion, from casual family desserts to festive gatherings.
Budget-Friendly: Most ingredients are pantry staples, so you likely already have everything you need.
Quick and Easy: The batter comes together quickly and the cheesecake swirl takes just a minute.
Customizable: Chocolate chips, nuts, or even white chocolate can be added for extra texture.
Crowd-Pleasing: The bold color and creamy swirls make these a guaranteed conversation starter.
Make-Ahead Friendly: They store beautifully, which makes them perfect for prepping in advance.
Great for Leftovers: If any survive the first day, the flavor becomes even richer after resting overnight.
Pro Tips for Bakery Style Results
A few small techniques make a big difference in the final texture and flavor.
- Use room temperature cream cheese so it blends smoothly into the cheesecake mixture.
- Do not overmix the brownie batter once the flour is added, which keeps the texture soft and tender.
- Reserve a few spoonfuls of brownie batter for swirling into the cheesecake layer for that signature marbled look.
- Allow the brownies to cool completely before cutting so the layers stay neat and defined.
Essential Kitchen Tools for This Recipe
Before mixing the batter, it helps to gather a few basic kitchen tools.
Mixing Bowls: Separate bowls help keep the brownie batter and cheesecake filling organized.
Hand Mixer or Whisk: This makes blending the cream cheese mixture smooth and lump free.
Rubber Spatula: Perfect for folding batter gently and scraping every bit from the bowl.
Square Baking Pan: A nine inch pan creates evenly thick brownies with clean edges.
Parchment Paper: Lining the pan makes lifting and slicing the brownies effortless.
Ingredients That Bring Everything Together
These ingredients create the perfect balance of fudgy brownie texture and creamy cheesecake swirl.
- All Purpose Flour: 1 cup, gives the brownies structure while keeping the crumb soft.
- Granulated Sugar: 1 cup, sweetens the batter and helps create a moist texture.
- Unsweetened Cocoa Powder: 2 tablespoons, adds the subtle chocolate flavor that defines red velvet.
- Baking Powder: 1 teaspoon, gives the brownies a gentle lift.
- Salt: 1/4 teaspoon, balances sweetness and deepens flavor.
- Unsalted Butter: 1/2 cup melted, adds richness and moisture.
- Eggs: 2 large, create structure and help bind the batter.
- Vanilla Extract: 1 teaspoon, enhances the cocoa flavor.
- Red Food Coloring: 1 tablespoon, gives the brownies their signature vibrant color.
- Cream Cheese: 8 ounces softened, forms the creamy cheesecake layer.
- Chocolate Chips: 1/2 cup, melt into pockets of chocolate throughout the bars.
Simple Ingredient Swaps If Needed
Sometimes a small swap keeps the baking going smoothly.
Butter: Coconut oil or neutral vegetable oil can be used instead.
Granulated Sugar: Coconut sugar works if you prefer a less refined option.
Chocolate Chips: White chocolate chips create a beautiful contrast.
All Purpose Flour: A gluten free baking blend can work for those avoiding gluten.
Spotlight on Two Star Ingredients
Cream Cheese: This ingredient creates the silky swirl that makes each bite creamy and rich.
Cocoa Powder: Even a small amount adds depth and that classic red velvet flavor.

Let’s Dive Into the Baking Process
Now comes the fun part, turning simple ingredients into a pan of gorgeous brownies.
- Preheat Your Equipment: Preheat the oven to 350°F and line a nine inch square pan with parchment paper.
- Combine Ingredients: In a mixing bowl whisk together flour, cocoa powder, baking powder, and salt. In another bowl mix melted butter, sugar, eggs, vanilla, and red food coloring until smooth.
- Prepare Your Cooking Vessel: Stir the dry mixture into the wet ingredients until just combined. Fold in the chocolate chips gently.
- Assemble the Dish: In a separate bowl beat cream cheese with a few spoonfuls of the brownie batter until smooth. Spread most of the brownie batter into the pan, then spoon the cheesecake mixture on top and swirl gently.
- Cook to Perfection: Bake for about 30 minutes, or until the edges are set and the center still looks slightly soft.
- Finishing Touches: Let the brownies cool completely in the pan so the cheesecake layer firms up.
- Serve and Enjoy: Lift the brownies out using the parchment paper and slice into neat squares.
A Look at the Texture and Flavor
These brownies are all about contrast. The base is dense, moist, and chocolatey, while the cheesecake swirls bake into creamy pockets that feel almost mousse like. The slight tang from the cream cheese balances the sweetness and highlights the cocoa flavor beautifully.
Every bite feels rich yet surprisingly light.
Helpful Baking Tips for Success
A few extra tricks can make these brownies even better.
- Use parchment paper that hangs over the sides of the pan so the brownies lift out easily.
- Chill the brownies briefly before slicing for the cleanest edges.
- Use a toothpick to swirl the cheesecake mixture gently so the pattern stays visible.
Common Mistakes and How to Avoid Them
Even simple recipes can have a few pitfalls.
- Overbaking the brownies can make them dry, so remove them while the center is still slightly soft.
- Skipping parchment paper can make the brownies difficult to remove from the pan.
- Using cold cream cheese can create lumps in the swirl.
Estimated Nutrition Overview
Servings: 9
Calories per serving: 320
Note: These values are approximate.
Timing at a Glance
Prep Time: 15 minutes
Cook Time: 30 minutes
Total Time: 45 minutes
Make Ahead and Storage Tips
These brownies store beautifully. Once cooled, keep them in an airtight container in the refrigerator for up to four days.
They also freeze well. Wrap individual squares tightly and freeze for up to two months. When ready to enjoy, thaw at room temperature or warm briefly in the microwave.
Delicious Ways to Serve Them
Serve these brownies slightly chilled for a cheesecake like texture, or at room temperature for the softest bite. They pair beautifully with a scoop of vanilla ice cream or a drizzle of chocolate sauce.
Fresh berries also add a bright contrast that complements the richness of the bars.
Fun Ideas for Leftover Brownies
If you somehow end up with extra pieces, there are creative ways to enjoy them again.
Crumble them over ice cream for a decadent sundae topping, or layer them into a trifle with whipped cream and berries.
They also make an incredible base for brownie milkshakes.
Extra Tips for the Best Flavor
Let the brownies rest overnight in the refrigerator before serving. The flavors deepen and the cheesecake layer becomes even smoother.
Also, use good quality cocoa powder for the richest chocolate flavor.
Presentation Tips for a Beautiful Dessert
For a bakery style look, dust the top lightly with powdered sugar before serving. You can also drizzle melted white chocolate across the brownies for a striking contrast against the red surface.
Cutting the brownies with a warm knife will create smooth, clean edges.
Creative Variations to Try
- Add chopped pecans or walnuts for a nutty crunch.
- Swap chocolate chips for white chocolate chips.
- Add a teaspoon of espresso powder to intensify the cocoa flavor.
- Sprinkle crushed cookies on top before baking for extra texture.
FAQ’s
1. Can I make these brownies ahead of time?
Yes, they actually taste even better the next day after the flavors settle.
2. Do I need gel food coloring?
Liquid or gel both work, though gel gives a more vibrant color.
3. Can I double the recipe?
Absolutely. Use a larger baking pan and adjust baking time slightly.
4. How do I know when they are done baking?
The edges should look set while the center still feels slightly soft.
5. Can I use low fat cream cheese?
Yes, though full fat cream cheese gives the creamiest swirl.
6. Can I reduce the sugar?
A small reduction works, but too much may affect the texture.
7. Can these be frozen?
Yes, wrap slices tightly and freeze for up to two months.
8. Why did my cheesecake swirl sink?
This can happen if the brownie batter is too thin or overmixed.
9. Can I add frosting on top?
You can, but the cheesecake swirl already adds plenty of richness.
10. How should I cut the brownies cleanly?
Use a sharp knife wiped clean between each slice.
Conclusion
There is something incredibly satisfying about baking a dessert that looks stunning and tastes even better. These red velvet cheesecake brownies deliver rich cocoa flavor, creamy cheesecake swirls, and a texture that feels both fudgy and smooth at the same time.
Once you make them, you will understand why this dessert disappears so quickly. This one’s a total game changer, and I have a feeling it might become a favorite in your kitchen too.
Print
Red Velvet Cheesecake Brownies
- Prep Time: 15 minutes
- Cook Time: 30 minutes
- Total Time: 45 minutes
- Yield: 9 servings 1x
- Category: Dessert
- Method: Baking
- Cuisine: American
- Diet: Vegetarian
Description
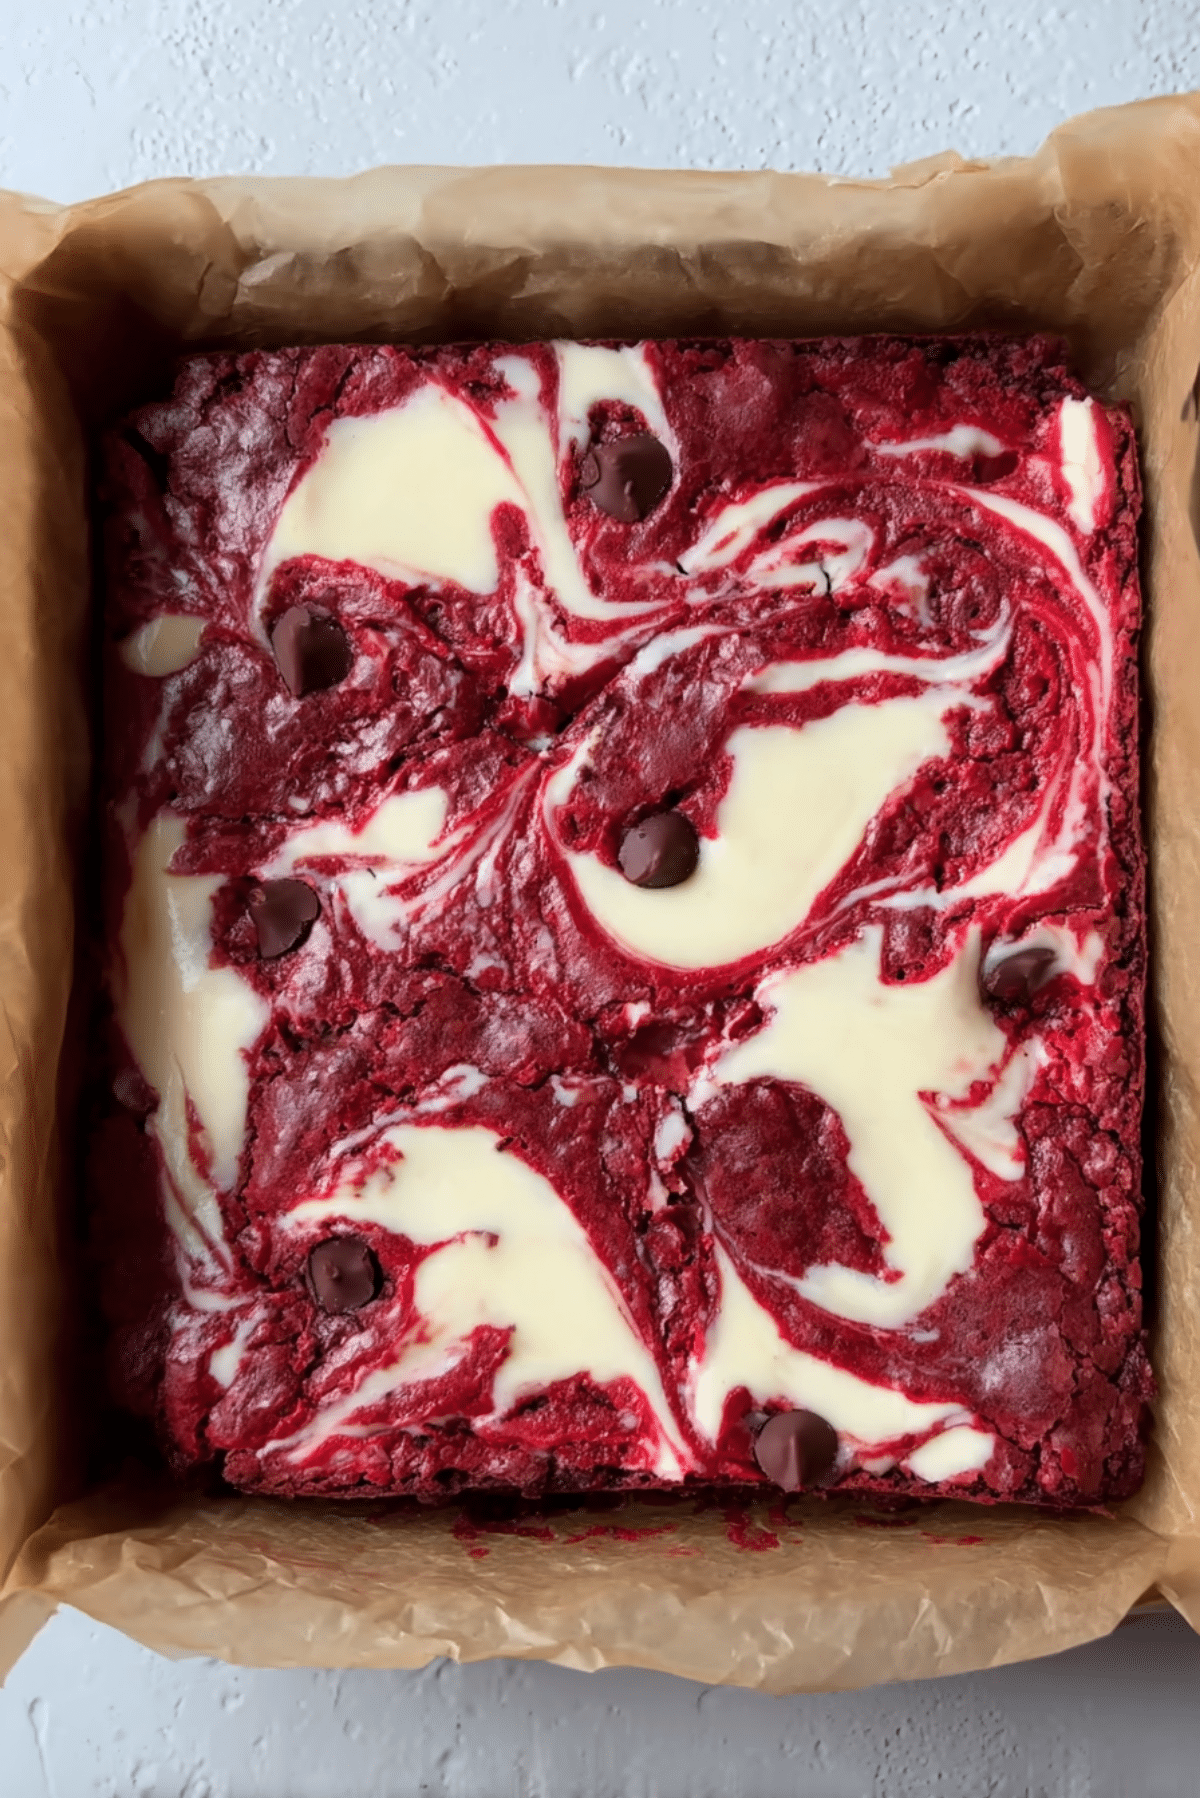
Rich and fudgy red velvet brownies swirled with creamy cheesecake and dotted with chocolate chips. These bars are soft, vibrant, and indulgent with the perfect balance of cocoa flavor and smooth cheesecake richness.
Ingredients
- 1 cup all-purpose flour
- 1 cup granulated sugar
- 2 tablespoons unsweetened cocoa powder
- 1 teaspoon baking powder
- 1/4 teaspoon salt
- 1/2 cup unsalted butter, melted
- 2 large eggs
- 1 teaspoon vanilla extract
- 1 tablespoon red food coloring
- 8 ounces cream cheese, softened
- 1/2 cup chocolate chips
Instructions
- Preheat the oven to 350°F and line a 9-inch square baking pan with parchment paper.
- In a bowl whisk together flour, cocoa powder, baking powder, and salt.
- In another bowl mix melted butter, sugar, eggs, vanilla extract, and red food coloring until smooth.
- Gradually stir the dry ingredients into the wet mixture until just combined.
- Fold in the chocolate chips gently.
- In a separate bowl beat the cream cheese with a few spoonfuls of the brownie batter until smooth.
- Spread most of the brownie batter into the prepared baking pan.
- Spoon the cream cheese mixture over the brownie batter and swirl gently with a knife to create a marbled effect.
- Bake for about 30 minutes until the edges are set and the center remains slightly soft.
- Allow the brownies to cool completely in the pan before lifting out and slicing into squares.
Notes
- Let the brownies cool completely before cutting for clean slices.
- Use room temperature cream cheese for a smooth swirl.
- Store leftovers in an airtight container in the refrigerator for up to 4 days.
- For neater cuts, chill the brownies briefly before slicing.
Nutrition
- Serving Size: 1 brownie
- Calories: 320
- Sugar: 22g
- Sodium: 150mg
- Fat: 17g
- Saturated Fat: 10g
- Unsaturated Fat: 6g
- Trans Fat: 0g
- Carbohydrates: 38g
- Fiber: 1g
- Protein: 4g
- Cholesterol: 75mg
Keywords: red velvet brownies, cheesecake brownies, red velvet dessert bars, chocolate cheesecake brownies