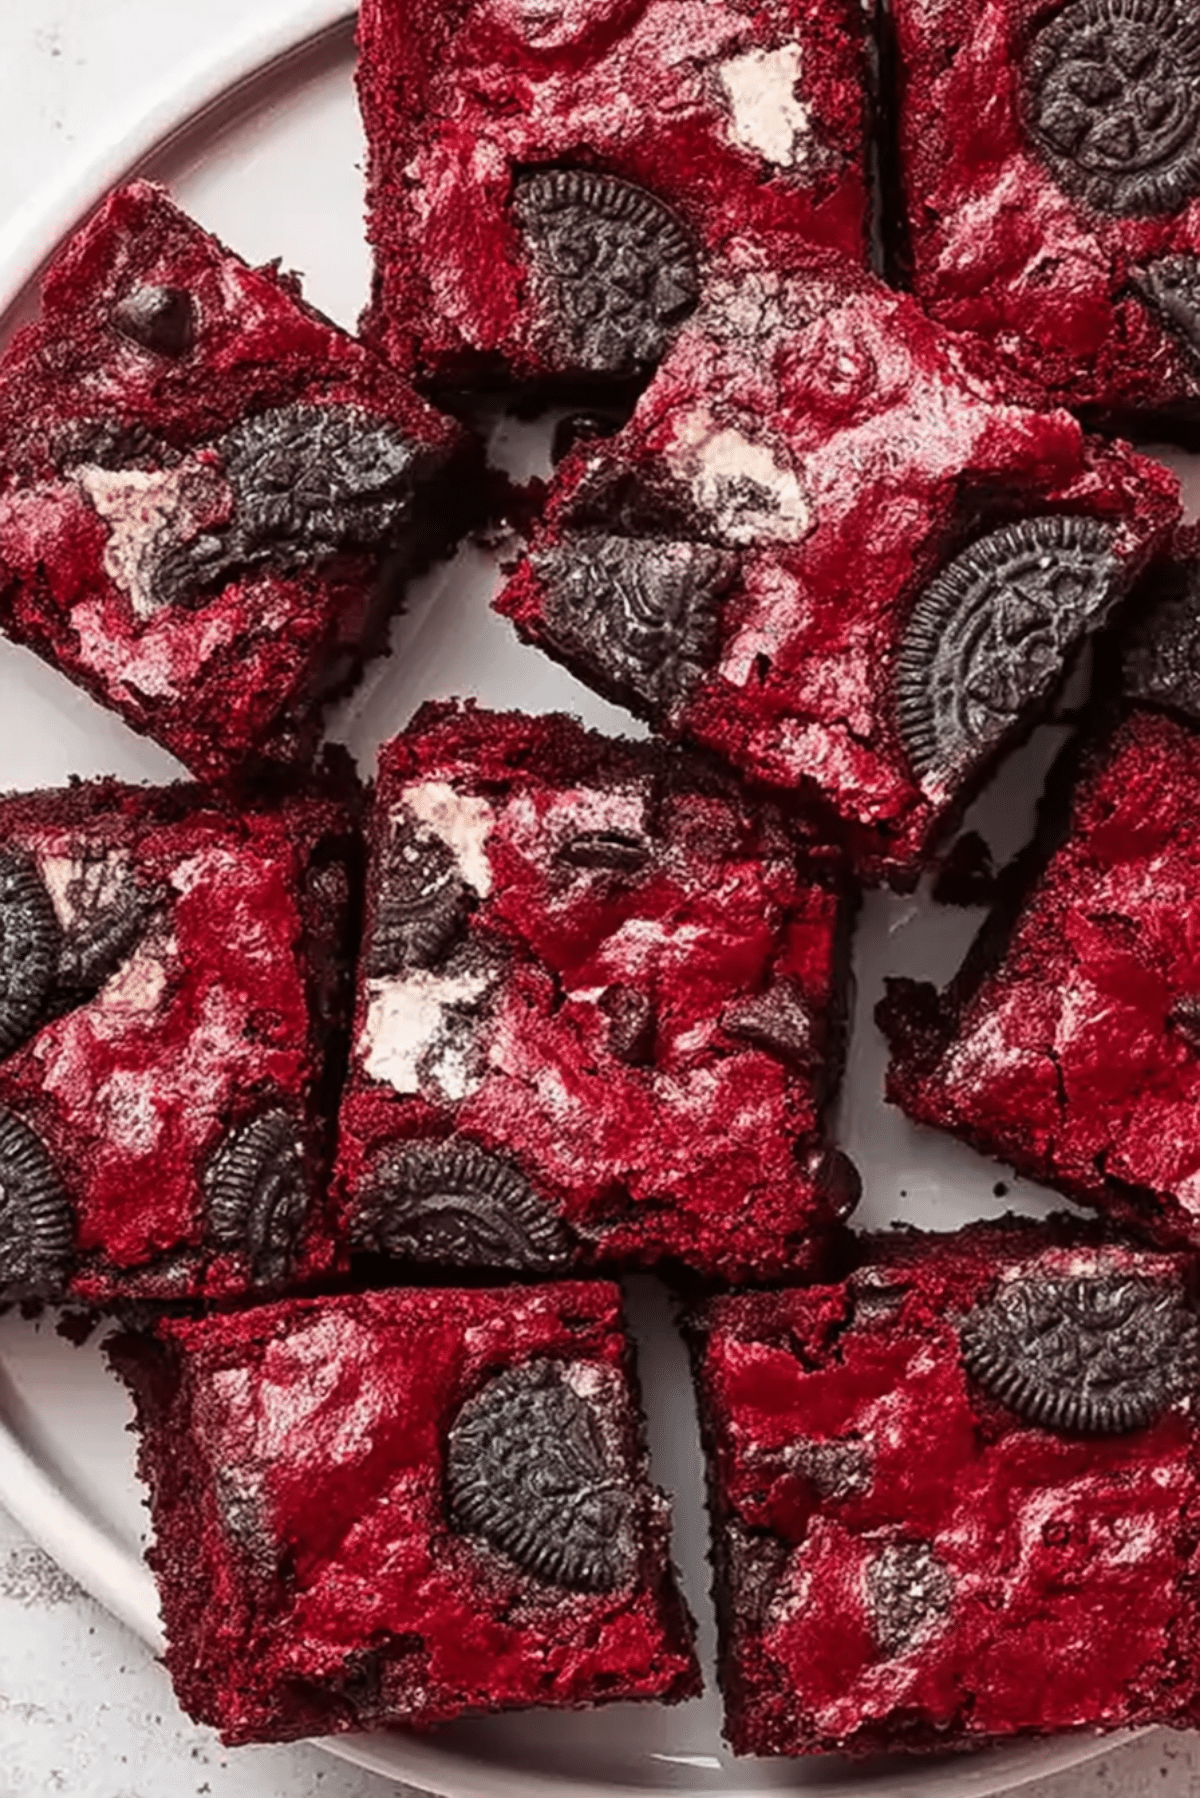
Red Velvet Oreo Chocolate Chip Brownies
There is something almost magical about biting into a brownie that is both rich and slightly tangy, with bursts of chocolate and creamy cookie pieces in every bite. The deep red color catches your eye first, but it is the soft, fudgy texture that keeps you coming back for more. Trust me, you’re going to love this, it feels indulgent yet comforting at the same time.
Why These Brownies Always Steal the Show
You know that feeling when a dessert looks impressive but is secretly simple to make? That is exactly what happens here. The glossy tops, the pops of Oreo, and those melty chocolate chips create a dessert that looks bakery-worthy without the stress.
A Sweet Twist on a Classic Favorite
Red velvet has always had a special place in dessert history, known for its subtle cocoa flavor and signature color. Pairing it with Oreo cookies and chocolate chips takes things to a whole new level. It feels like a modern twist on something familiar, combining nostalgic flavors into one unforgettable treat.
Why You Can Count on This Recipe Every Time
Before we dive into the details, let me tell you why this one’s a total game-changer.
Versatile: These brownies fit any occasion, from casual snacking to special celebrations, and they always feel just right.
Budget-Friendly: Most ingredients are pantry staples, so you do not need anything fancy to make something incredible.
Quick and Easy: The process is simple and straightforward, perfect even on a busy day.
Customizable: You can easily switch up the mix-ins or adjust sweetness to your taste.
Crowd-Pleasing: Everyone loves that mix of chocolate and cookies, it is hard to go wrong here.
Make-Ahead Friendly: These brownies actually taste even better the next day.
Great for Leftovers: If there are any left, they store beautifully and stay moist.
Pro Tips That Make All the Difference
Once you have made these once, you will start noticing the little tricks that elevate them.
- Use room temperature eggs so the batter mixes smoothly
- Do not overmix, it keeps the brownies soft and tender
- Slightly underbake for that perfect fudgy center
- Let them cool fully before cutting for clean squares
Tools That Make Baking Easier
Before we start mixing, let’s make sure everything is ready.
Mixing Bowl: For combining all ingredients smoothly
Whisk or Spatula: Helps create a uniform batter without overworking it
Baking Pan: A square pan works best for even thickness
Parchment Paper: Makes removal and cleanup so much easier
Measuring Cups and Spoons: Keeps everything accurate
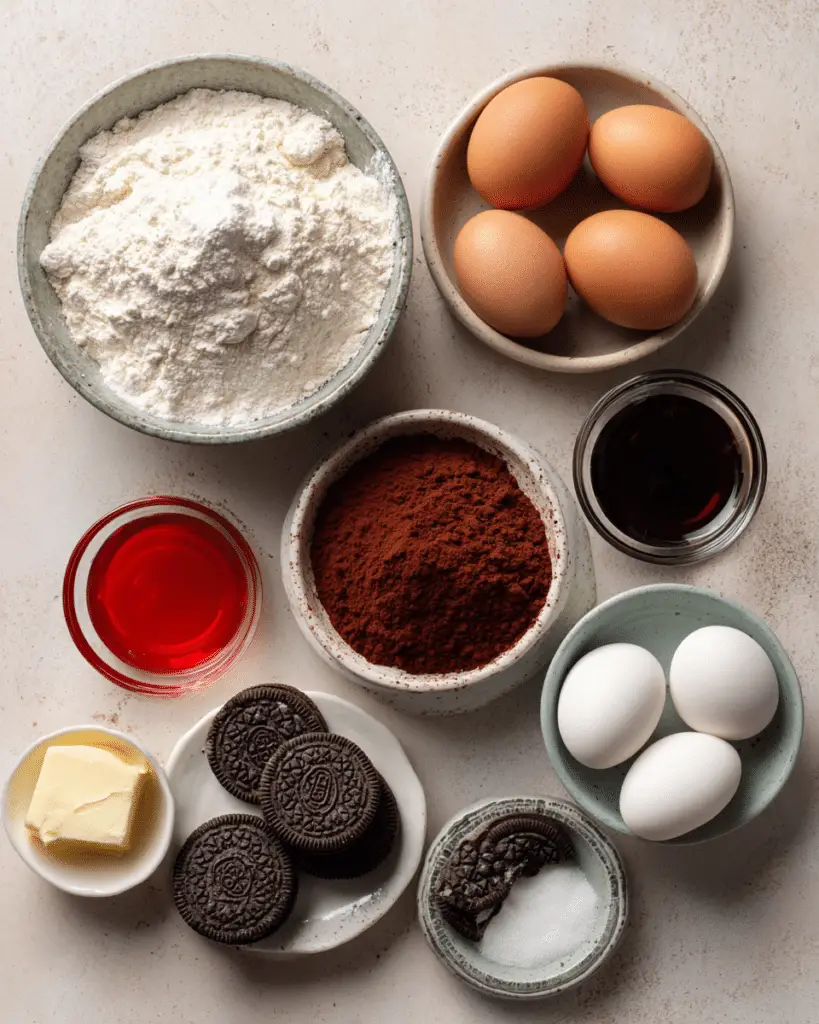
Ingredients That Bring It All Together
Now let’s look at what makes these brownies so irresistible. Each ingredient plays its own role in building flavor and texture.
- All-Purpose Flour: 1 cup, provides structure and balance
- Granulated Sugar: 1 cup, adds sweetness and helps create that shiny top
- Unsweetened Cocoa Powder: 2 tablespoons, gives a subtle chocolate depth
- Baking Powder: 1 teaspoon, helps create a slight lift
- Salt: 1/4 teaspoon, enhances all the flavors
- Large Eggs: 2, bind everything together and add richness
- Melted Butter: 1/2 cup, creates a moist and fudgy texture
- Vanilla Extract: 1 teaspoon, rounds out the sweetness
- Red Food Coloring: 1 tablespoon, gives that iconic vibrant color
- Semi-Sweet Chocolate Chips: 1/2 cup, add pockets of melted chocolate
- Oreo Cookies: 10 cookies, roughly broken for texture and crunch
Easy Swaps If You Need Them
Sometimes you need to improvise, and that is totally fine.
Butter: Swap with margarine or neutral oil
Chocolate Chips: Use dark or milk chocolate instead
Oreo Cookies: Any cream-filled sandwich cookies will work
All-Purpose Flour: Try a gluten-free blend if needed
The Star Ingredients That Make It Special
Some ingredients really stand out here and deserve a little spotlight.
Oreo Cookies: They add crunch and creamy sweetness, creating contrast in every bite
Cocoa Powder: Even in a small amount, it deepens the flavor and balances the sweetness
Let’s Bake Together Step by Step
And now let’s dive into the fun part, bringing everything together.
- Preheat Your Equipment: Set your oven to 350°F and line your baking pan with parchment paper
- Combine Ingredients: In a bowl, whisk together flour, cocoa powder, baking powder, and salt
- Prepare Your Cooking Vessel: In another bowl, mix melted butter and sugar until smooth
- Assemble the Dish: Add eggs, vanilla, and red food coloring to the butter mixture, then gently fold in dry ingredients, chocolate chips, and Oreo pieces
- Cook to Perfection: Pour the batter into the pan and bake for 25 minutes until the edges are set but the center is slightly soft
- Finishing Touches: Let the brownies cool completely in the pan
- Serve and Enjoy: Slice into squares and enjoy every rich, chocolatey bite
That Perfect Balance of Texture and Flavor
The moment you take a bite, you notice the contrast. The edges are slightly crisp while the center stays soft and fudgy. The chocolate chips melt into little pockets of richness, while the Oreo pieces bring a slight crunch and creamy sweetness. It is a combination that feels both indulgent and satisfying.
Extra Tips for the Best Results
A few small details can make a big difference.
- Use good quality cocoa powder for better flavor
- Do not skip the cooling step, it improves texture
- Line your pan for easy removal
Common Mistakes and How to Avoid Them
Even simple recipes can go wrong, but these tips will keep you on track.
- Overbaking can dry them out, keep an eye on the center
- Cutting too early can make them fall apart, let them cool fully
- Overmixing the batter can make them dense instead of fudgy
Nutrition Snapshot
Servings: 12
Calories per serving: 220
Note: These are approximate values.
Time Breakdown
Prep Time: 15 minutes
Cook Time: 25 minutes
Total Time: 40 minutes
Make-Ahead and Storage Tips
If you are planning ahead, you are in luck. These brownies store beautifully. Keep them in an airtight container at room temperature for up to three days. You can also refrigerate them for a slightly firmer texture. For longer storage, freeze them individually and reheat gently when needed.
Serving Ideas to Make It Even Better
Serve these brownies slightly warm with a scoop of vanilla ice cream, or drizzle a little chocolate sauce on top. They also pair wonderfully with a glass of milk or a warm cup of coffee.
Turn Leftovers Into Something New
If you somehow have leftovers, you can crumble them over ice cream, layer them into a dessert parfait, or even use them as a base for a trifle.
A Few Extra Helpful Notes
Keep your ingredients measured and ready before you start, it makes the process smoother. Also, taste your batter before baking to adjust sweetness if needed.
Make Them Look Bakery-Worthy
For a beautiful presentation, press a few extra Oreo pieces on top before baking. Once cooled, cut clean squares and dust lightly with powdered sugar for that final touch.
Fun Variations to Try
Try switching things up once you master the base recipe.
- Add white chocolate chips for extra sweetness
- Swirl in cream cheese for a tangy twist
- Use peppermint cookies for a holiday version
- Add chopped nuts for crunch
FAQ’s
Q1: Can I make these without food coloring?
Yes, the flavor stays the same, only the color changes.
Q2: How do I know when they are done?
The edges should be set while the center remains slightly soft.
Q3: Can I use a different type of cookie?
Absolutely, any cream-filled cookie works well.
Q4: Can I double the recipe?
Yes, just use a larger pan and adjust baking time slightly.
Q5: Why are my brownies too dry?
They were likely overbaked, try reducing the baking time.
Q6: Can I freeze them?
Yes, wrap them individually and freeze for up to two months.
Q7: Do I need to refrigerate them?
Not necessary, but it can extend freshness.
Q8: Can I make them gluten-free?
Yes, use a gluten-free flour blend.
Q9: What pan size works best?
An 8×8 inch pan gives the best thickness.
Q10: Can I reduce the sugar?
You can slightly reduce it, but it may affect texture.
Conclusion
These brownies are rich, colorful, and packed with layers of flavor that feel both fun and comforting. Let me tell you, it’s worth every bite. Once you make them, they might just become your new favorite go-to dessert.
Print
Red Velvet Oreo Chocolate Chip Brownies
- Prep Time: 15 minutes
- Cook Time: 25 minutes
- Total Time: 40 minutes
- Yield: 12 servings 1x
- Category: Dessert
- Method: Baking
- Cuisine: American
- Diet: Vegetarian
Description
Rich and fudgy red velvet brownies loaded with chocolate chips and chunks of Oreo cookies, delivering a perfect balance of sweetness, texture, and indulgence in every bite.
Ingredients
- 1 cup all-purpose flour
- 1 cup granulated sugar
- 2 tablespoons unsweetened cocoa powder
- 1 teaspoon baking powder
- 1/4 teaspoon salt
- 2 large eggs
- 1/2 cup melted butter
- 1 teaspoon vanilla extract
- 1 tablespoon red food coloring
- 1/2 cup semi-sweet chocolate chips
- 10 Oreo cookies, roughly broken
Instructions
- Preheat oven to 350°F and line an 8×8 inch baking pan with parchment paper.
- In a bowl, whisk together flour, cocoa powder, baking powder, and salt.
- In another bowl, mix melted butter and sugar until smooth.
- Add eggs, vanilla extract, and red food coloring to the butter mixture and mix well.
- Gently fold in the dry ingredients until just combined.
- Fold in chocolate chips and broken Oreo cookies.
- Pour batter into the prepared pan and spread evenly.
- Bake for 25 minutes until edges are set and center is slightly soft.
- Allow to cool completely before slicing into squares and serving.
Notes
- Do not overmix the batter to keep the brownies soft and fudgy.
- Let brownies cool completely before cutting for clean slices.
- Slightly underbake for a gooier texture.
- Store in an airtight container for up to 3 days.
Nutrition
- Serving Size: 1 brownie
- Calories: 220
- Sugar: 18g
- Sodium: 120mg
- Fat: 11g
- Saturated Fat: 6g
- Unsaturated Fat: 4g
- Trans Fat: 0g
- Carbohydrates: 28g
- Fiber: 1g
- Protein: 3g
- Cholesterol: 45mg
Keywords: red velvet brownies, oreo brownies, chocolate chip brownies, fudgy brownies, easy dessert recipe